Rockland NY Mom
  • About this Site
    • Privacy Policy & Disclosure
  • Savings for RNYM.com Readers!
  • Currently loving….
    • Feeding Baby
    • BabyCare 101
  • Directories
    • Pregnancy and Babies
    • Camps Directory 2023
    • Childcare/Pre-School Directory
    • Classes Directory
    • For the Home
    • Direct Sales Directory
    • Party Directory
    • Party Entertainment Directory
    • Photographers Directory
    • Family Services Directory
    • Crafters Directory
    • Specialty Items Directory
    • Play Ball
  • A Good Cause
  • I’m Going on a Trip…
    • Theater
  • We’re having a party….
  • RNYM’s Favorite Recipes
  • Become Part of RocklandNYMom
  • RNYM in the News!
  • Christmas 2019

Category Archives: Crafts and More Crafts

CAMP Johnston- Tie Dye Fun

Posted on August 18, 2020 by RocklandNYMom Posted in Camp Johnston, Crafts, Crafts and More Crafts .

Disclosure:  This is an unsponsored post.  All opinions expressed are my own.  The supplies list contains affiliate links which means if you use them we earn a small sum.

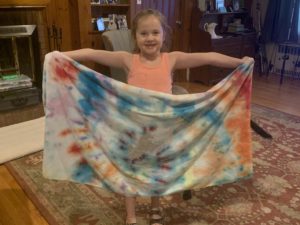
Yes, I know.  You’re thinking- this isn’t really a novel idea.  Everyone Tie Dye’s during the summer its a standard activity.  BUT its what we used that makes it so cool.  Instead of the usual Shirts, tanks, socks, and shorts- we opted to do towels and face masks.

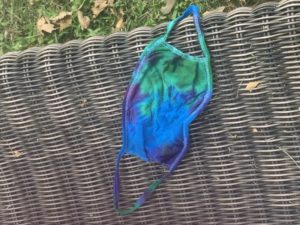
Now for the rest of the summer our kids have their very own towel creations to take with them to the pool etc, and they LOVE them.  They don’t forget them like they do other towels.  Additionally, we have some personalized face masks that they are proud to wear, and they know belong to them.

Ok let’s get down to the nitty gritty.

What you need:

  • Towels
  • Vinyl
  • Glitter Vinyl
  • Rubber Bands – The kit comes with some but towels are large so its always better to have more.
  • Dye Kit
  • Face Masks
  • Plastic Bags (or saran wrap)- we just used food store bags, but have used saran in the past)

Got our towels and vinyl from Hudson Valley Vinyl but you can also order from Amazon if you would rather (affiliate links to items are the list above).  We like to support local so we went with HVV.

Once you have all the items its easy-

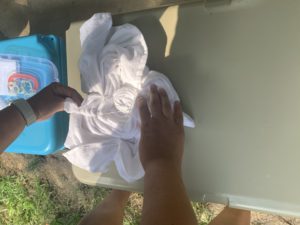
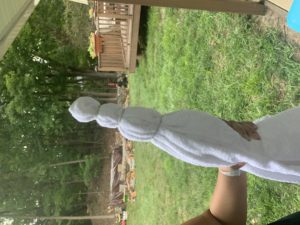
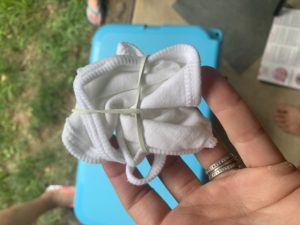
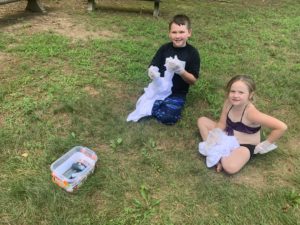
The kit comes with some ideas for how to wrap up your towel, (E) chose a swirl and (A) chose two bullseyes.

Then we added the dye.  As it got down to about 2/3 we added water again to get a little more out of the small bottles.  When you do this the color gets a little lighter over time, but it wasn’t bad.  I might opt to get larger bottles (like these) since the towels take so much though next time for more vibrant colors.

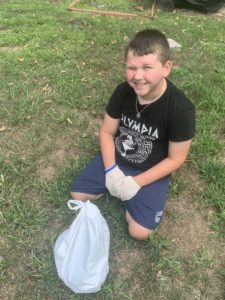
Upon completion, we wrapped them up in plastic bags and left them for 24 hours (it says you can do as littlea s 6).  WE opened them and laid them out to dry in the sun (not necessary but what we do).

Next step is to wash the towels.  I washed each seperately so the colors didn’t run.

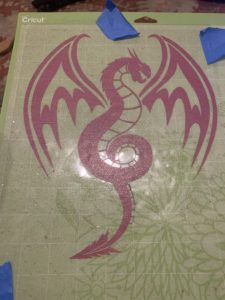
Kids then picked a color vinyl and a shape to add.   If you can’t cut vinyl because you don’t have a machine reach out we know people like Hudson Adrift who can handle that for you.

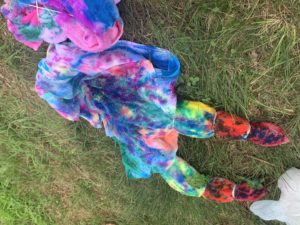
Viola!  Our Tie Dye Towels (and mask)!!!


Upcoming Directory Member Events!!! September- October

Posted on September 13, 2019 by RocklandNYMom Posted in Birthdays, Crafts and More Crafts, Halloween, Out and about..., RNYM Events, Things to Do! .

Disclosure:  This is a sponsored post. All events below are being held by directory members.  All events also have Facebook events on our page for more information and RSVP.

Sparkle Up Grand Re-Opening

Come see all the new changes at Sparkle up in New City and partake in some services, celebrity interaction, learn about our new events, have some ice cream and socialize!

Appropriate for all ages!

RVSP: Rocklandnymom@yahoo.com or via Facebook: www.facebook.com/rocknyom

_________________________________

One-Time EventSomething Sweet at Jills Ceramics

Come paint something sweet at Jill’s Ceramics- a new year treat, a back to school piece, or a hand print keepsake Jill has got it all.  Open 10-am to 3 pm 9/22/19 Price varies by piece chosen.

Appropriate for artists of all ages!

RVSP: Rocklandnymom@yahoo.com or via Facebook: www.facebook.com/rocknyom

_________________________________

Fun “Stuff” at Matisse

Appropriate for ages 4 and up, must RSVP.

_________________________________

Evil Edibles at Matisse

Appropriate for ages 4 and up, must RSVP.

_________________________________

Sparkle Up Halloween!

Come Dressed and get a monster makeover (complete with glitter tattoo), decorate a trick or treat bag, make a pumpkin spice sugar scrub or mad lab bath gel, and make some slime with Day Camp in the Park!  Also, each attendee gets neon Dracula teeth, as well as a photo opportunity in front of our Halloween Backdrop, and gets to try to eat a donut off of a string!!!

Appropriate for ages 4 and up.

RVSP: Rocklandnymom@yahoo.com or via Facebook: www.facebook.com/rocknyom

_________________________________

Pumpkin Decorating at Matisse

Appropriate for ages 4 and up! MUST RSVP!

_________________________________

Monster Chocolate at Matisse


Appropriate for ages 4 and up! MUST RSVP!

_________________________________

Scary Slime at Matisse

Appropriate for ages 4 and up! MUST RSVP!

Adult Night at Jill’s

Have a personalized light up pumpkin carved for you to paint, or paint any other wonderful Halloween, or regular themed item!!!

Pumpkins must be pre-ordered and paid.  Large $50 (max 9 letters) Medium $30 (max 8 letters)

RVSP: Rocklandnymom@yahoo.com or via Facebook: www.facebook.com/rocknyom

_________________________________

Kids Personalized Pumpkins!

Pumpkins must be pre-ordered and paid.  Large $50 (max 9 letters) Medium $30 (max 8 letters)

Appropriate for ages 4 and up, must RSVP.

RVSP: Rocklandnymom@yahoo.com or via Facebook: www.facebook.com/rocknyom

_________________________________


Halloween at Jill’s

Pumpkins must be pre-ordered and paid.  Large $50 (max 9 letters) Medium $30 (max 8 letters)

RVSP: Rocklandnymom@yahoo.com or via Facebook: www.facebook.com/rocknyom

_________________________________

Halloween Headbands- Sparkle Up Fashion Series

Make a Halloween headband, have a spooky makeover (glitter tattoo, hair, nails (or makeup) make a mad bath gel or pumpkin spice sugar scrub)

Appropriate for ages 5 and up, must RSVP.

RVSP: Rocklandnymom@yahoo.com or via Facebook: www.facebook.com/rocknyom

_________________________________

Re-occurring Events

Mommy and Me Makeovers

Mini Facials, drinks, matching robes and hair!!! Cost $35

Appropriate for ages 3 and up with adult :o)

Sparkle Up Halloween

Posted on November 10, 2017 by RocklandNYMom Posted in Birthdays, Classes, Crafts and More Crafts, Day Trips, Events, Out and about..., Party, Reviews, RNYM Events, Uncategorized .

Disclosure:  This is a sponsored post.  All opinions expressed are my own.

This past weekend RNYM held our first of MANY super fun events at Sparkle Up in New City.  The Halloween Party hosted over 30 adorable kids in costume and we all had a blast.  Deborah and I are hard at work planning the next event- so we thought we would let you know how this one went.

Kiddies were invited to come in costume and have their Hair, makeup and/or facepaint, nails, glitter tattoos and tattoos and hang out with friends.

Sparkle up 1

SParkle up 4

Sparkle Up is just so much fun-  There is a dress up room to check out, a runway to walk- some adorable gifts you can purchase and then all the fun activities.  In fact, I am always shocked at how people think its only for girls- its not (A) and several other boys had a blast this past weekend.  Additionally, since (A) isn’t allowed to wear the hood and mask that go with his costume he was looking for something to make his head look cool – and it was Sparkle Up that ended up inspiring his Halloween look.

Sparkle up 2

Deborah and her talented team, braided, sprayed, applied, and smiled for 3 hours as they attentively catered to each adorable need and want.  There isn’t really too much more to say except take a look at these photos!!!

Sparkle up 5

Sparkle Up 6

SParkle up 3

We hope to see you at our next event on December 9th It’s Coronation Day! This event is a collaboration with Mandas Enchanted Events, where kiddos will be able to meet and greet with princess, dress up (come in your favorite) have your hair braided etc, make-up/glitter tattoo applied, nails painted, AND be crowned princess with a royal decree from a special guest!

Coronation Day Flyer 2017
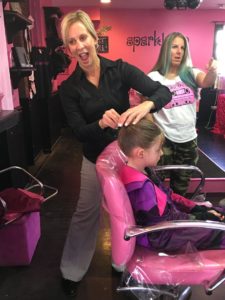
Sparkle Up is an amazing party and event venue, and so much more.  To make an appointment for a haircut, style, makeup application, lesson or more please contact Deborah at:  (845) 634-0140    or you can email her at:  sparkleup@me.com  As always, we appreciate if you mention that you heard about our adventures here if you should choose to go in on our recommendation.  <3  

Look out for our full review of my makeup application for our family photos and so much more!!!


Valentine I Choose You!!! – FREE file download

Posted on February 8, 2017 by RocklandNYMom Posted in Crafts, Crafts and More Crafts, Valentines Day .

Disclosure:  This is an unsponsored post, all opinions expressed are my own. Contains affiliate links.

 (A) is so excited for his Valentines this year.  We did a non-food, very fun project (that I have included in case you would like to use them).

He and his friends are really into Pokemon.  So we attempted to incorporate them into it.  

We started by naming his favorite Pokemen and then found this adorable rhyme online.  I created the graphics myself on the computer.

IMG_5104

Pokemon Valentines

We printed them on good card stock and then cut them out.

IMG_5156

We found these adorable figurines on Amazon (click here) and placed them into little cellophane baggies (4 to a child).

IMG_5161

(A) signed each one and we attached them to the cards.

IMG_5155

Viola! Pokemon Valentines!!!

IMG_5159

IMG_5160

Christmas Ornament 2016

Posted on December 21, 2016 by RocklandNYMom Posted in Christmas 2016, Crafts, Crafts and More Crafts, In the Home, Uncategorized .

Disclosure:  This is an unsponsored post.  All opinions expressed are my own.  Products contain affiliate links.

Every Year we make an ornament to give to the family.  We try to make it a little different every year.  So far we have succeeded in making each one using either a hand or finger of the kids to personalize it just a little bit more.  Here is this years version.  For years past you can either click the links provided (in purple at the bottom of the post)- or check out our pinterest page.

I purchased these clear glass ornaments, the glitter and the special glue.  I followed the directions on the glitter glue (non-toxic) to decorate the inside of the ornaments (clean, put in clue, drain, add glitter).

ornametn-2016-1

ornament-2016-1

We recently acquired a silhouette machine for the business and I used it for this project- Here is the vinyl I like the best so far too. You could use the paint pens we used later to do the same wire and date.  In fact, that is what we did in the past.

The kids helped me to put the vinyl onto the glass which they really enjoyed because its like playing with stickers (again, stickers from the craft store could have been used for this too).

ornament-2016-2

ornament-2016-3

Once all set the kids used craft paint in different colors (yellow, orange, blue and red) to put finger prints on the “wire” to make it look like Christmas Lights.

ornament-2016-5

The final step was for the kids to use the paint pens to write their names.  I love this part because over the years you can watch the kids handwriting grow and develop.

ornament-23016-4

Here is a link to our YouTube Video of the finished product!!!

Past Ornaments:

  • 2015
  • 2014
  • Favorite PHOTO CARD ORNAMENT


Sabrina’s Murals and the Nursery of my Dreams!

Posted on August 29, 2016 by Ashley Carmichael Posted in Crafts and More Crafts, In the Home, Reviews, RNYM's Picks, Services, Specialty Items, Uncategorized .

Disclosure:  This is an unsponsored post.  All opinions expressed are our own.

-Ashley Carmichael

3rd baby, and finally the nursery of my dreams!

When I had my first son, we were living in a one bedroom apartment and I used an alcove as the nursery. When I was expecting my 2nd son we were living with my parents, so we used an extra room for his crib and dresser, never really making much of it. Now, as I am expecting my 3rd (and my last), I had the urge to have a ‘perfect’ nursery.  In doing so, my goal was to keep the baby room as budget friendly as possible. To accomplish this feat I planned to try to DIY, and recycle as much as I could.


Paint the room. 

While my husband and I were debating on colors to paint the walls of the baby room, I stumbled upon posts from Sabrina’s Murals on Facebook. WOW. I was instantly in love with her work! So naturally, I jumped on Pinterest for ideas. I sent Sabrina a message and set up a time for her to come see the room and talk out ideas.

Sabrina is the sweetest, a total breeze to work with, she is always smiling! I explained loosely with some ideas I found online that I was looking to do trees, stars, and a moon – like a forest scene. She was very honest about design concepts, color schemes and how to make it work in the room.   Since the room is small, and the design I wanted was complicated, we decided only to do a small portion of the room to not over do it.

Her ideas were so spot on, I couldn’t resist booking her!

A few weeks later, she emailed me a sketch of the mural and I melted! It was exactly what we had discussed.  She arrived the next morning at 9am. Sabrina told me to come in through out the day to see the progress, but I wanted to wait for the big reveal! She finished around 4:30pm – seems like a long day to have someone in your house – but I honestly didn’t even know she was there!

The mural is PERFECT! I am so in love with the colors – exactly what I wanted. And the peaceful ambiance it brings to the room – is also exactly what I wanted. She even offered to come back after we had the baby and paint the babies name on the wall.

IMG_5127
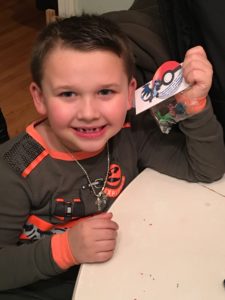
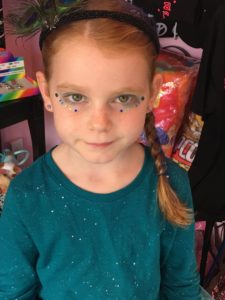
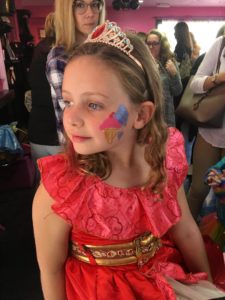
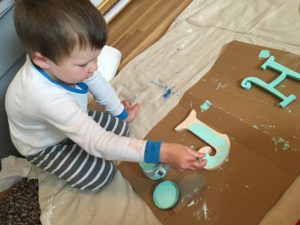
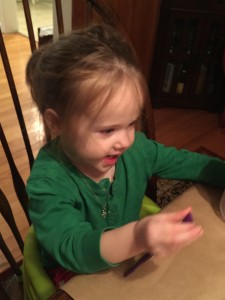
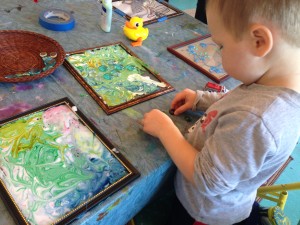
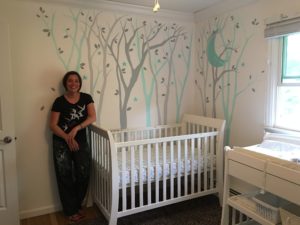
Sabrina with her masterpiece. 

IMG_5128

IMG_5130

I find myself just sitting in the nursery when I need a few minutes of peace from the crazy chaos. I just love it.

Alphabet Frame

RNYM has this adorable alphabet on the wall in her playroom that I just love! (http://rocklandnymom.com/category/playroom-project/) So again I found myself on Pinterest working off this idea and found an idea for an alphabet that I thought would work. I ordered the wooden letters off of Etsy (https://www.etsy.com/shop/TheMonogramCompanySE?ref=l2-shopheader-name – letters arrived quickly!) and Sabrina left me the paint samples of the teal colors from the mural so I was able to match the color of the letters to the trees in the mural.

IMG_5469
IMG_5468

It was important to me to include the boys in the projects for the baby’s room to
help them feel included.  They loved picking the letters to paint – and we worked on letter recognition in the process. 

I happened to have a large framed mirror lying around that was intended for a different project, but it was the perfect size to frame the letters. I matched the grey colors to the trees of the mural and painted the frame. I relaxed in the rocking chair and let hubby do the hanging – using small poster size command strips to hang the wooden letters.

IMG_6941
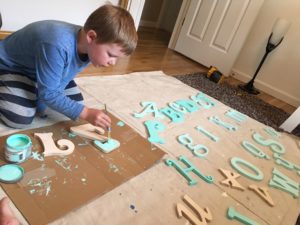
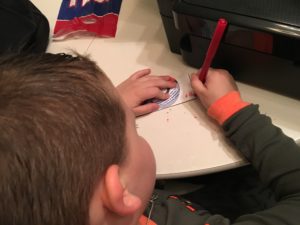
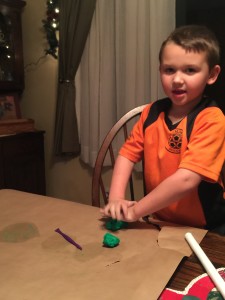
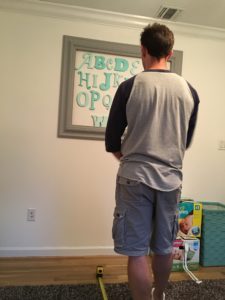
Making sure his spacing was even.

Blanket Ladder
I love blanket ladders. So much easier than folding the hundreds of baby blankets you have, plus it doubles as decoration.

RNYM again to the rescue with a ladder she found on the side of the road. We (and by we I mean my wonderful Husband) sawed it in half, power washed, and sanded it down. I had left over paint from the walls and mural – easy! And it looks perfect in the room. Just by coincidence, the majority of my gender neutral blankets from my boys are teal and grey – perfect match.

IMG_6949 IMG_6957
My boys hard at work. 

Closet Organization
Since the room is a bit small, we decided not to buy a dresser/armoire. I had hanging shoe organizers, and found baskets at the dollar store that fit perfectly in the slots. Great for holding onesies, burp clothes, tiny baby socks.  The baskets even fit great on the changing table.

Ashley Closet

Sonogram Photos
Photobarn.com was having a special promotion on free wooden photo prints (they do this often so if you are a photo junkie go sign up), and I was looking for some more wall decor…I couldn’t resist!  I ordered 2, used my sonogram photos, and they look adorable!

IMG_7288

The perfect gift from an amazing friend!
I knew she was up to something, she always is 😉 She had been asking me for a pair of jammies from when each of the boys were infants. I found a pair for each, that reminded me of when they were tiny and cuddly.

A few weeks later she surprised me with these amazing ELEPHANTS (which I happen to love)! This wonderful Etsy Shop – (https://www.etsy.com/listing/291624967/memory-elephant-handmade-elephant) took the boys jammies and sewed them into stuffed elephants!  Even embroidered their names on the feet. This gift could not be more perfect! Looking forward to having a matching one made for #3 as a keepsake.

IMG_6597
IMG_6598

The nursery turned out better than I imagined, I can’t wait for baby 3 to arrive!

IMG_6985
IMG_6986
Empty wall perfect for a newborn photo.

IMG_6987


2 Comments .

Holly Hand-Print Ornaments- 2015

Posted on December 15, 2015 by RocklandNYMom Posted in Christmas 2015, Crafts, Crafts and More Crafts .

Disclosure:  This is an unsponsored post.   All opinions expressed are my own.

We ALWAYS make an ornament.  We keep one and then give one to each of the grandparents.  I ALWAYS incorporate their hand, foot, or finger prints. Here is this years.

I had a lot to consider.  I always want it to be different.  Also, I have tried carefully to include skills that the kids need to work on for school into each of our “projects”.  (A) hates writing so we have been working at home on pencil grip and increasing his endurance.  One great way to do that is with clay.

Marvin brought a picture of what he wanted us to make, as well as the clay and ribbon for the project.

2015 Ornament 1

2015 ornament 2

I wanted to liven it up a bit so instead of just one color, (A) got plain green and (E) had a glitter green.

Sculpey Clay PhotoSculpey glitter

Note: the glitter was much harder to work with and I’m not sure I would purchase it again.  There is a Softening agent I learned after the fact which might have helped. 

First I let the kiddies play with the clay to soften it up.  Then we worked on rolling it out and tracing hands with a toothpick.

2015 Ornament 3

2015 Ornament 4

Once traced I cut the handprints out with a knife and placed them on the cookie sheet.  I poked a hole in (A)’s hand before baking so that we could get the ribbon through at the end.

2015 ornament 6

Sparkle and plain went on different sheets because one bakes longer than the other.

Once out and cooled we super glued the hands and berries in the design we wanted, looped through a ribbon and Viola!

Holly Handprint Ornaments!

2015 Ornament 7

Looking for more hand made ornaments?  See ours from years past (click the date to see)!

2014

The years prior, I didn’t post “How to’s” but are pretty self explanatory, if you have a question, please ask, I will explain.

Here are the pictures:

 2013Hand Made Ornament 2013

 2012

Hand Made ornament 2012

1 Comment .

Mornings On the Farm

Posted on November 16, 2015 by Ashley Carmichael Posted in Classes, Classes for Kids, Crafts, Crafts and More Crafts, Day Trips, Day Trips, Reviews .

Disclosure:  This is a sponsored post.  All opinions expressed are those of Ashley our writer. 

Screen Shot 2015-11-08 at 5.53.04 PM

Circle on the farm is located right off 303 on Greenbush road (behind the old U-Delco) on the property of Bell-Ans Farm.

I was graciously invited by Rachael to join her for ‘Mornings on the Farm.’ A 2 ½ hour ‘class’ (I hesitate to call it a class) of creativity and exploration for kids and their parents/caregiver. Of course, my first thought its 2 ½ hours?! How will the boys be focused for that long?

Rachael works and volunteers in Recreational and Creative Arts Therapy. She studied Fine Art and is working towards her Masters in Creative Arts Therapy. She believes that busy hands lead to an open heart and and open mind. She is UNBELIEVABLE. Her patience, and warmth is something special. She welcomes you into the studio with such warmth and true joy to have you there for the morning.

We arrived on time to a welcoming smile from Rachael. The studio is full of wonderfully mismatched chairs and colors, that all seems to match. She instantly encouraged (W) and (S) to explore to their liking and offered me coffee, tea and water to enjoy while I sat on the couch waiting for others to arrive. There is an adorable play nook set up under the staircase with basic blocks, toy kitchen and a few trucks that instantly drew the boys in.

ef498b_5e590feeb7014c6383185b684d5a0a95.jpg_srz_p_405_576_75_22_0.50_1.20_0.00_jpg_srz

As the other families trickled in conversation was easily made and everyone was so happy to meet each other. It was a first class for many, so it was nice to experience the class amongst other first timers.

Racheal began to set up the art project. Our project for the day was making a Stand Glass Window frame to hang. She explained several different ideas how to complete the project, but ultimately it was a free for all. She encouraged the kids to participate, but did not force. If the children were un-inspired with the project, they were free to play and roam about the studio while the parents created.

She came over to the boys and poured glue all over a glass 8×11 frame. She then let the boys choose colors and dropped dots of food coloring in the glue,  gave the boys popsicle sticks and let them create as they pleased. The boys had a blast swirling the colors, and making a wonderful mess. She also had plates of beads to add to the glue if they wanted. The boys finished and moved back to the play nook again.

The kids would again start to wander back to the table interested in what the adults and other kids were up to. She could see the interest peaking in those little minds, and offered another project of painting – paper, mason jars, tiles. She was full of fun ideas! There was never a moment of “let’s stop and clean up” or “Don’t do it that way”, Rachael watched the project flow letting the children and adults create as they felt inspired.

image1

IMG_1556
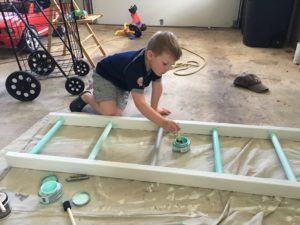
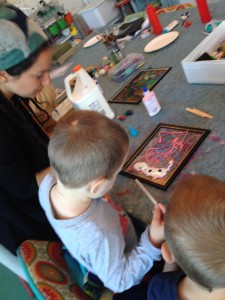
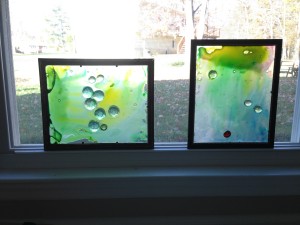
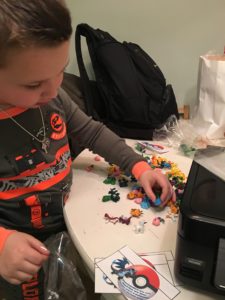
(S) working hard on his stained glass. Choosing the perfect stones to add.

As everyone finished their glass, and paintings she offered to make snack! Fresh popped popcorn and delicious berry smoothies. Two of the boys favorites!

IMG_1559
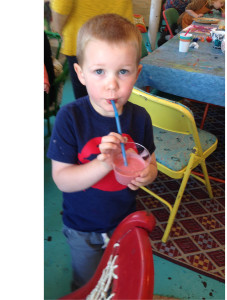
(W) enjoying his smoothie!

Rachael saw those little legs getting antsy so she grabbed a bucket of birdseed, a head of lettuce and we headed out for a walk around the farm. The kids got to feed the chickens, peacocks, guinea foul, pigs and goats! The morning wrapped with a fun game of ring around the rosy on the large lawn of the farm. I couldn’t believe it was already time to go!

IMG_1573
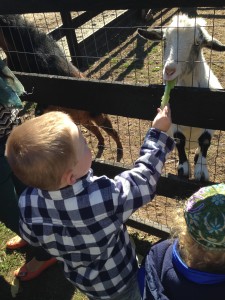
(W) Feeding the goats.

The boys insisted on hanging their beautiful projects in their playroom so everyone who comes over to play can see them!

IMG_1944

Mornings on the Farm is unlike any other “mommy and me class” I have experienced. The mood is calm, and free flowing. The ‘class’ was relaxing, as if I were at a playdate at a friends house.
The boys and I are BEYOND excited to visit another morning.

Rachael along with her partners Jayme and Lauren created this amazing space for creativity and growth at Circle on the Farm with offerings not only for children, but for adults as well, yeah we will go check that out too ;o). Please check out CirlceontheFarm.com or their Facebook page for upcoming events.

 https://www.facebook.com/circleonthefarm/?fref=ts

Check here for the schedule of their offerings.
http://www.circleonthefarm.com/#!calendar/c22g5

A New Talent (or Addiction..)

Posted on August 19, 2015 by RocklandNYMom Posted in Classes, Crafts, Crafts and More Crafts, Reviews, Services, Specialty Items .

Disclosure:  This is a sponsored post as I was invited to a class with Underground Finds & Furniture.  All opinions expressed are my own.

You may recall that almost a year ago, I started painting (E)’s highchair and gave up sure that I wouldn’t be able to get it right.  At that time Mary of Underground Finds & Furniture came to my rescue and painted it for me at a super reasonable rate (click here).  Mary not only paints your requests, she looks for interesting pieces to paint for you, sells the paint so that you can do it yourself, but also offers classes.  Given our love for great sturdy and classic furniture we became fast friends.  So much so that when I went and purchased some furniture for (E)’s bedroom (coming soon), I brought her with me.  I intended to have her paint it for me (again convinced that I would fail), but she talked me into something a little different.

She wanted me to do it myself, but she said that she would teach me at one of her classes…. This is a big deal.  Tackling an entire bedroom isn’t something that I was prepared for nor did I have the time, or so I thought.

The furniture I found for (E)’s room:

Purchased these three main pieces from a North Rockland Swap Site.  These are the three I worked on at Mary’s workshop, the others I added afterwards because I am glutton for punishment ;o)

Tall Dresser Before

Mirror Before

Short Dresser Before

The nightstand I found that coordinated for FREE on the side of the road.

Nightstand Before

The bed frame we had sitting in the basement.

Bedframe Before

 A New City Garage Sale purchase.

Frame Before

When we showed up for class Mary was all set for us with plenty of space to work, and every supply that we needed.  Mary made sure that we had dusted and cleaned our pieces prior to our starting.  Then we discussed our vision.  I wanted to paint the furniture white, and then add a touch of pink to the details, all while keeping the style very shabby chic.  I had seen Mary do this on a previous piece that I adored.

Dresser Clean and Ready

I was nervous about the workload (naturally) so I brought my mother with me.  By the end of the day (yes the day) between my mother, Mary and Myself we were able to get two coats of  paint on and some of the pink detailing done.  Mary assured me that I was ready to complete the rest on my own.  This was the part that I was so very nervous about.  Most people complete their projects in the class time allotted so she is able to show them all of the steps involved.  While I was there  two other painters participated in the class.  One completed an adorable gossip chair, and the other a lovely headboard for her daughter.  (Usually Mary limits people to pieces that can be done in one class, in my case I was supposed to come back for another class, but our schedules didn’t mesh).  Mary assured me that she would be available for any questions and even offered for me to come to her HOUSE and work if I needed to.

Nana Paints

Mary Paint

One Coat Down

Pink Detail Mirror

When Summer started I was finally able to work on my masterpieces.  Although the paint is soft enough to wax straight after drying, I wanted a smoother finish, and some distressing (which Mary has a trick for, I chose to do it the HARD way).   I used a fine sandpaper first, followed by a “SUPER-fine) sand paper.  Once pleased with the distressing I used the wax that Mary provided to seal it all in.  It feels as smooth as glass.  I adore it.  I had SEVERAL million questions and Mary was super quick to respond, and had ideas and hints for everything.  For instance:  I needed to find a matching drawer pull for a missing one on the set, she directed me to the right group!

I needed to add a little something to the bedframe to make it coordinate with the rest of the set so Mary suggested I get a wooden applique (you can find them at Home Depot, or Dykes Lumber).  I affixed them with Loctite wood glue, painted and distressed.  I LOVE THESE DETAILS!!

Adding the Applique

Adding E to Mirror

I worked for what seems like forever on these pieces but am so proud of the outcome.  (E) even got in on it and learned how to sand (there is a video on our YouTube channel because OH MY GOSH its cute).

Emmie Helps

My finished products (you will get to see them in the room when her room is complete and I post).

Dressers

Complete Tall Dresser

Complete small Dresser

Night Stand Done

Mirror

Emma Kiss Mirror

Emmie Loves Mirror

Bedframe

Headboard Complete

Picture Frame (now awesome bow holder)

Picture Frame

Special credit must be given to Auntie’s Crafts and More who helped me to create this awesome bow holder, and is also responsible for filling it up!

If you are interested in taking a class with Mary (count me in)! I already have so many ideas for new projects (and yes I will share).  She is holding her next class on 9/26 from 12-3pm .  You can follow her on Instagram, Twitter, and Facebook, BLOG, or you can check out her website: http://www.undergroundfindsandfurniture.com/ .


1 Comment .

Sanctuary…

Posted on April 2, 2014 by RocklandNYMom Posted in Crafts and More Crafts, Playroom Project, Thoughts.. .

Like many mothers, I always knew I would have kids.  I knew I liked kids, and having them was just something to check off of my endless lists.  There were a few things that I would come to realize when I had children that I was completely unprepared for.

1. Just how much you could love someone you had never “met”.
2. How hard it would be to leave them and go back to work.
3. How amazing it is to see the world through their eyes.
4. How awesome it is to just sit and watch them.
5.  The unbelievable amount of crap that comes with them.

I have read countless articles about all of the above topics, and I promise to elaborate on each of them at some point in the future but today, I would like to focus on #5.

(D) and I were married in 2004, we waited 6 years to have children.  The planners that we are we needed to have all of our “T’s” crossed and “i’s” dotted.  We needed the house, my masters (I got two), his MBA, paid off cars, the dog, the whole deal.  Before we had children we swore that our house would remain organized, neat and clean (HA!).  We even had a little sanctuary, in the form of a sun porch off the back of our house, which was outfitted with lovely resin wicker furniture, and a ceiling fan.  It looked out on our nice sized, quiet backyard.  It was the perfect place to enjoy a hot cup of coffee, or a cold beer.  A great setting for a long catch up phone call with a friend who had moved away.

Fast-forward, to 2014.  (D) and I now have two children and two dogs. Mess comes with kids, I know that, and I love every moment of it.  I would not trade Motherhood for anything in the world. However, I am tripping over toys in my living room, and spend more time “picking up”, cleaning, and washing than sipping coffee, beer or talking to those long lost friends.

Then there is my sanctuary.  It has become a catch all, and transition area.  Items that belong outside but we needed to store for the winter, shoes, party items from BBQ’s I never quite finished organizing.  It’s sad really.

I have often thought of what I should do with this space, and recently came to a decision while attempting yet again to confine the toys to the corner of the living room that we lovingly call the “garage”.  It would make a fantastic play room.  (D) and I have discussed for two years now trying to find a space for the kids to play and keep all of the toys, often resigning ourselves to the fact that the basement project will have to wait; but will be great when we do it.

My father had suggested using the sun porch for a playroom several times, and each time I dismissed the idea.  It was just recently that I realized he was right.  It’s on the same level with the house, in close proximity with the main living space.  The door can remain open and the kids would be close enough to feel safe and keep an eye on, while giving Mommy (and Daddy?) a space for herself (obviously to a point).  A great plan.

My father loved photography, and I wanted to dedicate the room to him, and at the suggestion of a very smart Mommy from my Warwick, NY Facebook group, the room will be themed in his honor.  I will be posting updates to show you all of the progress made in the room that will once again be a sanctuary not just for me, but for my children as well.

My sanctuary turned into a “catch all”.  Sadly, I don’t even have pictures of its glory days.  This is my “BEFORE” picture.

Playroom Before


Next Page »
  • About this Site
    • Privacy Policy & Disclosure
  • Savings for RNYM.com Readers!
  • Currently loving….
    • Feeding Baby
    • BabyCare 101
  • Directories
    • Pregnancy and Babies
    • Camps Directory 2023
    • Childcare/Pre-School Directory
    • Classes Directory
    • For the Home
    • Direct Sales Directory
    • Party Directory
    • Party Entertainment Directory
    • Photographers Directory
    • Family Services Directory
    • Crafters Directory
    • Specialty Items Directory
    • Play Ball
  • A Good Cause
  • I’m Going on a Trip…
    • Theater
  • We’re having a party….
  • RNYM’s Favorite Recipes
  • Become Part of RocklandNYMom
  • RNYM in the News!
  • Christmas 2019

Newsletter Sign Up

Categories

Recent Comments

  • MB on Home Made Christmas Ornaments!
  • Mom E. on LEGOLAND NY- The RNYM Scoop
  • RocklandNYMom on Socially Safe Santa
  • sikis izle on Socially Safe Santa
  • Amanda Kivell on Camps Directory 2023

Meta

  • Register
  • Log in
  • Entries RSS
  • Comments RSS
  • WordPress.org

Recent Posts

  • Climbing out of our Comfort Zone
  • Four Stars for Movie House Paramus
  • Getting Back to it!
  • Kicking off Spring Break with a Time Mission Review!
  • Music Spring Break Camps at Bach 2 Rock!

CyberChimps WordPress Themes

© Rockland Mom