Rockland NY Mom
  • About this Site
    • Privacy Policy & Disclosure
  • Savings for RNYM.com Readers!
  • Currently loving….
    • Feeding Baby
    • BabyCare 101
  • Directories
    • Pregnancy and Babies
    • Camps Directory 2023
    • Childcare/Pre-School Directory
    • Classes Directory
    • For the Home
    • Direct Sales Directory
    • Party Directory
    • Party Entertainment Directory
    • Photographers Directory
    • Family Services Directory
    • Crafters Directory
    • Specialty Items Directory
    • Play Ball
  • A Good Cause
  • I’m Going on a Trip…
    • Theater
  • We’re having a party….
  • RNYM’s Favorite Recipes
  • Become Part of RocklandNYMom
  • RNYM in the News!
  • Christmas 2019

Category Archives: Crafts

Christmas Ornament 2014

Posted on December 10, 2014 by RocklandNYMom Posted in Christmas 2014, Crafts .

Disclosure:  This is an unsponsored post, the items used in this post are just the ones that I happen to use.  All opinions expressed are my own.

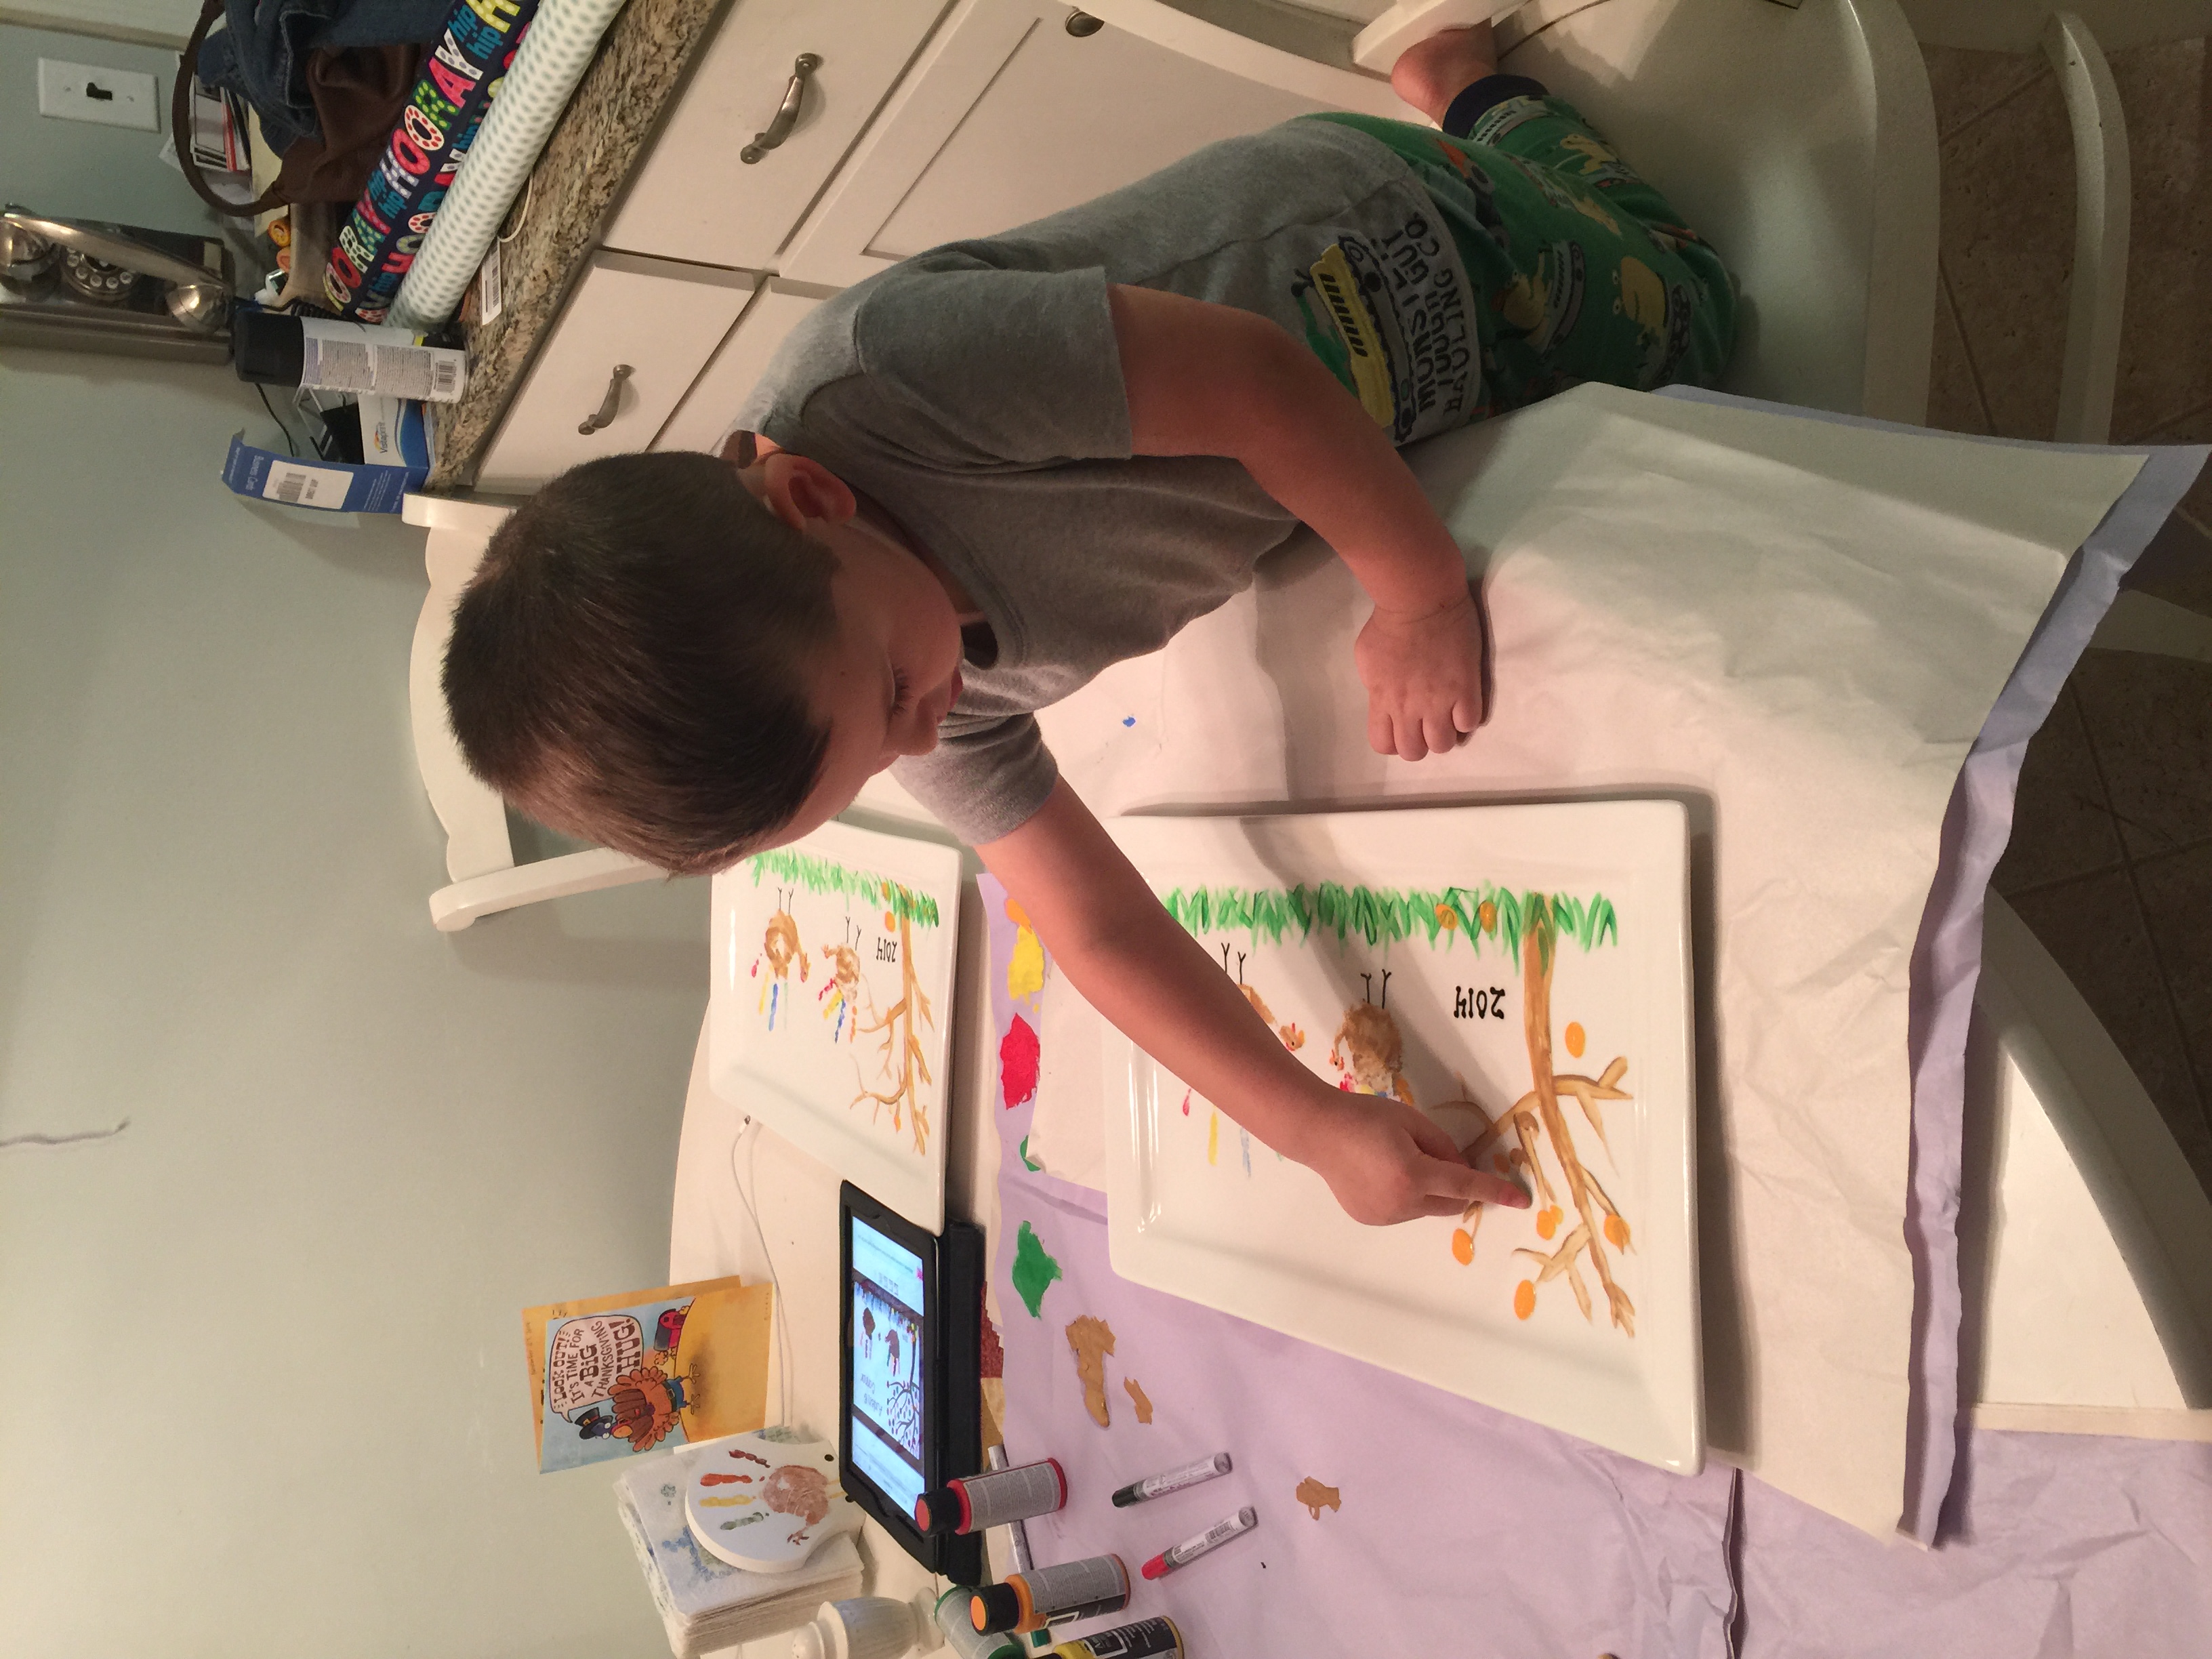
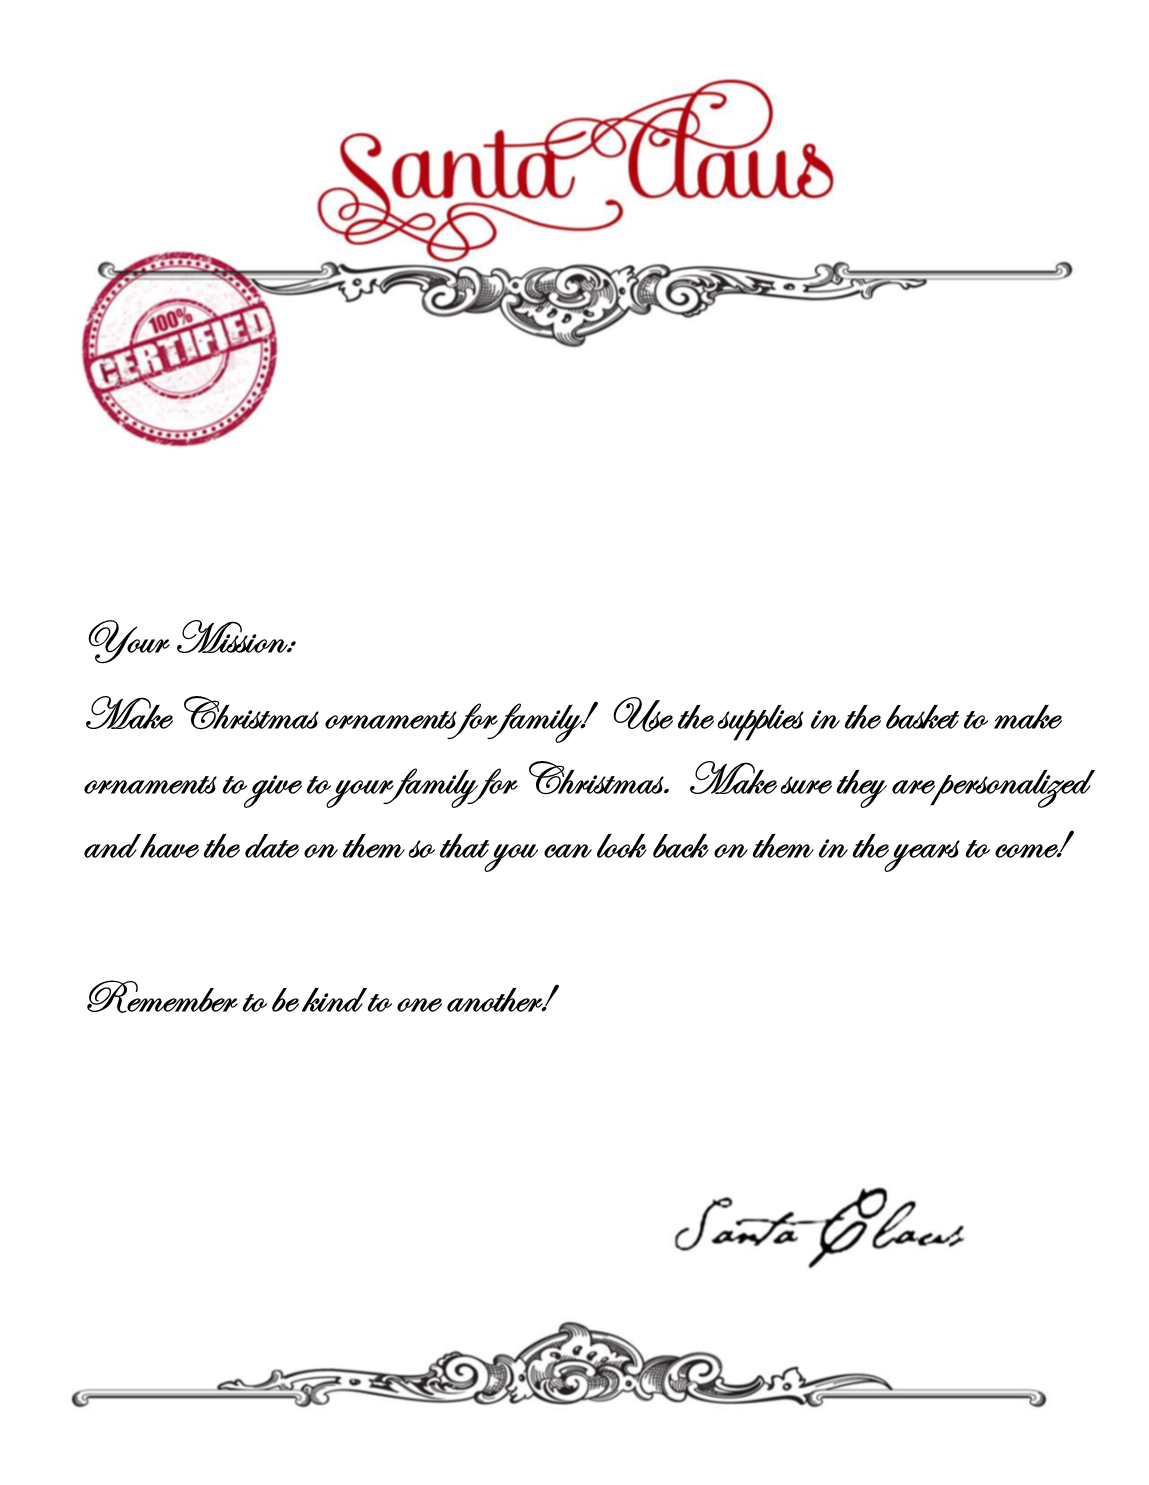
“Marvin” our elf on the shelf showed up yesterday with a mission for the kids.  To create our annual family ornament using the supplies that he supplied.  In years past I had a plan when going into this, I would always know just what I wanted them to look like (of course incorporating their hands/feet/fingerprints).  This year we winged it.  with (A) getting older and being able to do so much more undirected I let him decide.  I love the outcome and hope you do too!!

Marvin’s letter

Ornament Letter

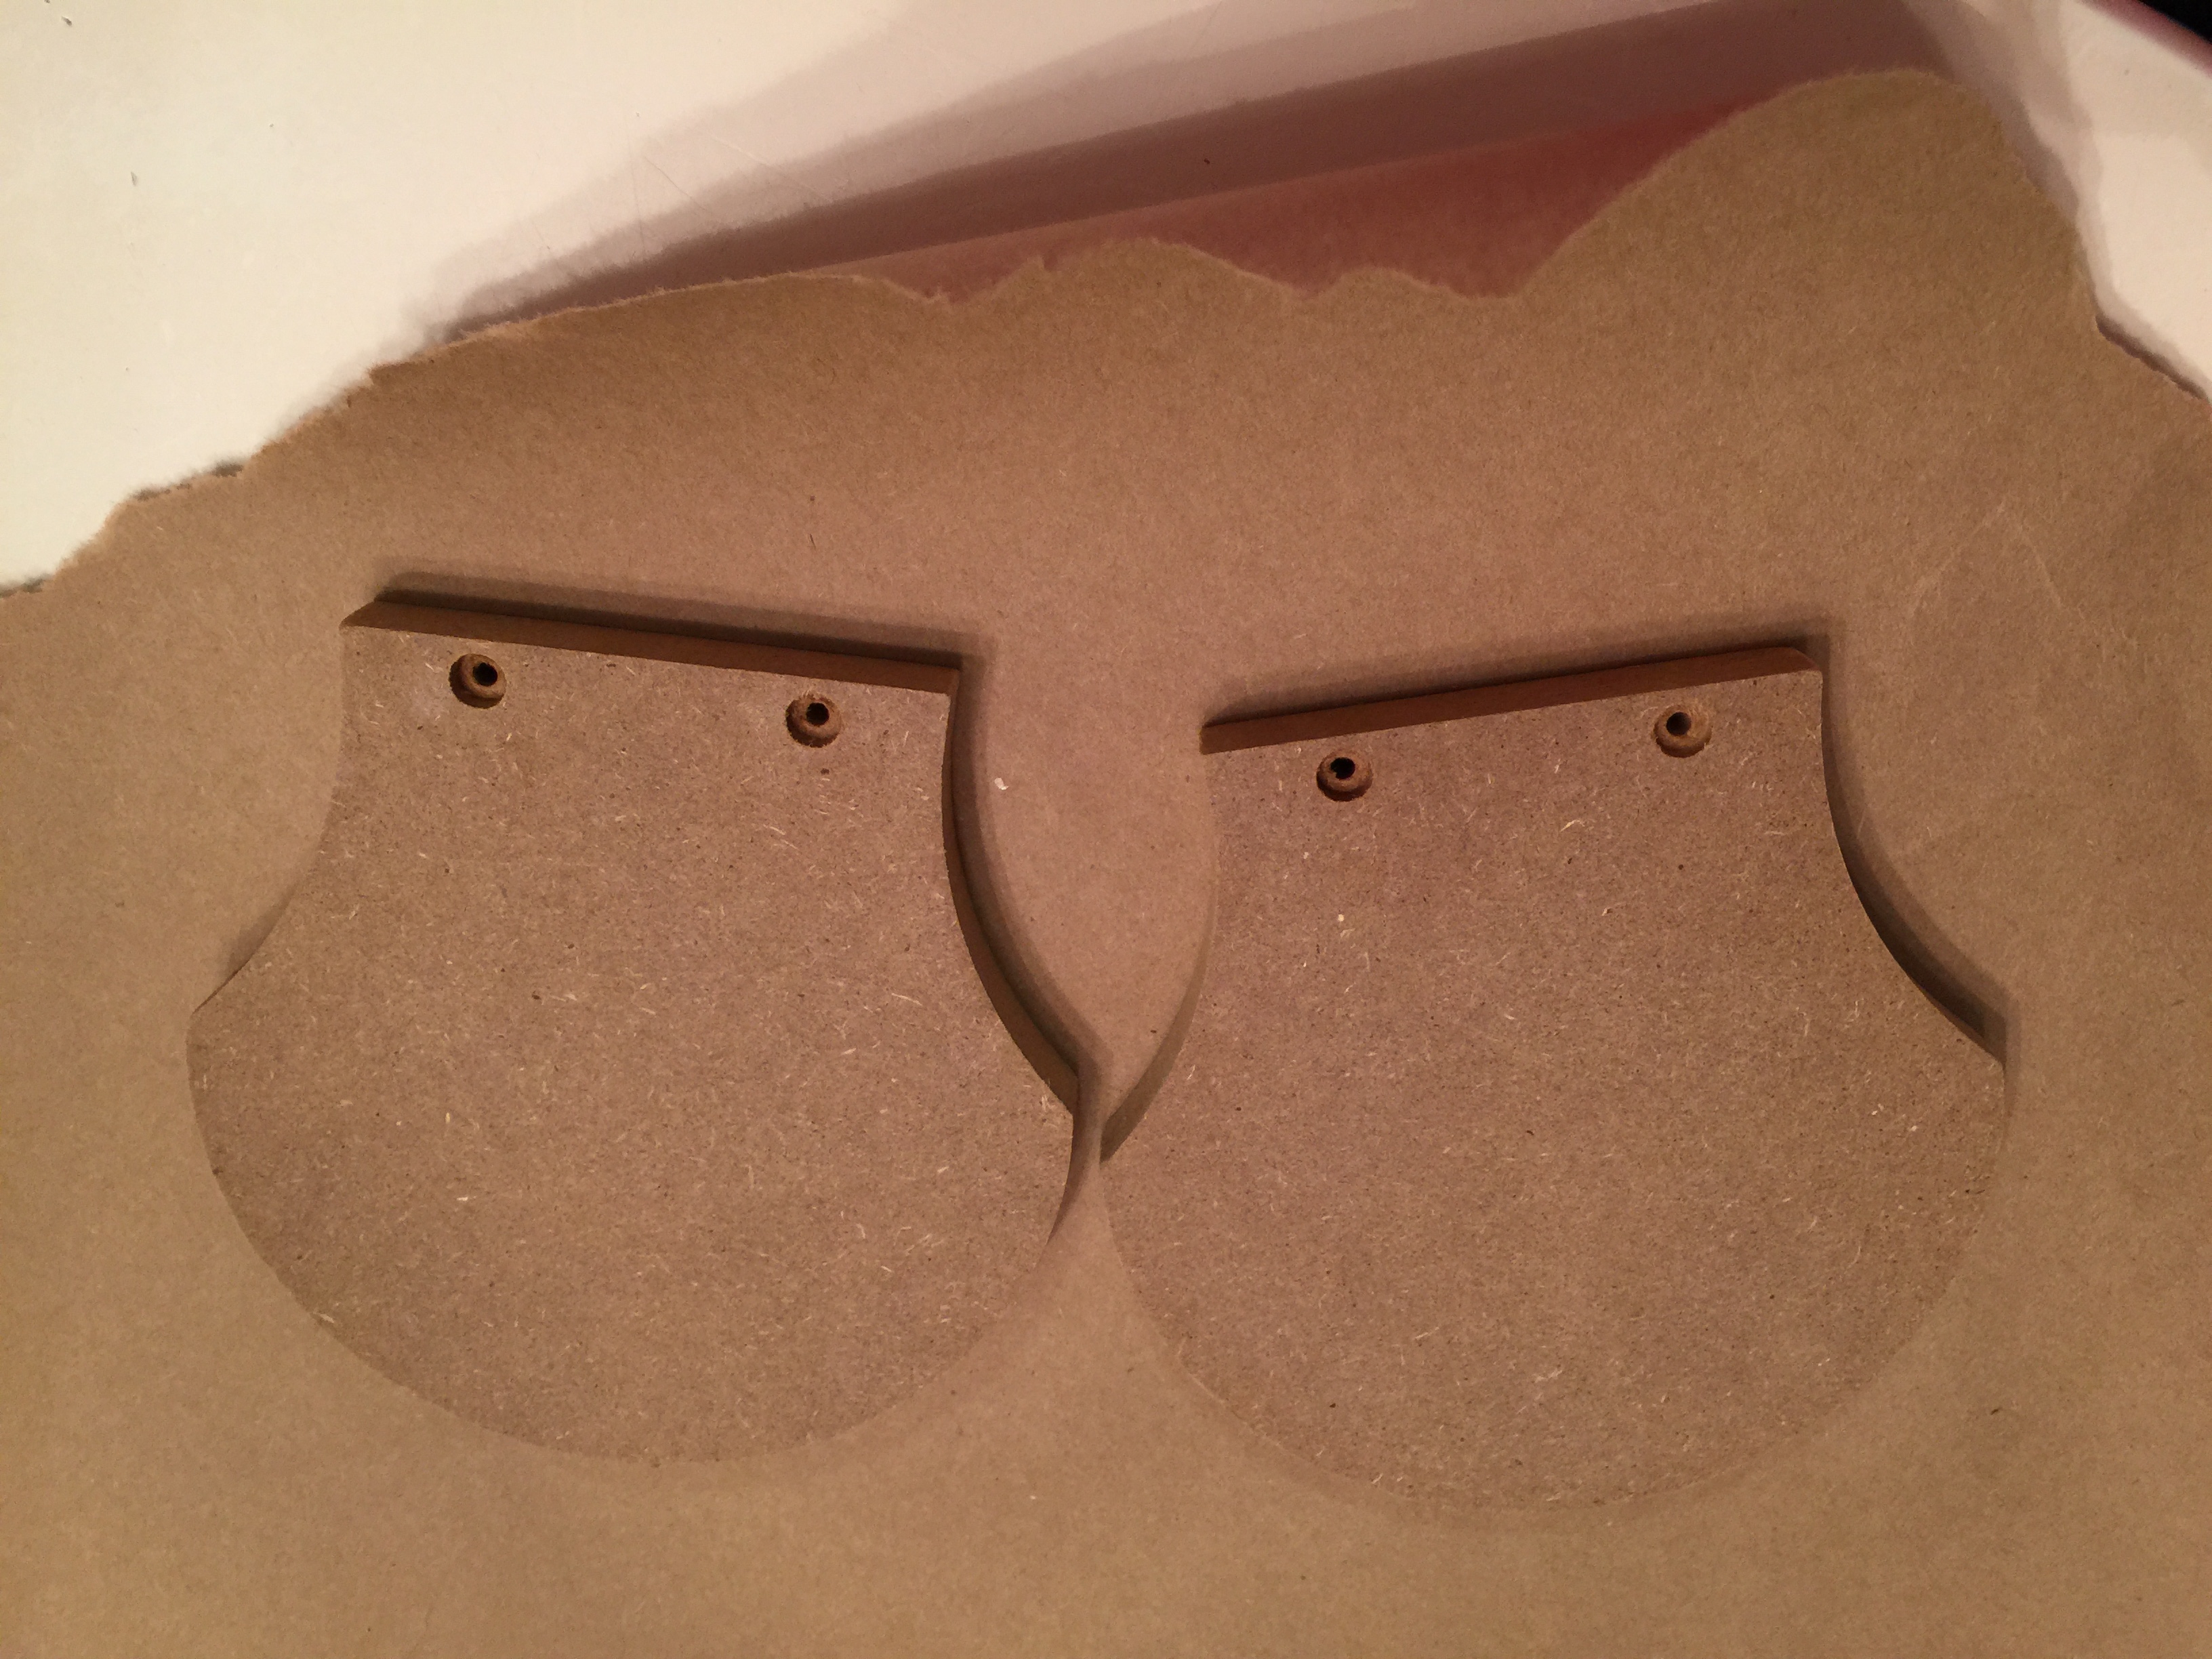
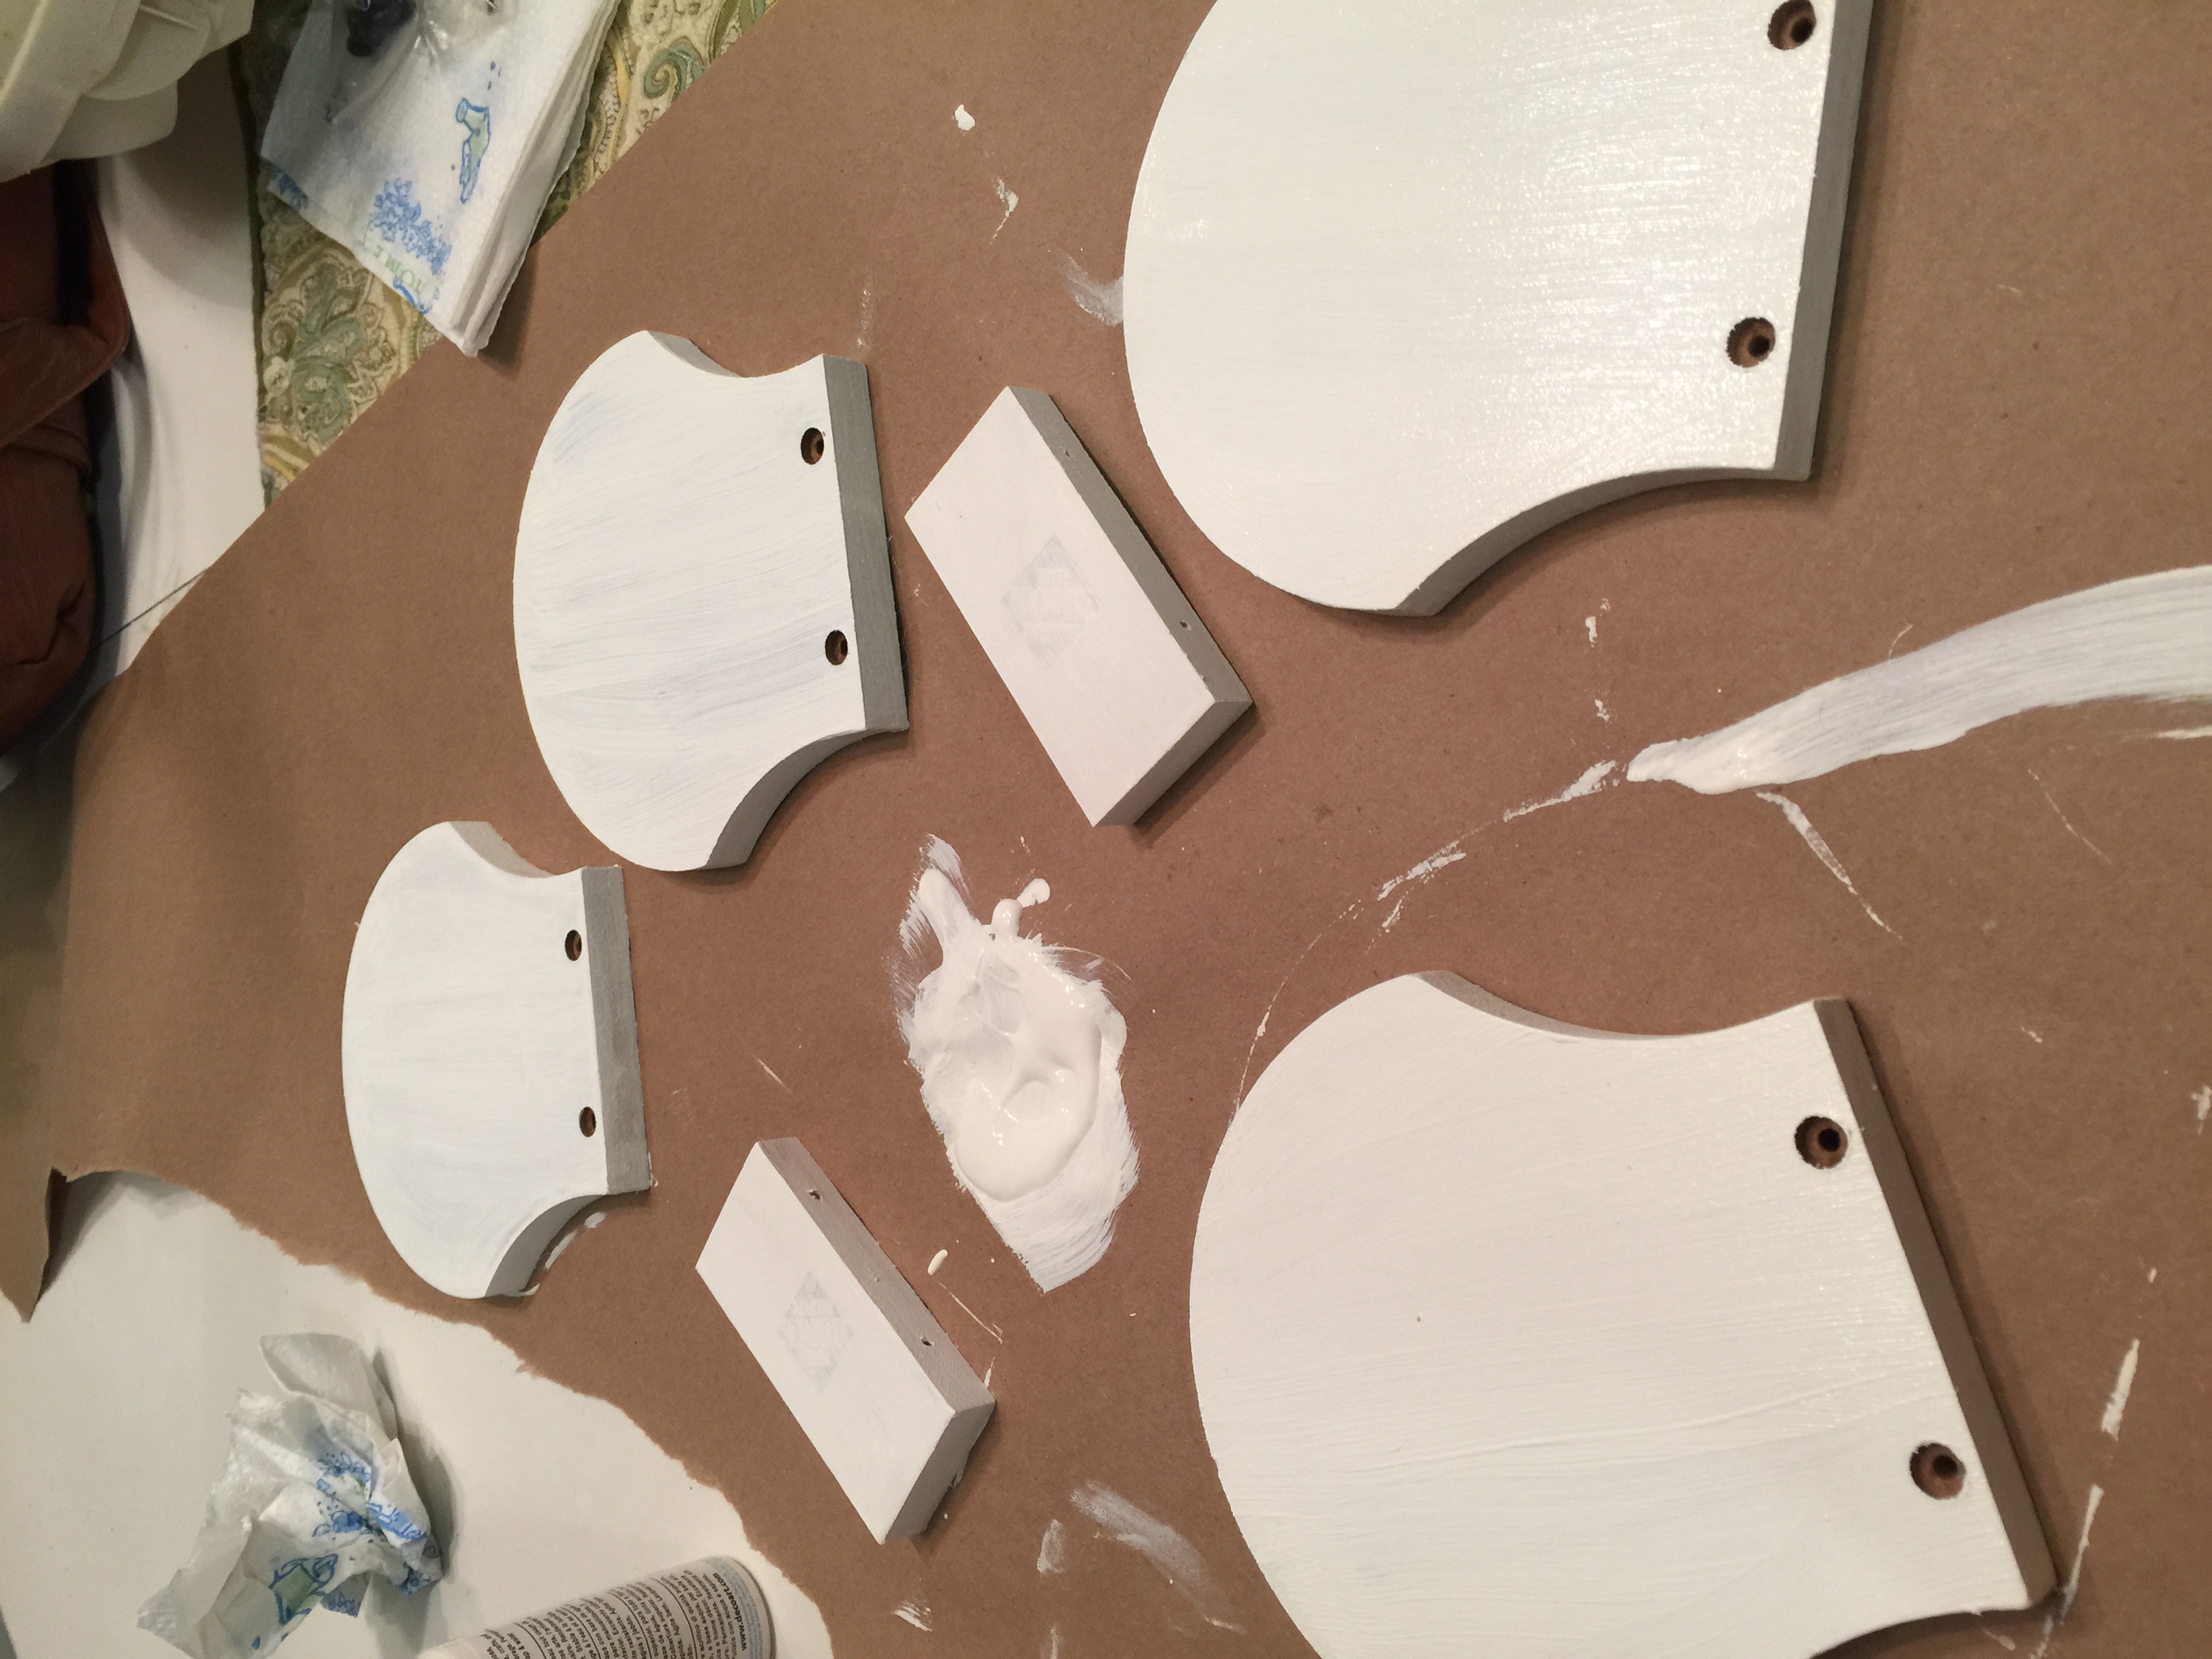
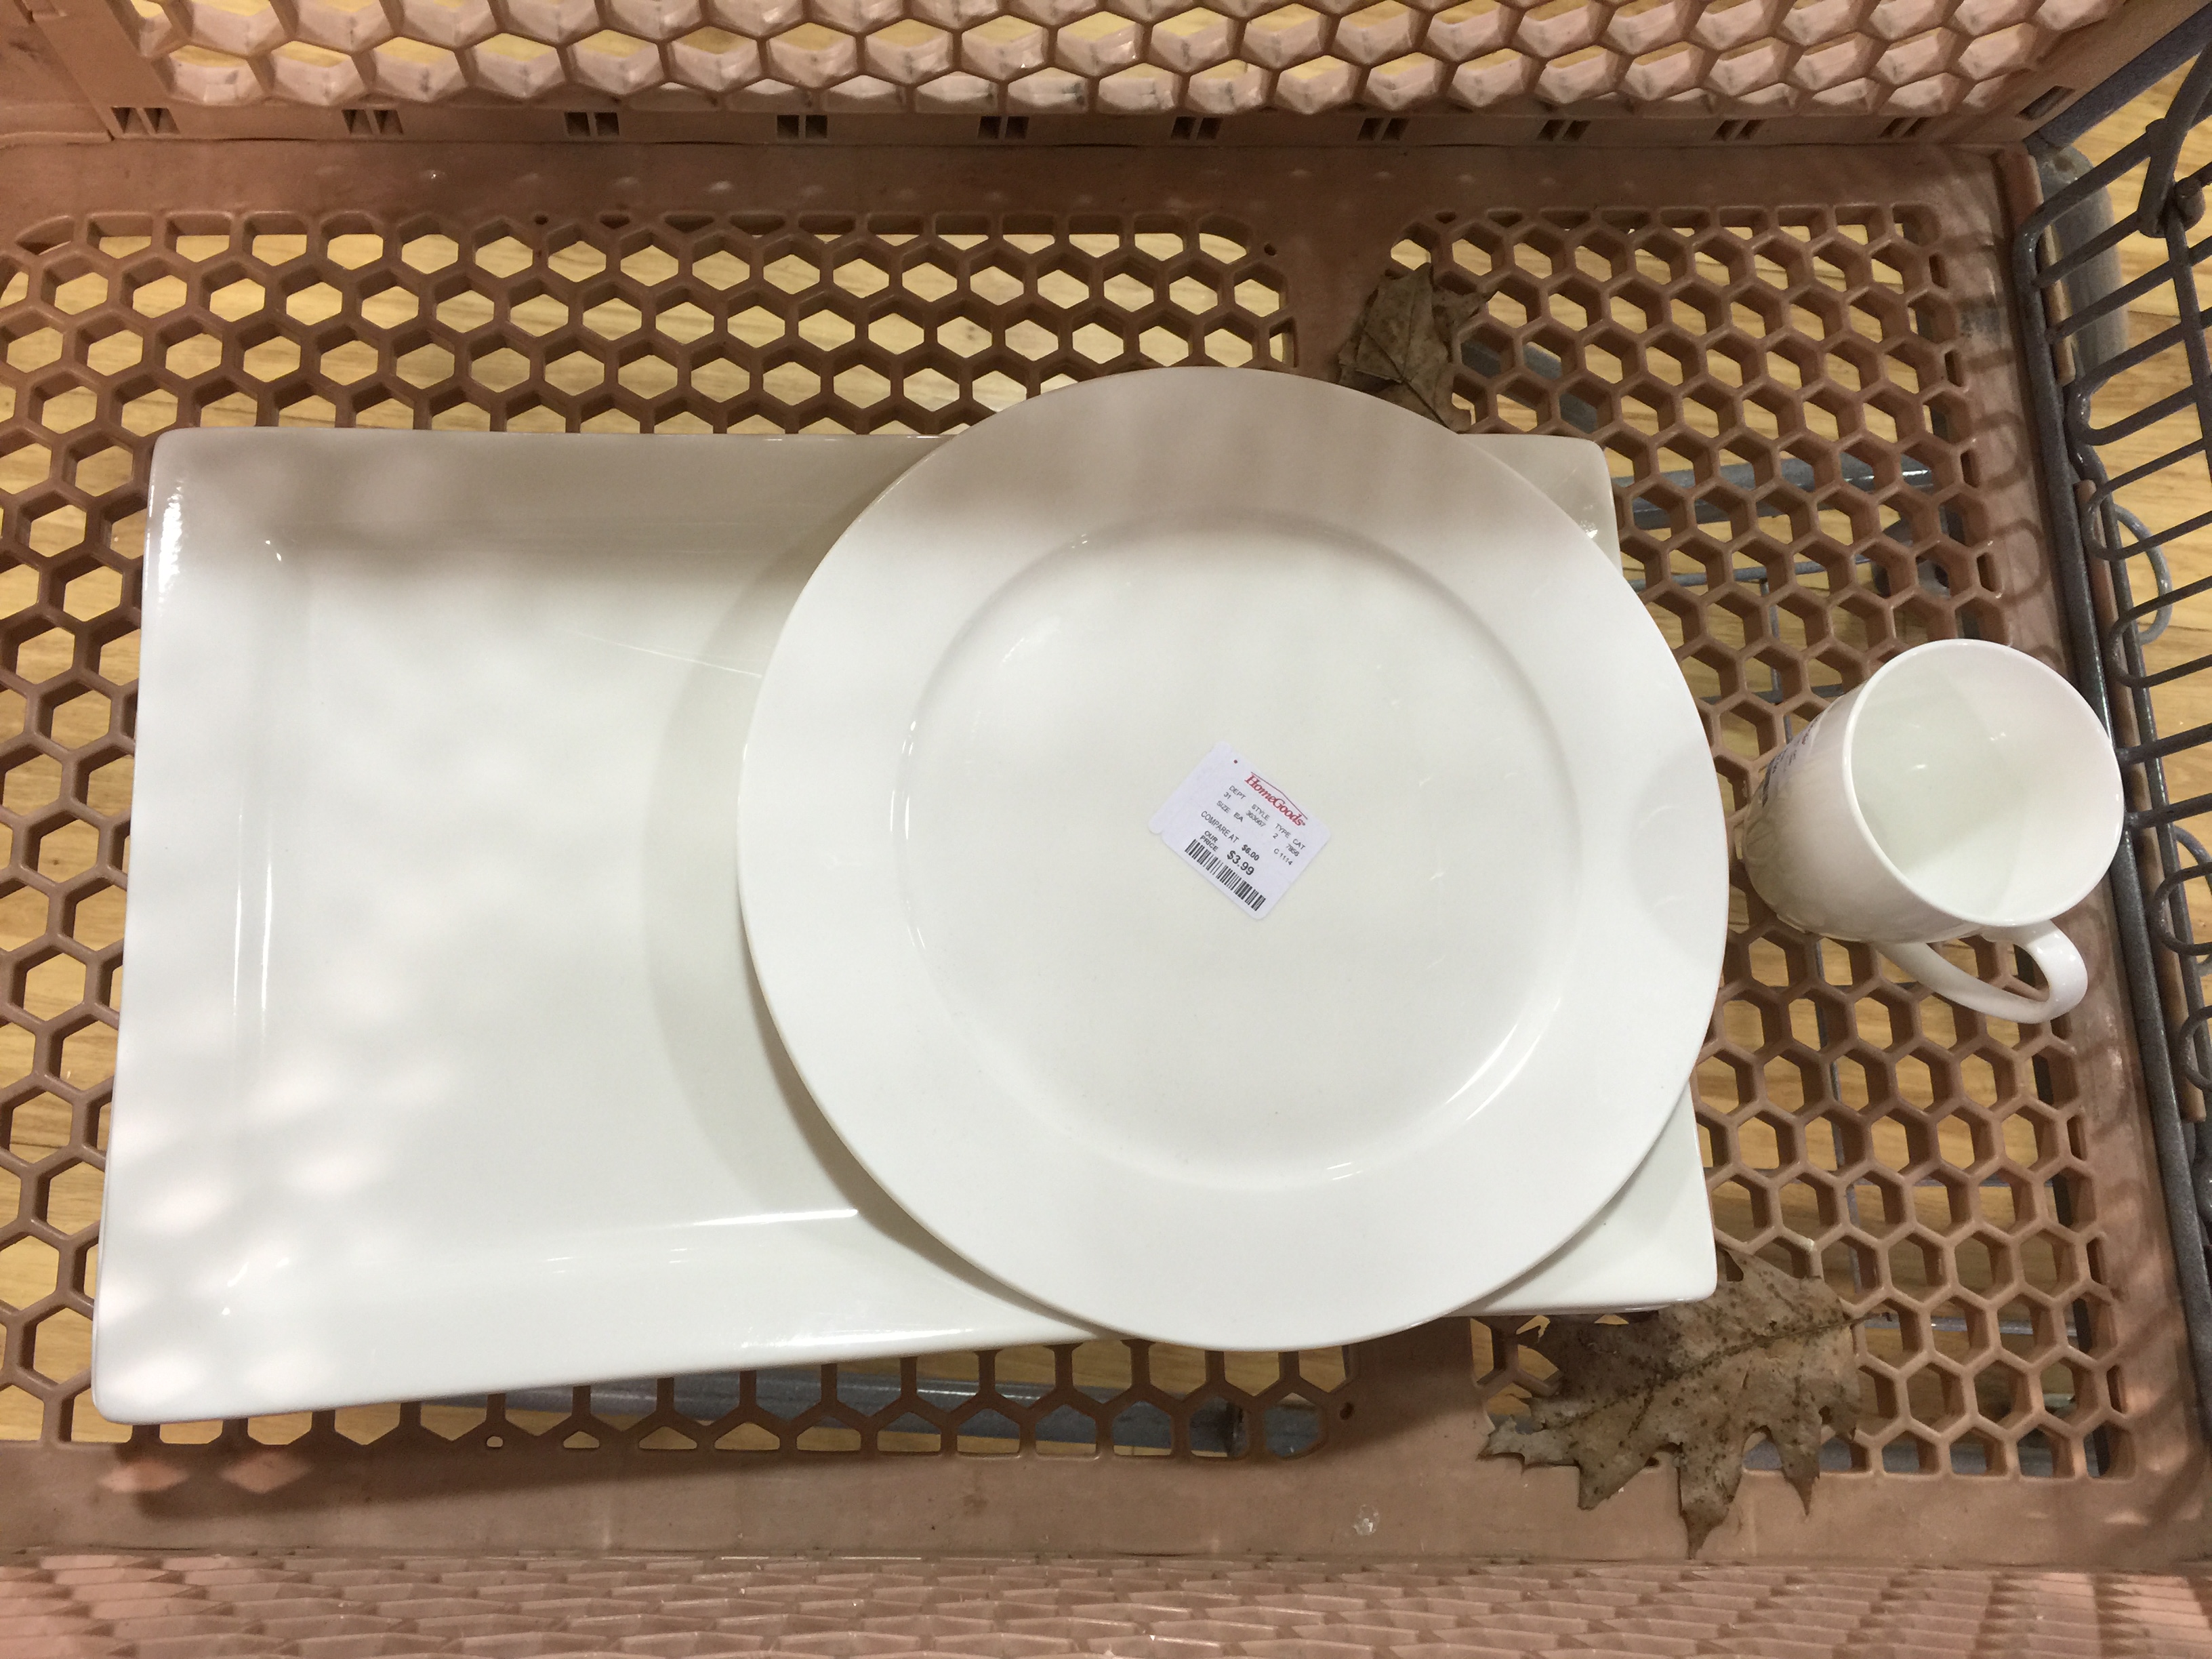
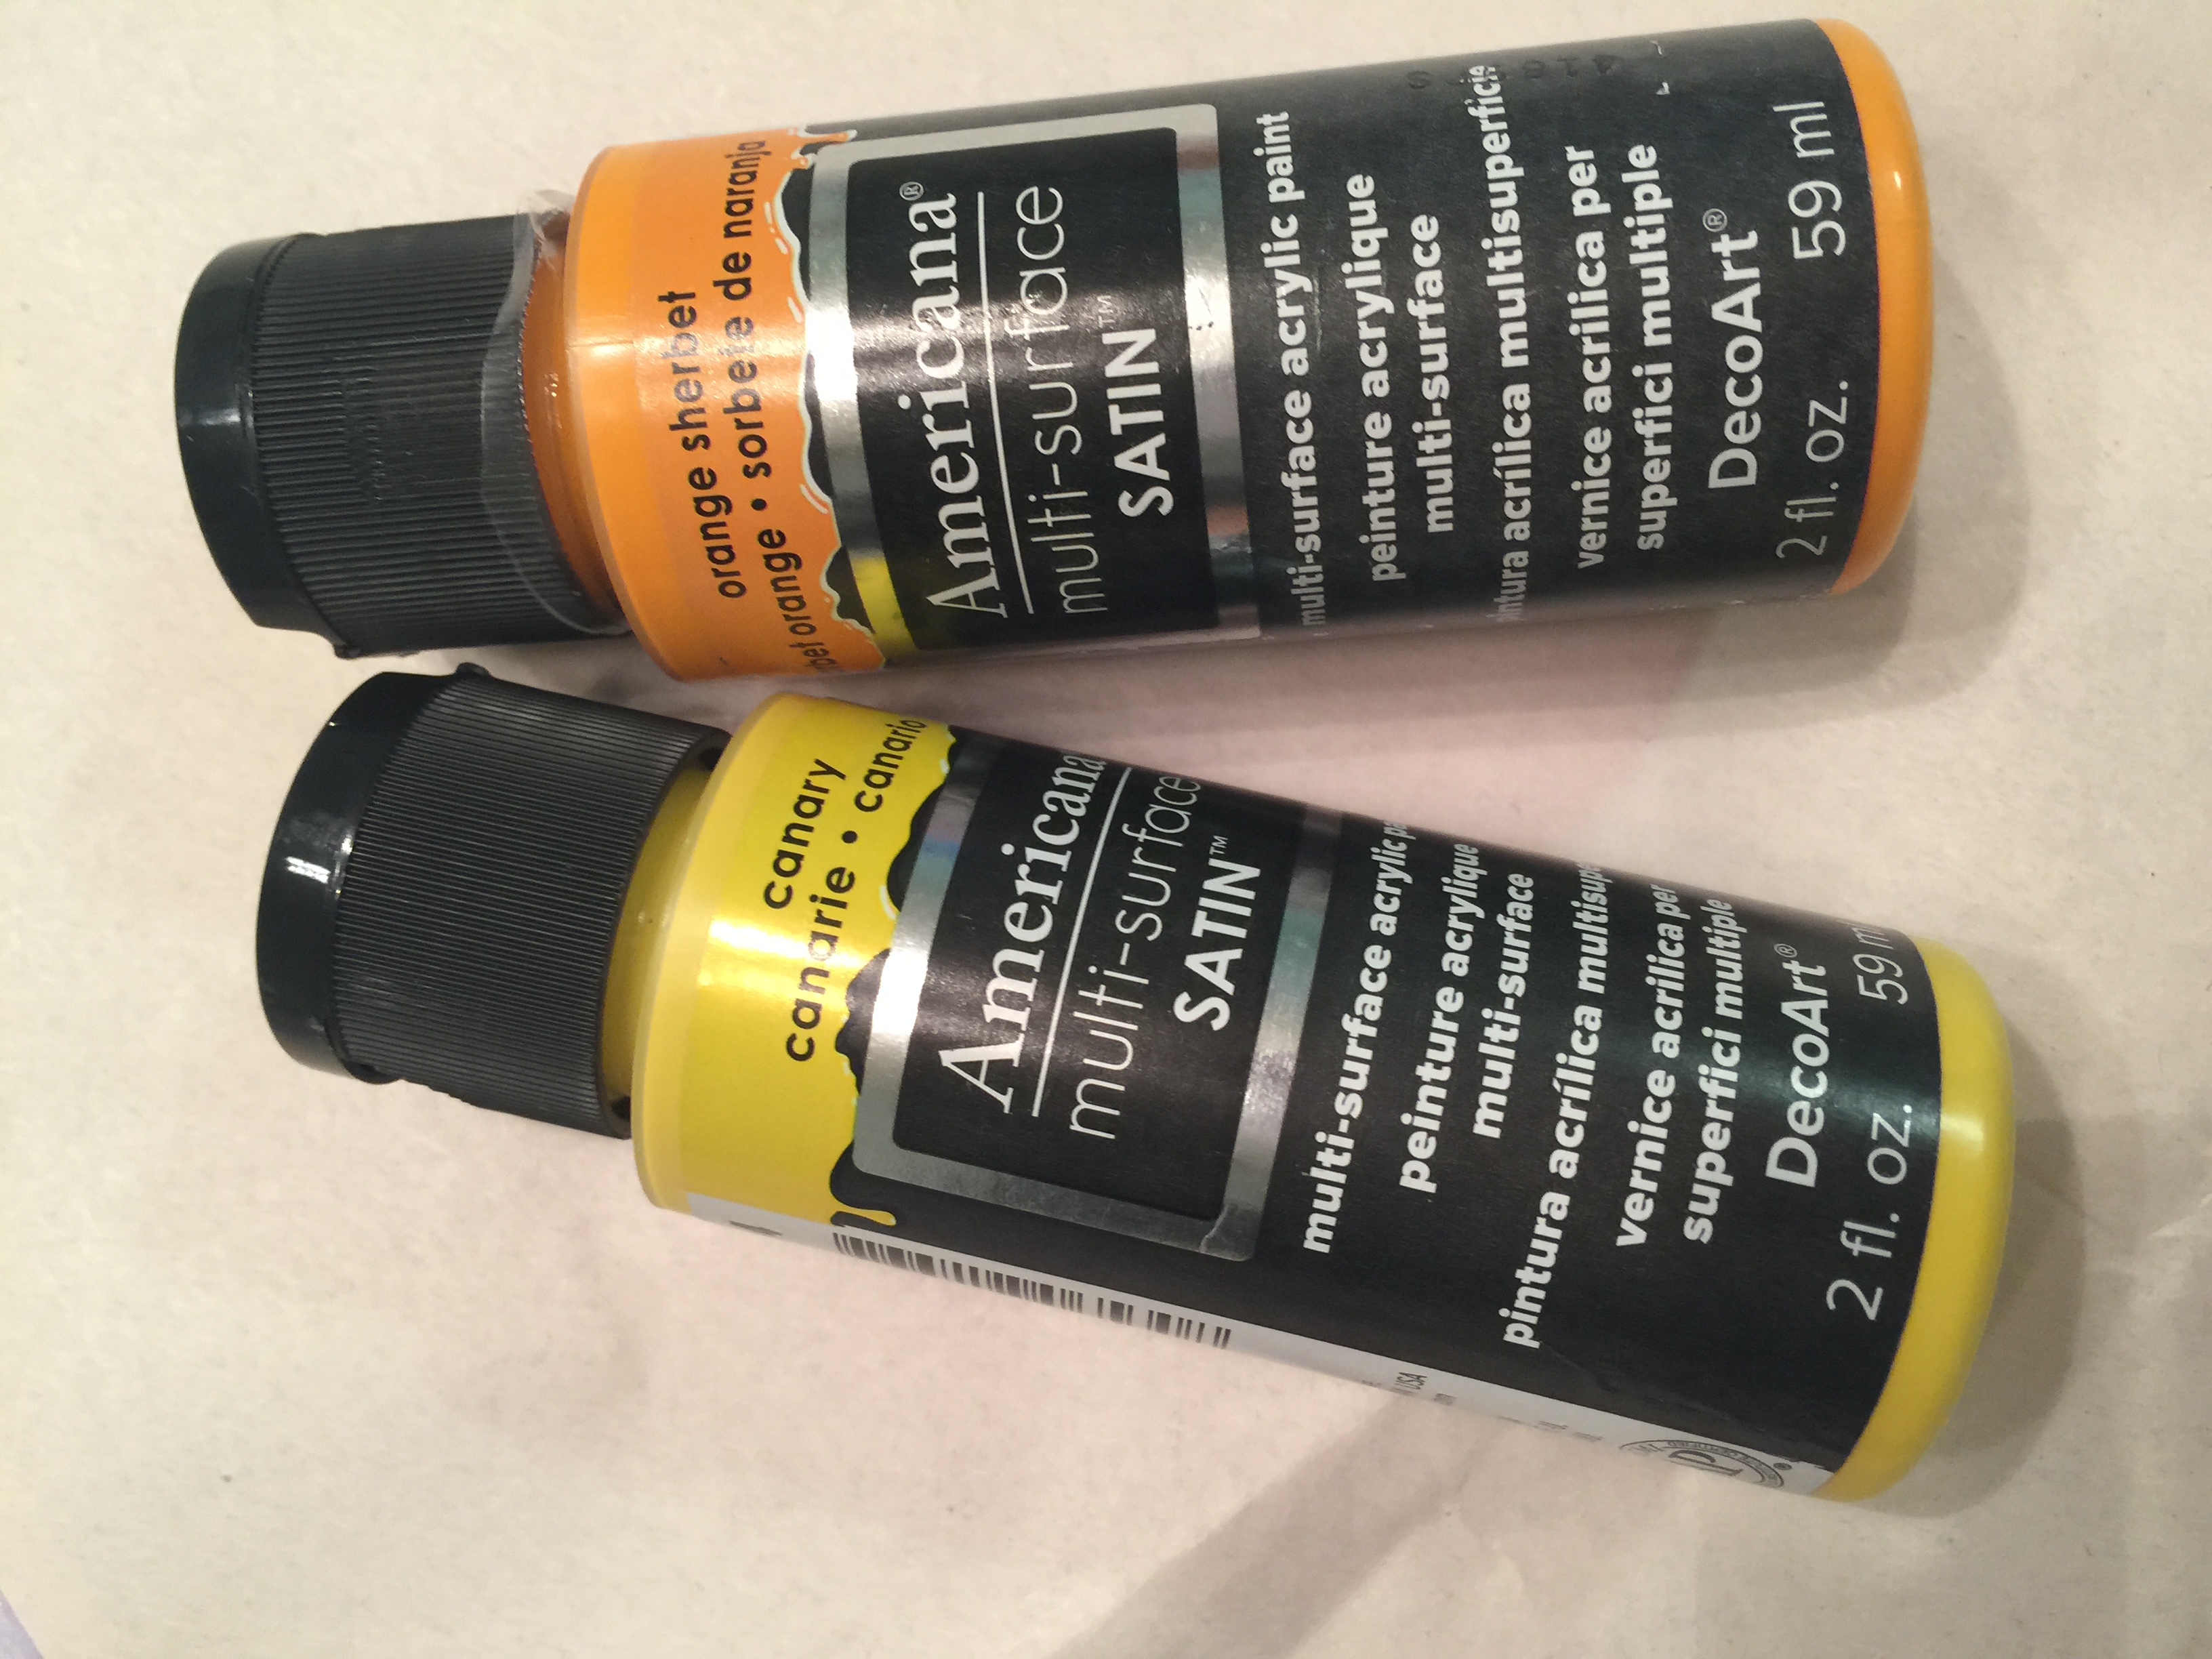
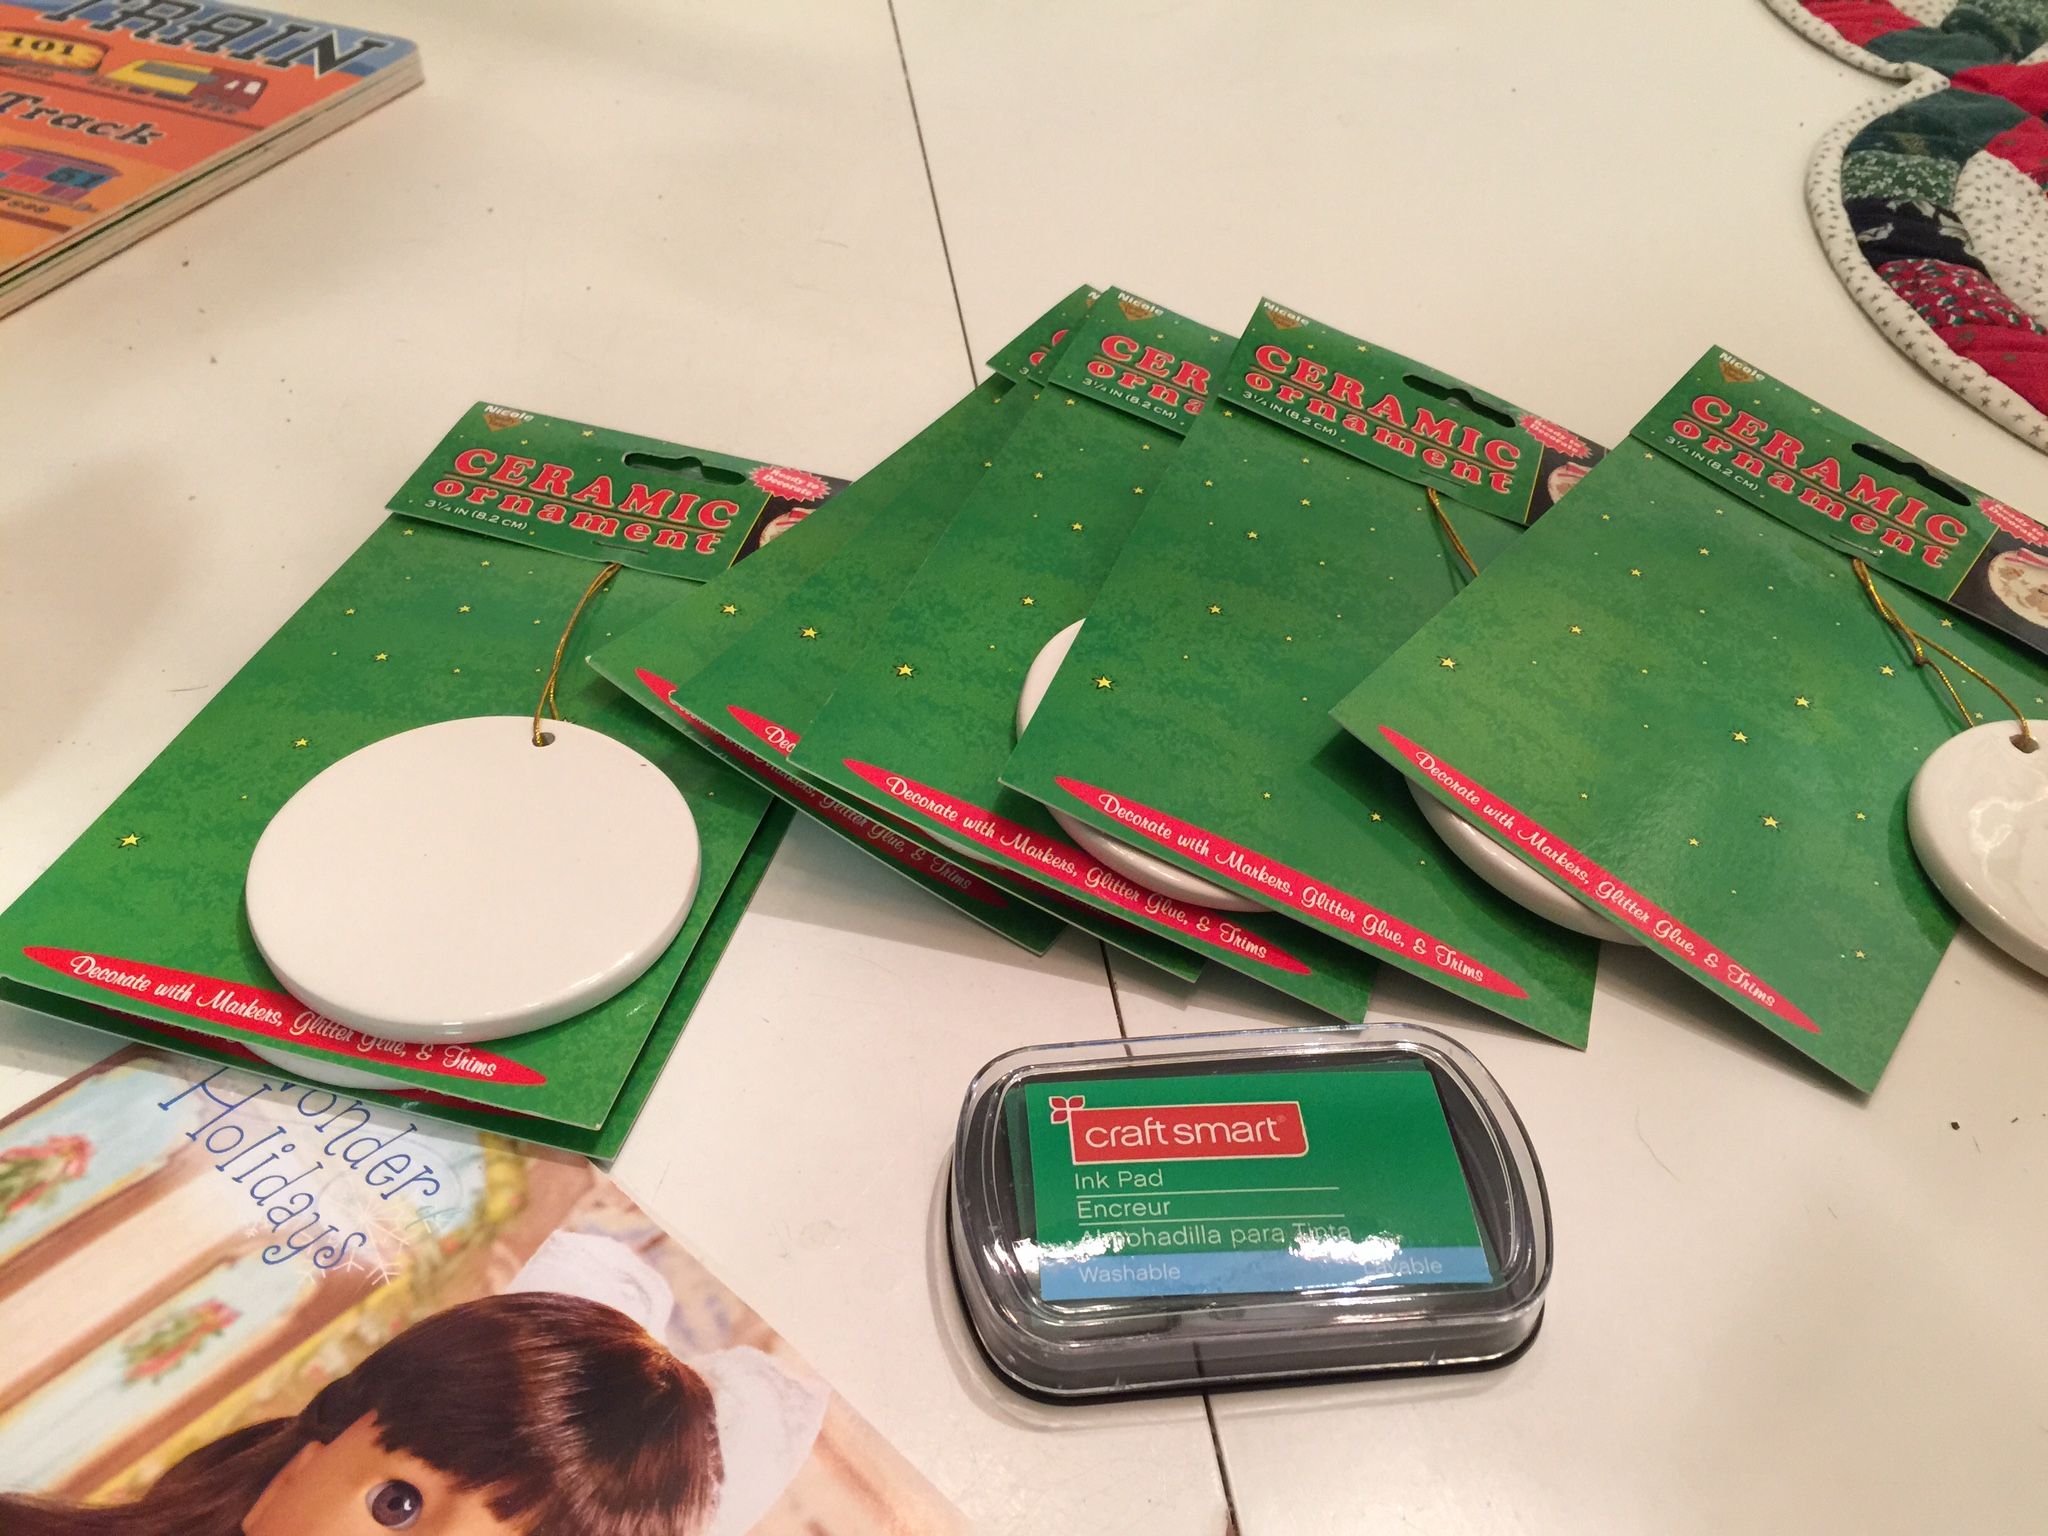
The supplies were actually purchased a year ago 12/27/13.  I waited for them to go on clearance and picked up enough for this year.  I then stored them with the Christmas stuff for the year.  I paid .96 for all 7 ornaments at AC Moore.  The paint I used was the  acrylic paints that I used on the last project.

The supplies Marvin brought us.

ornament supplies

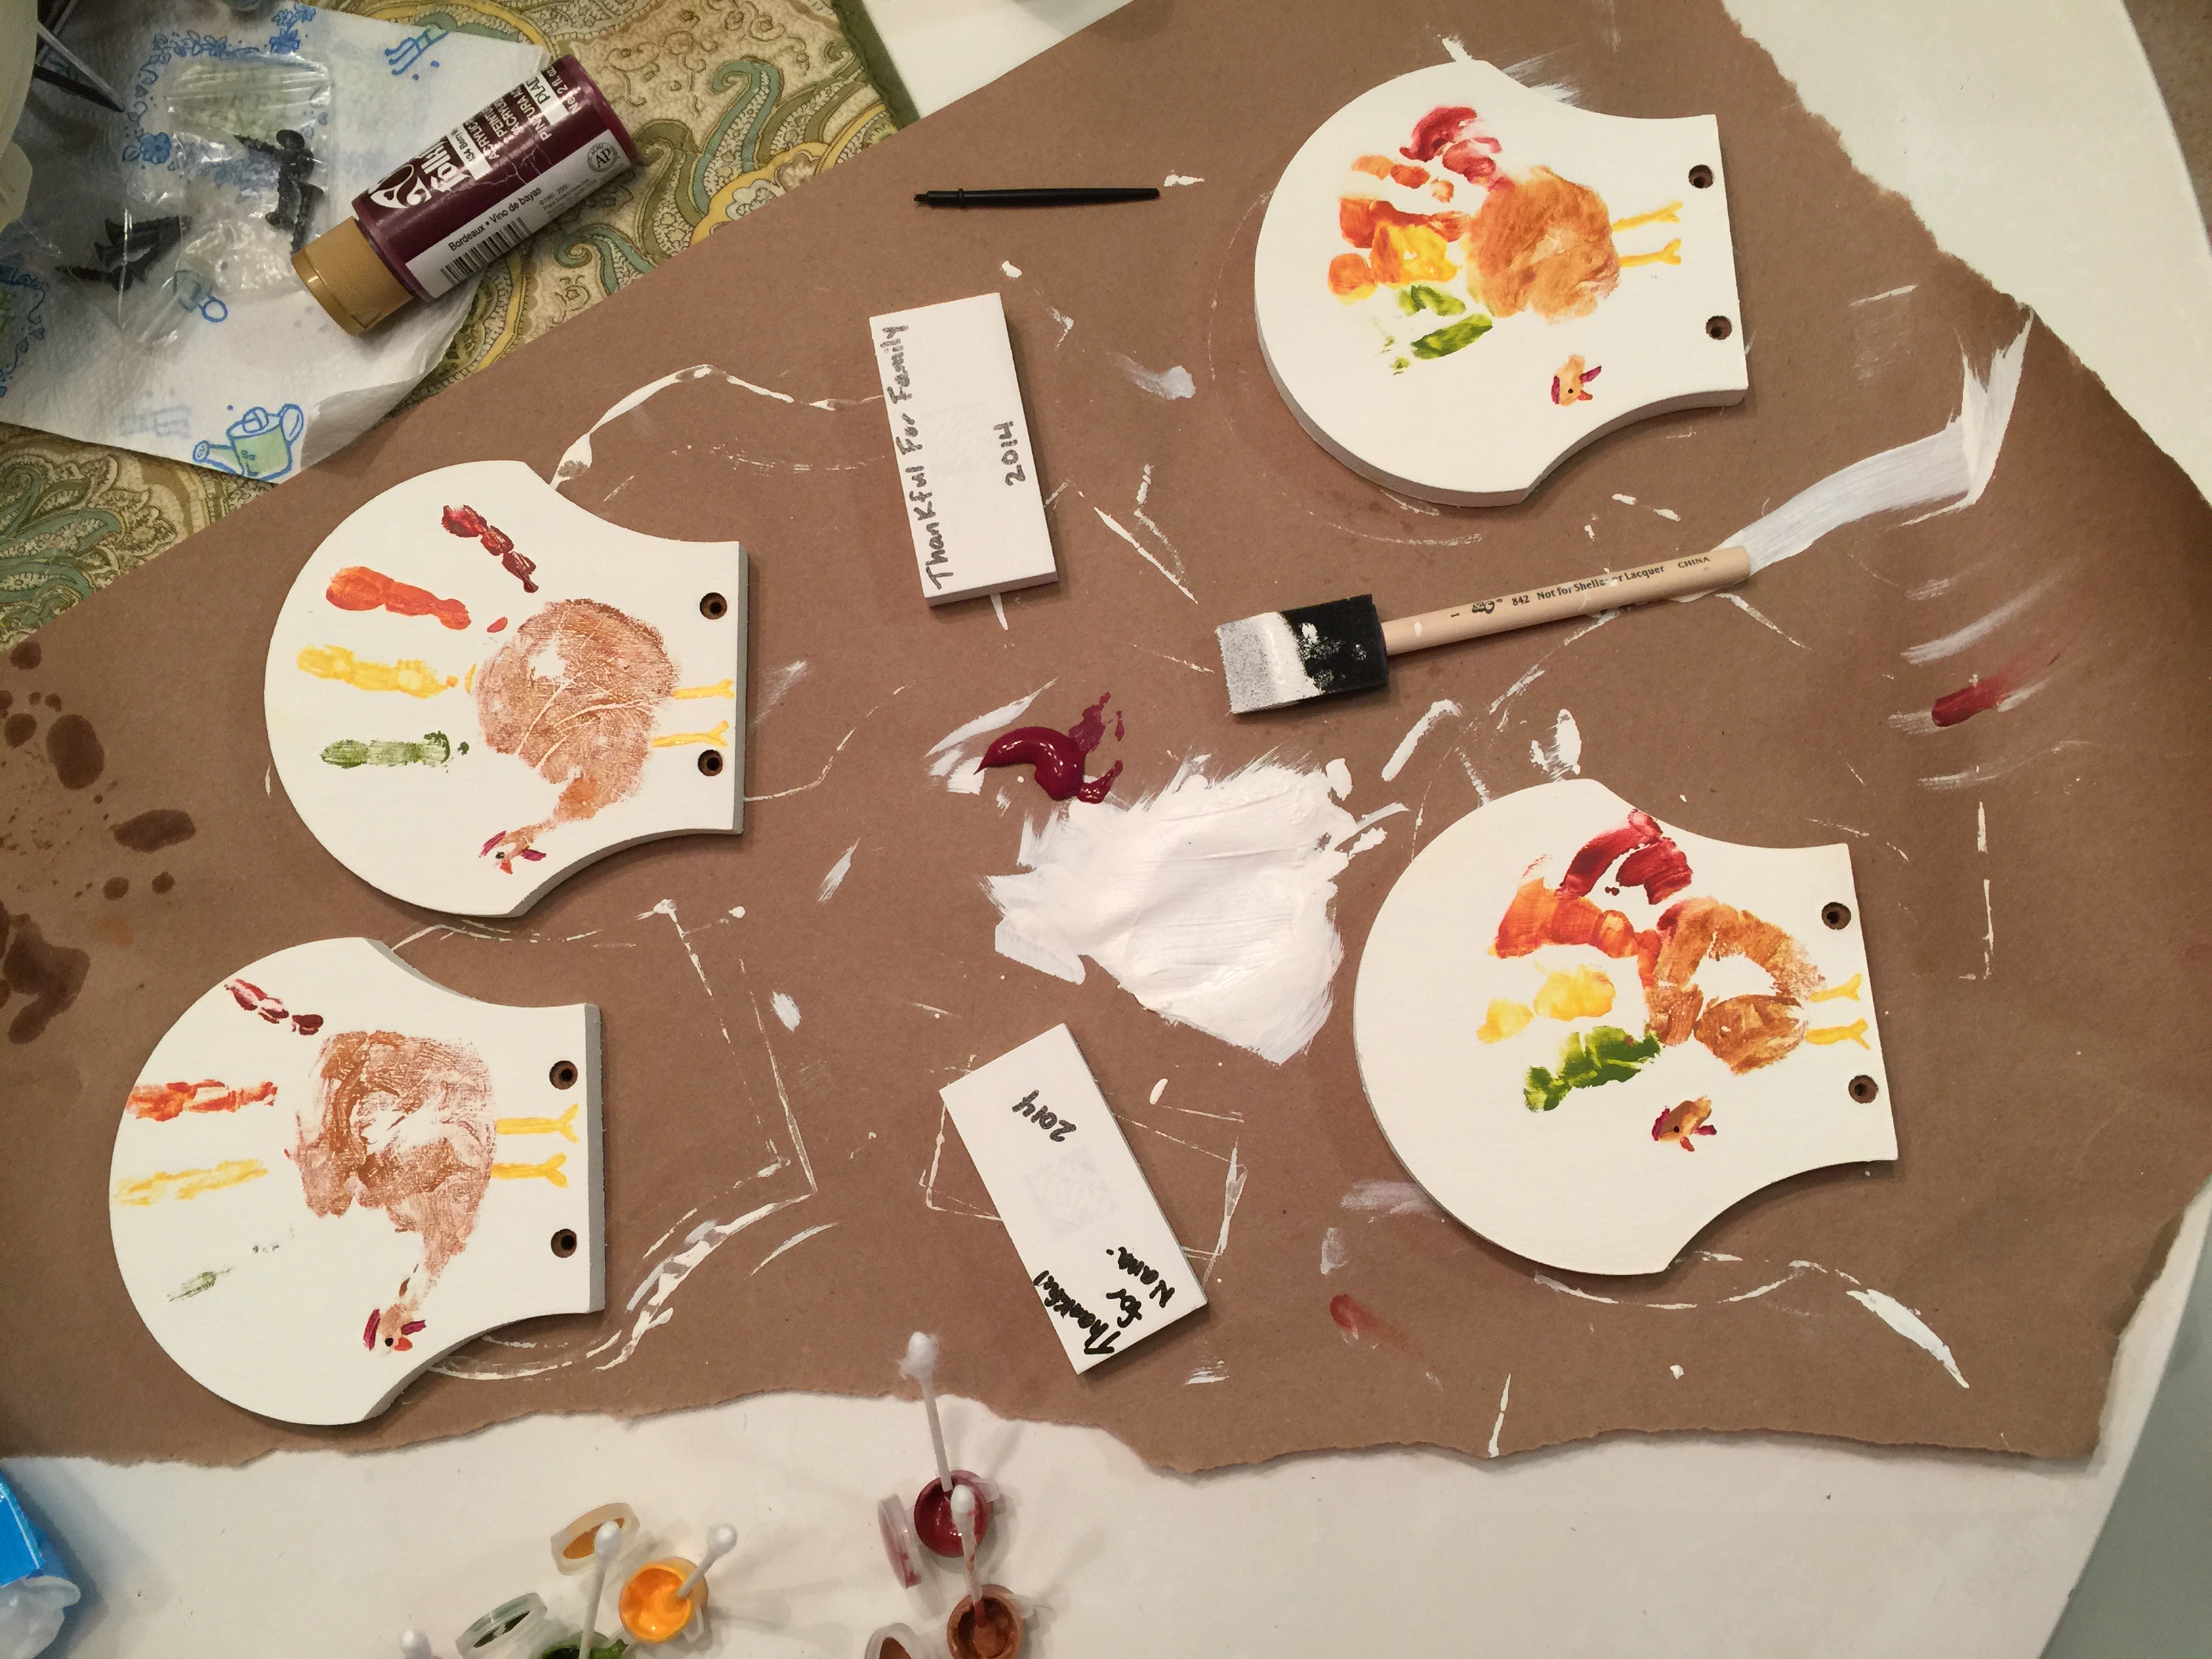
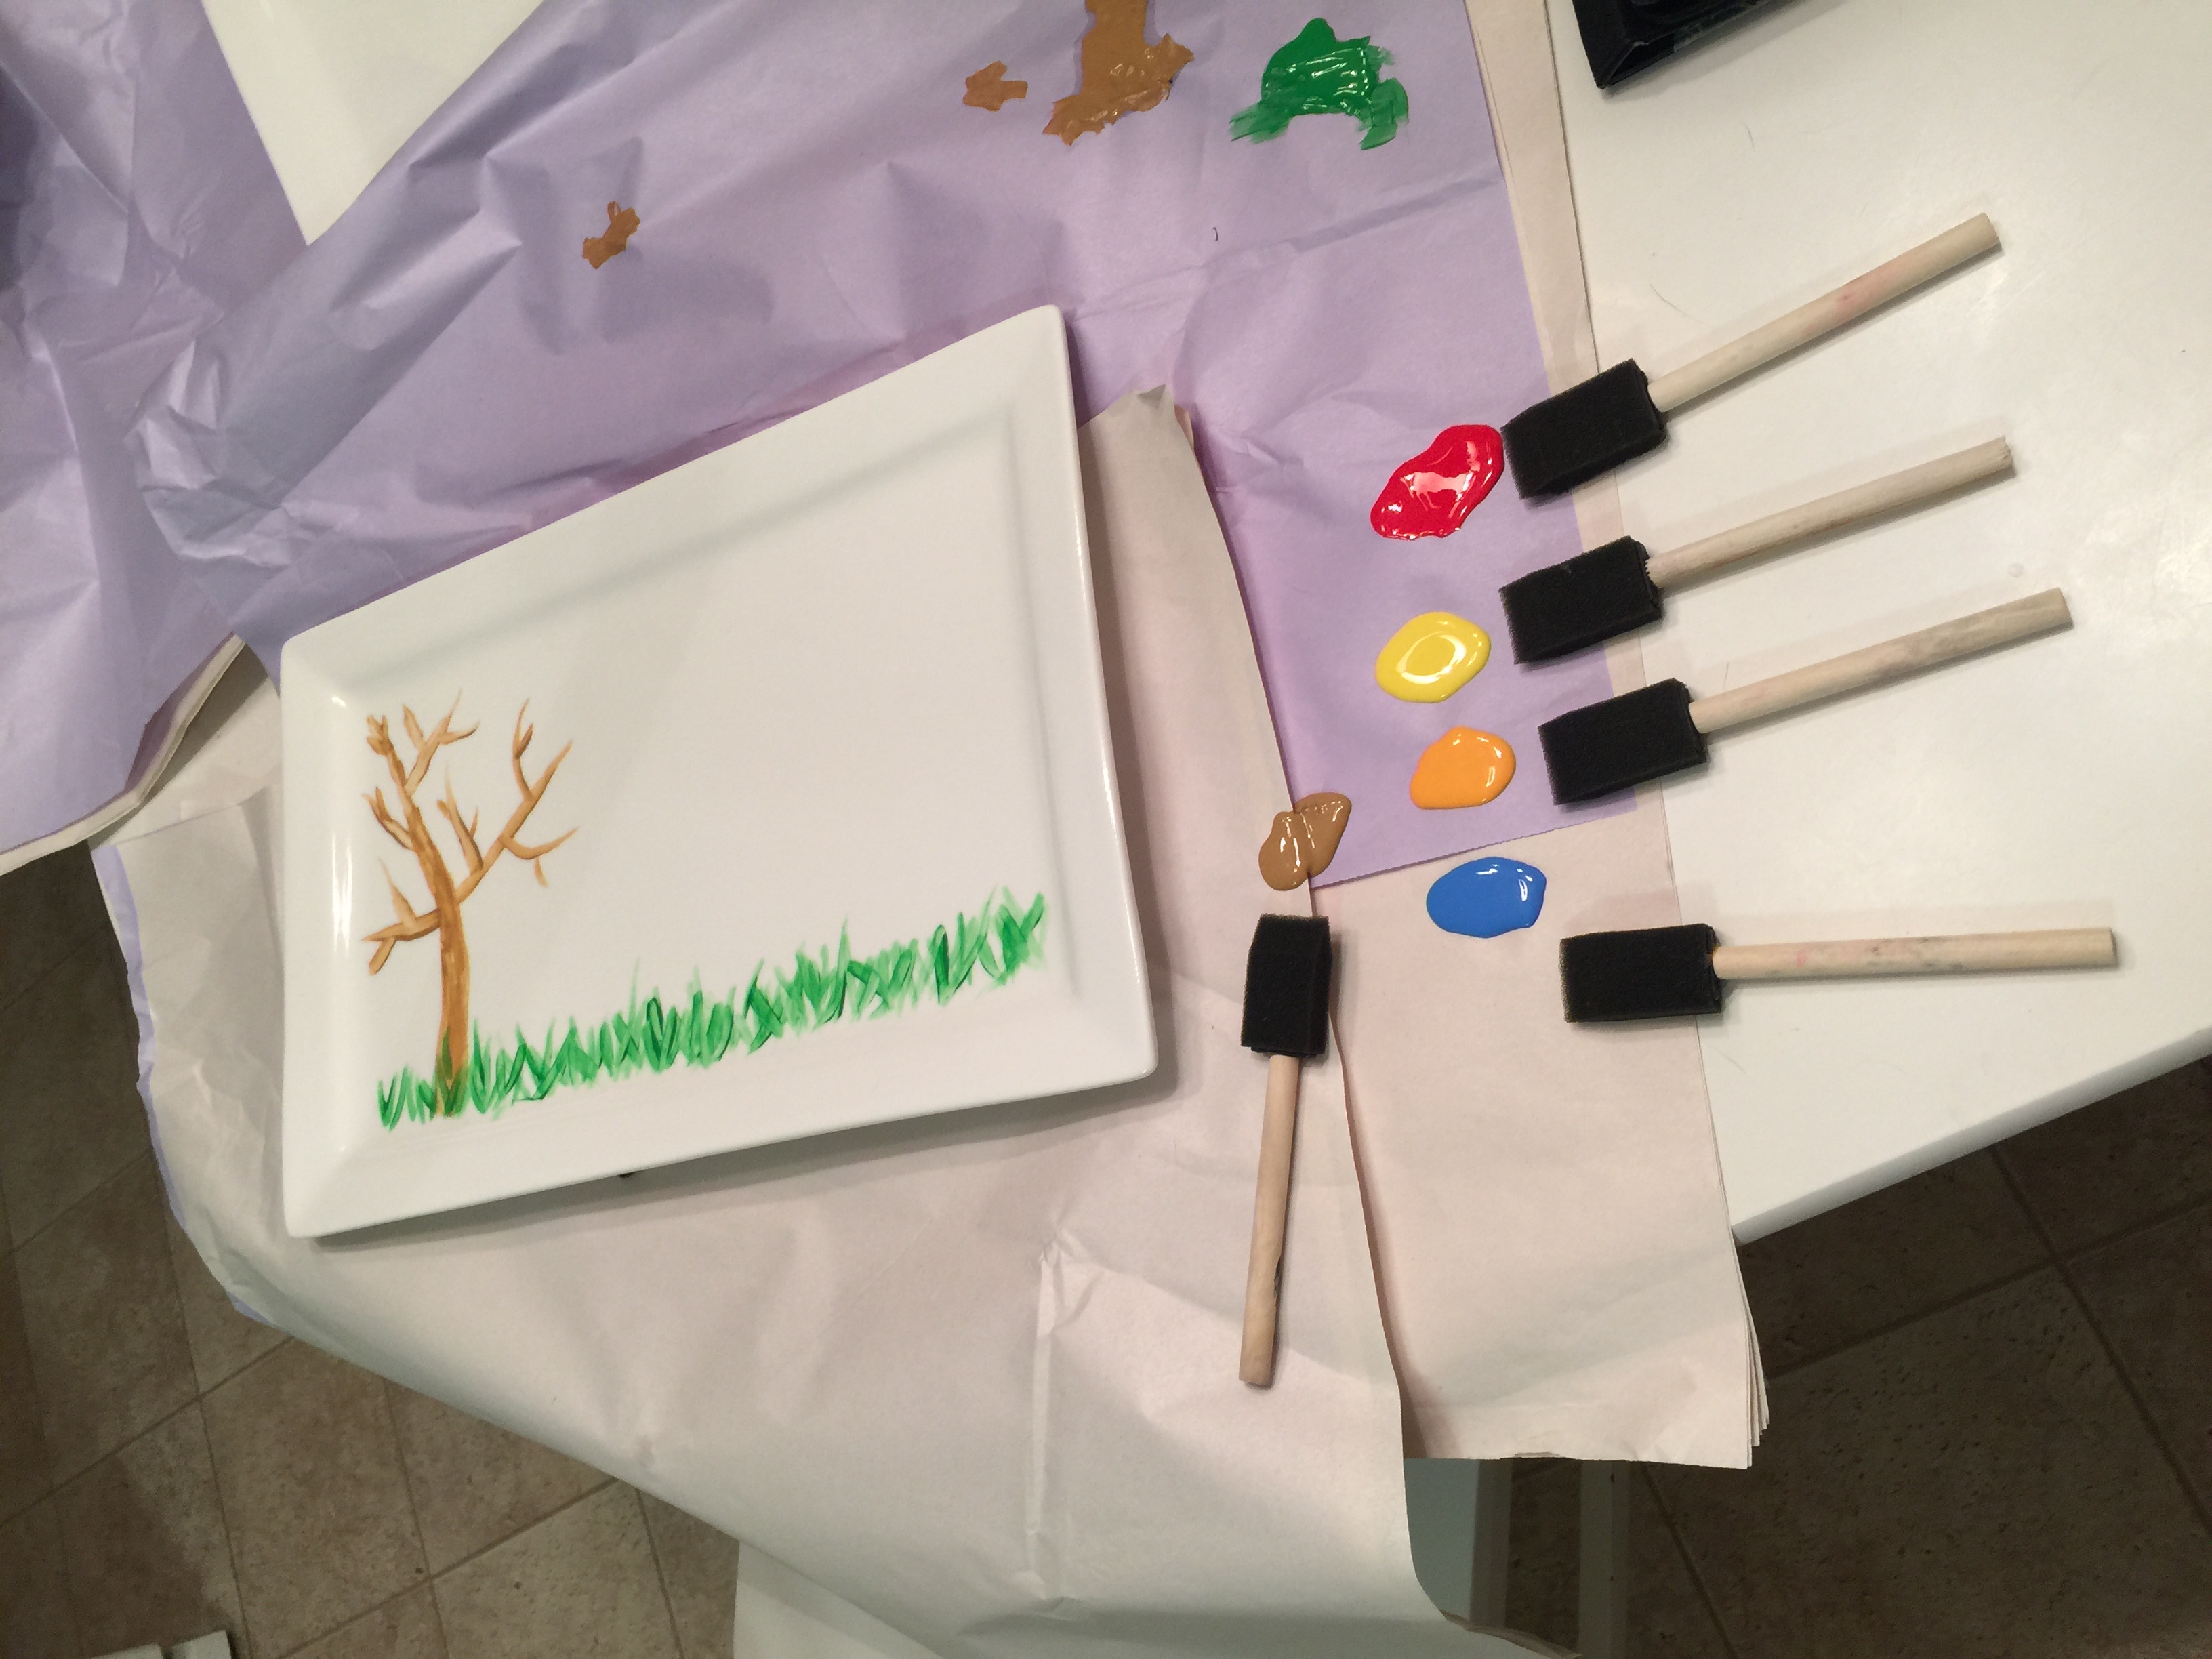
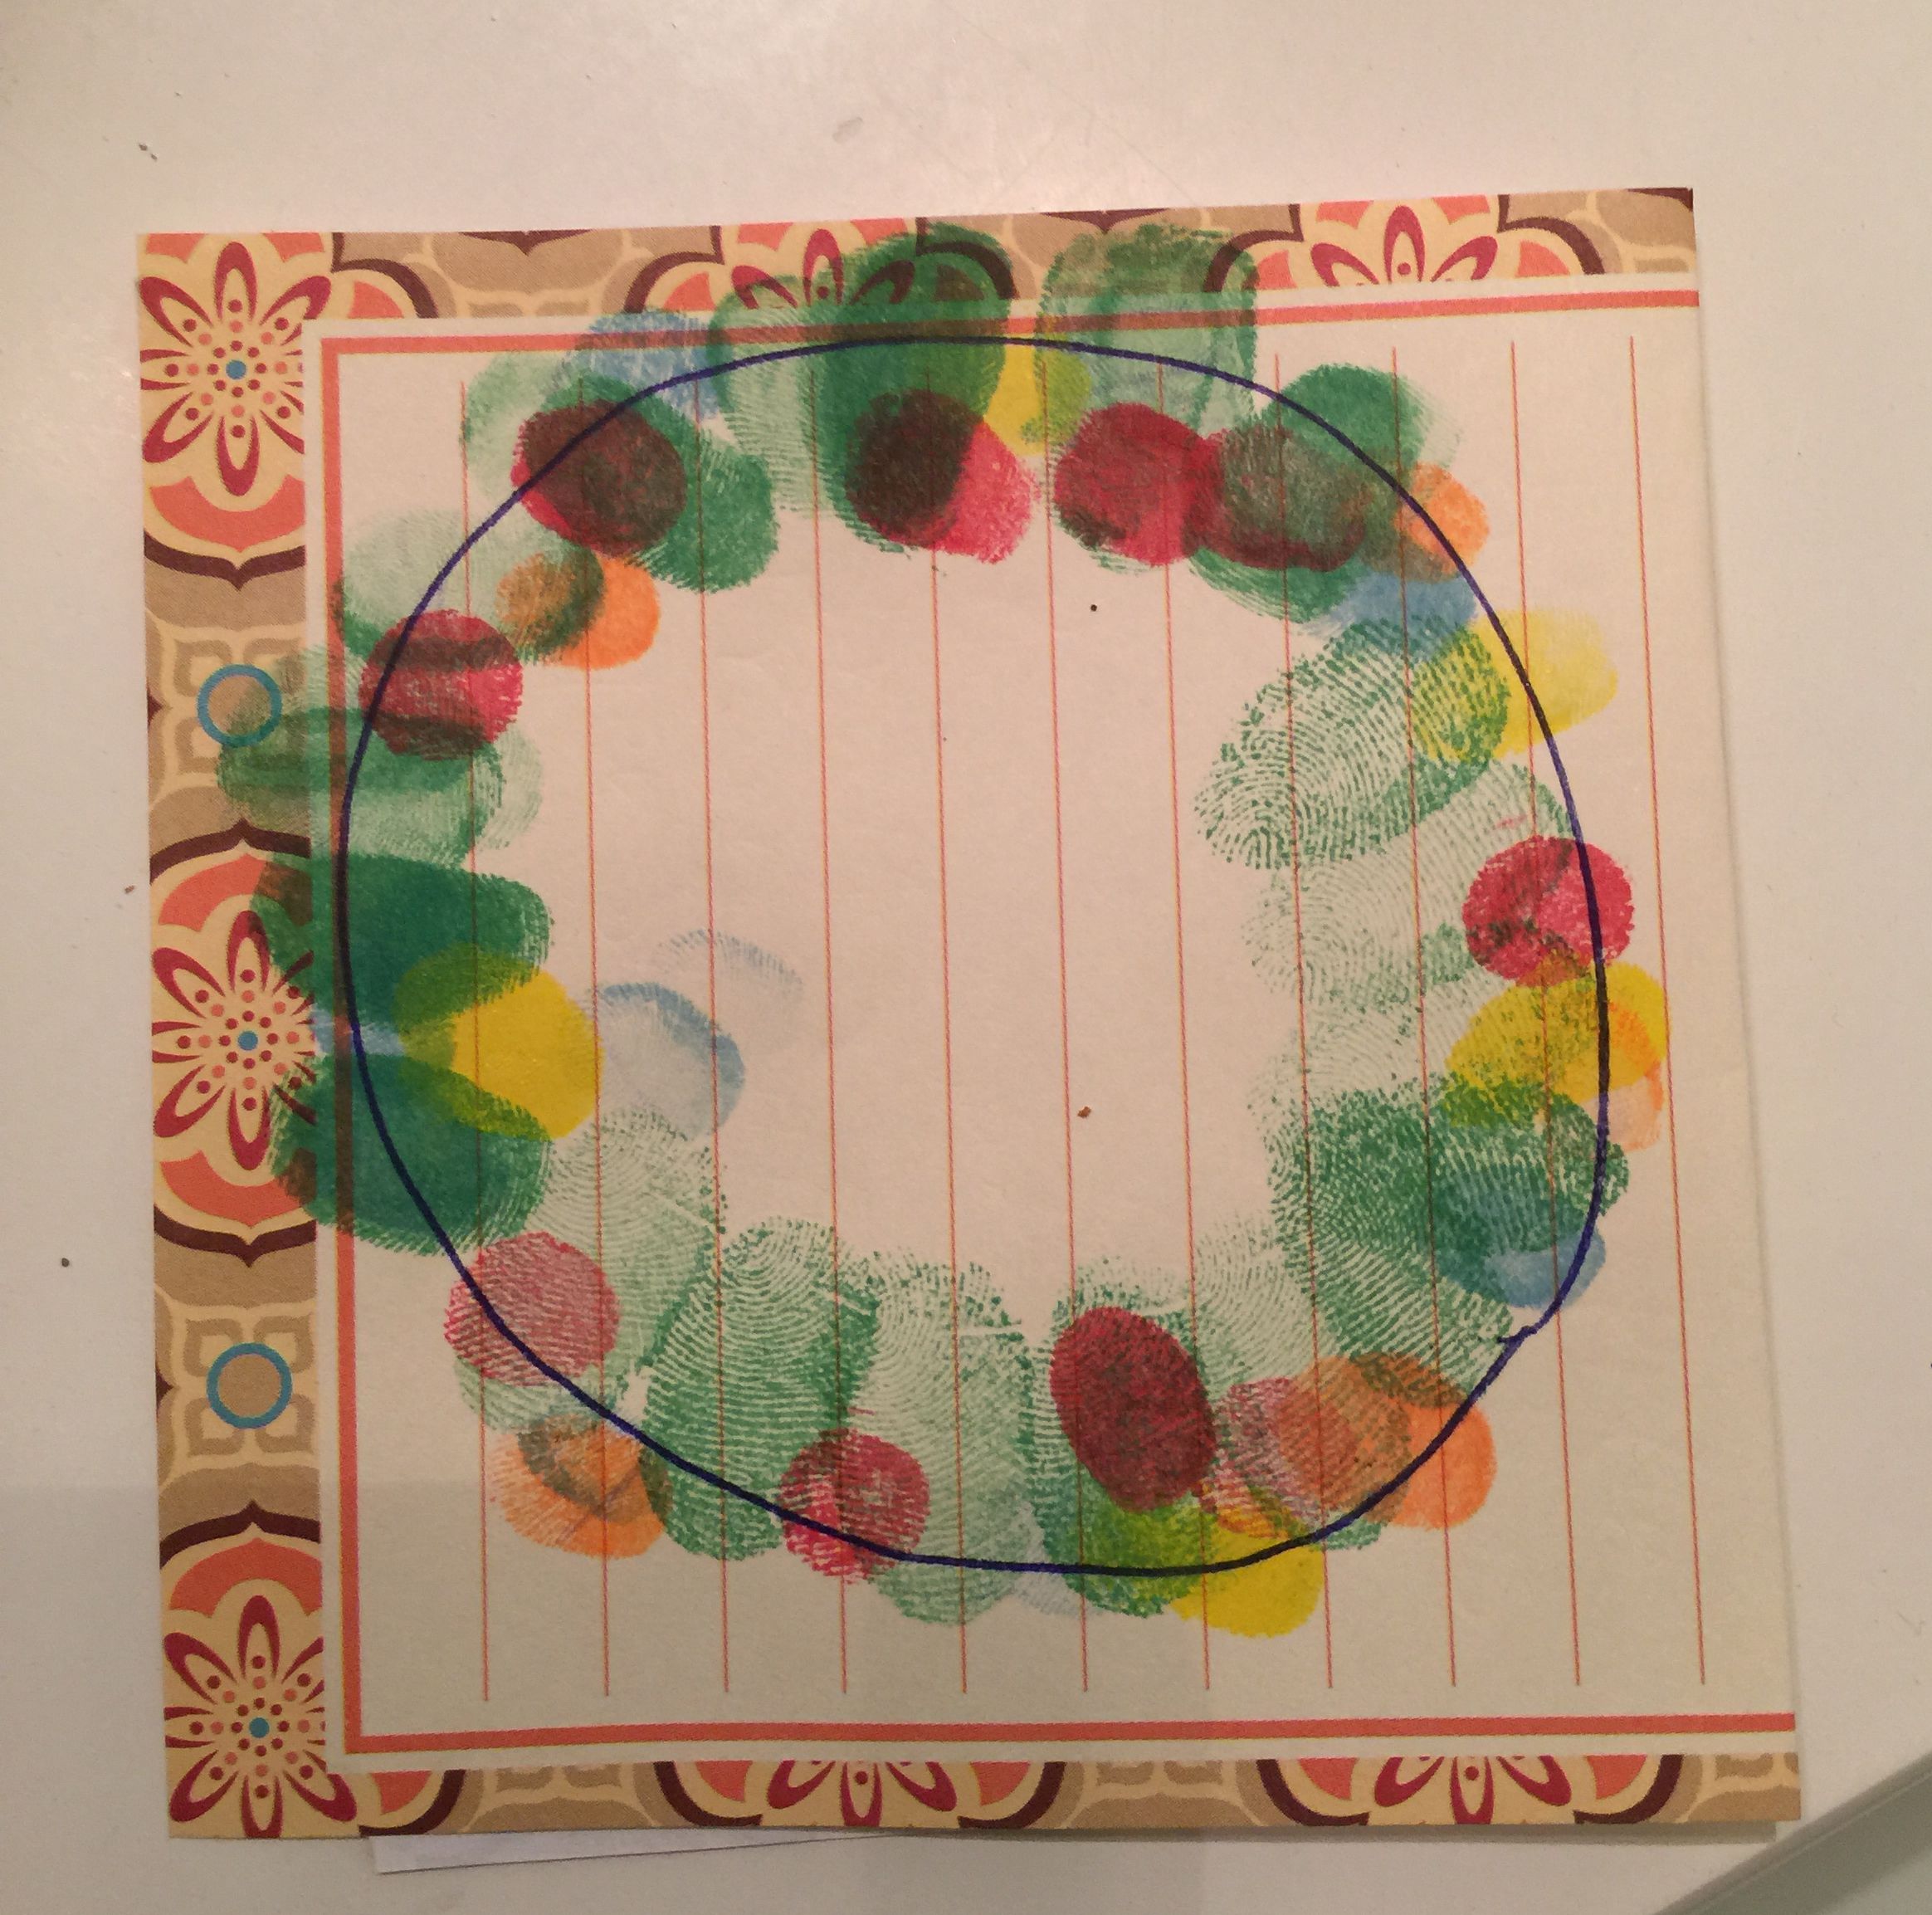
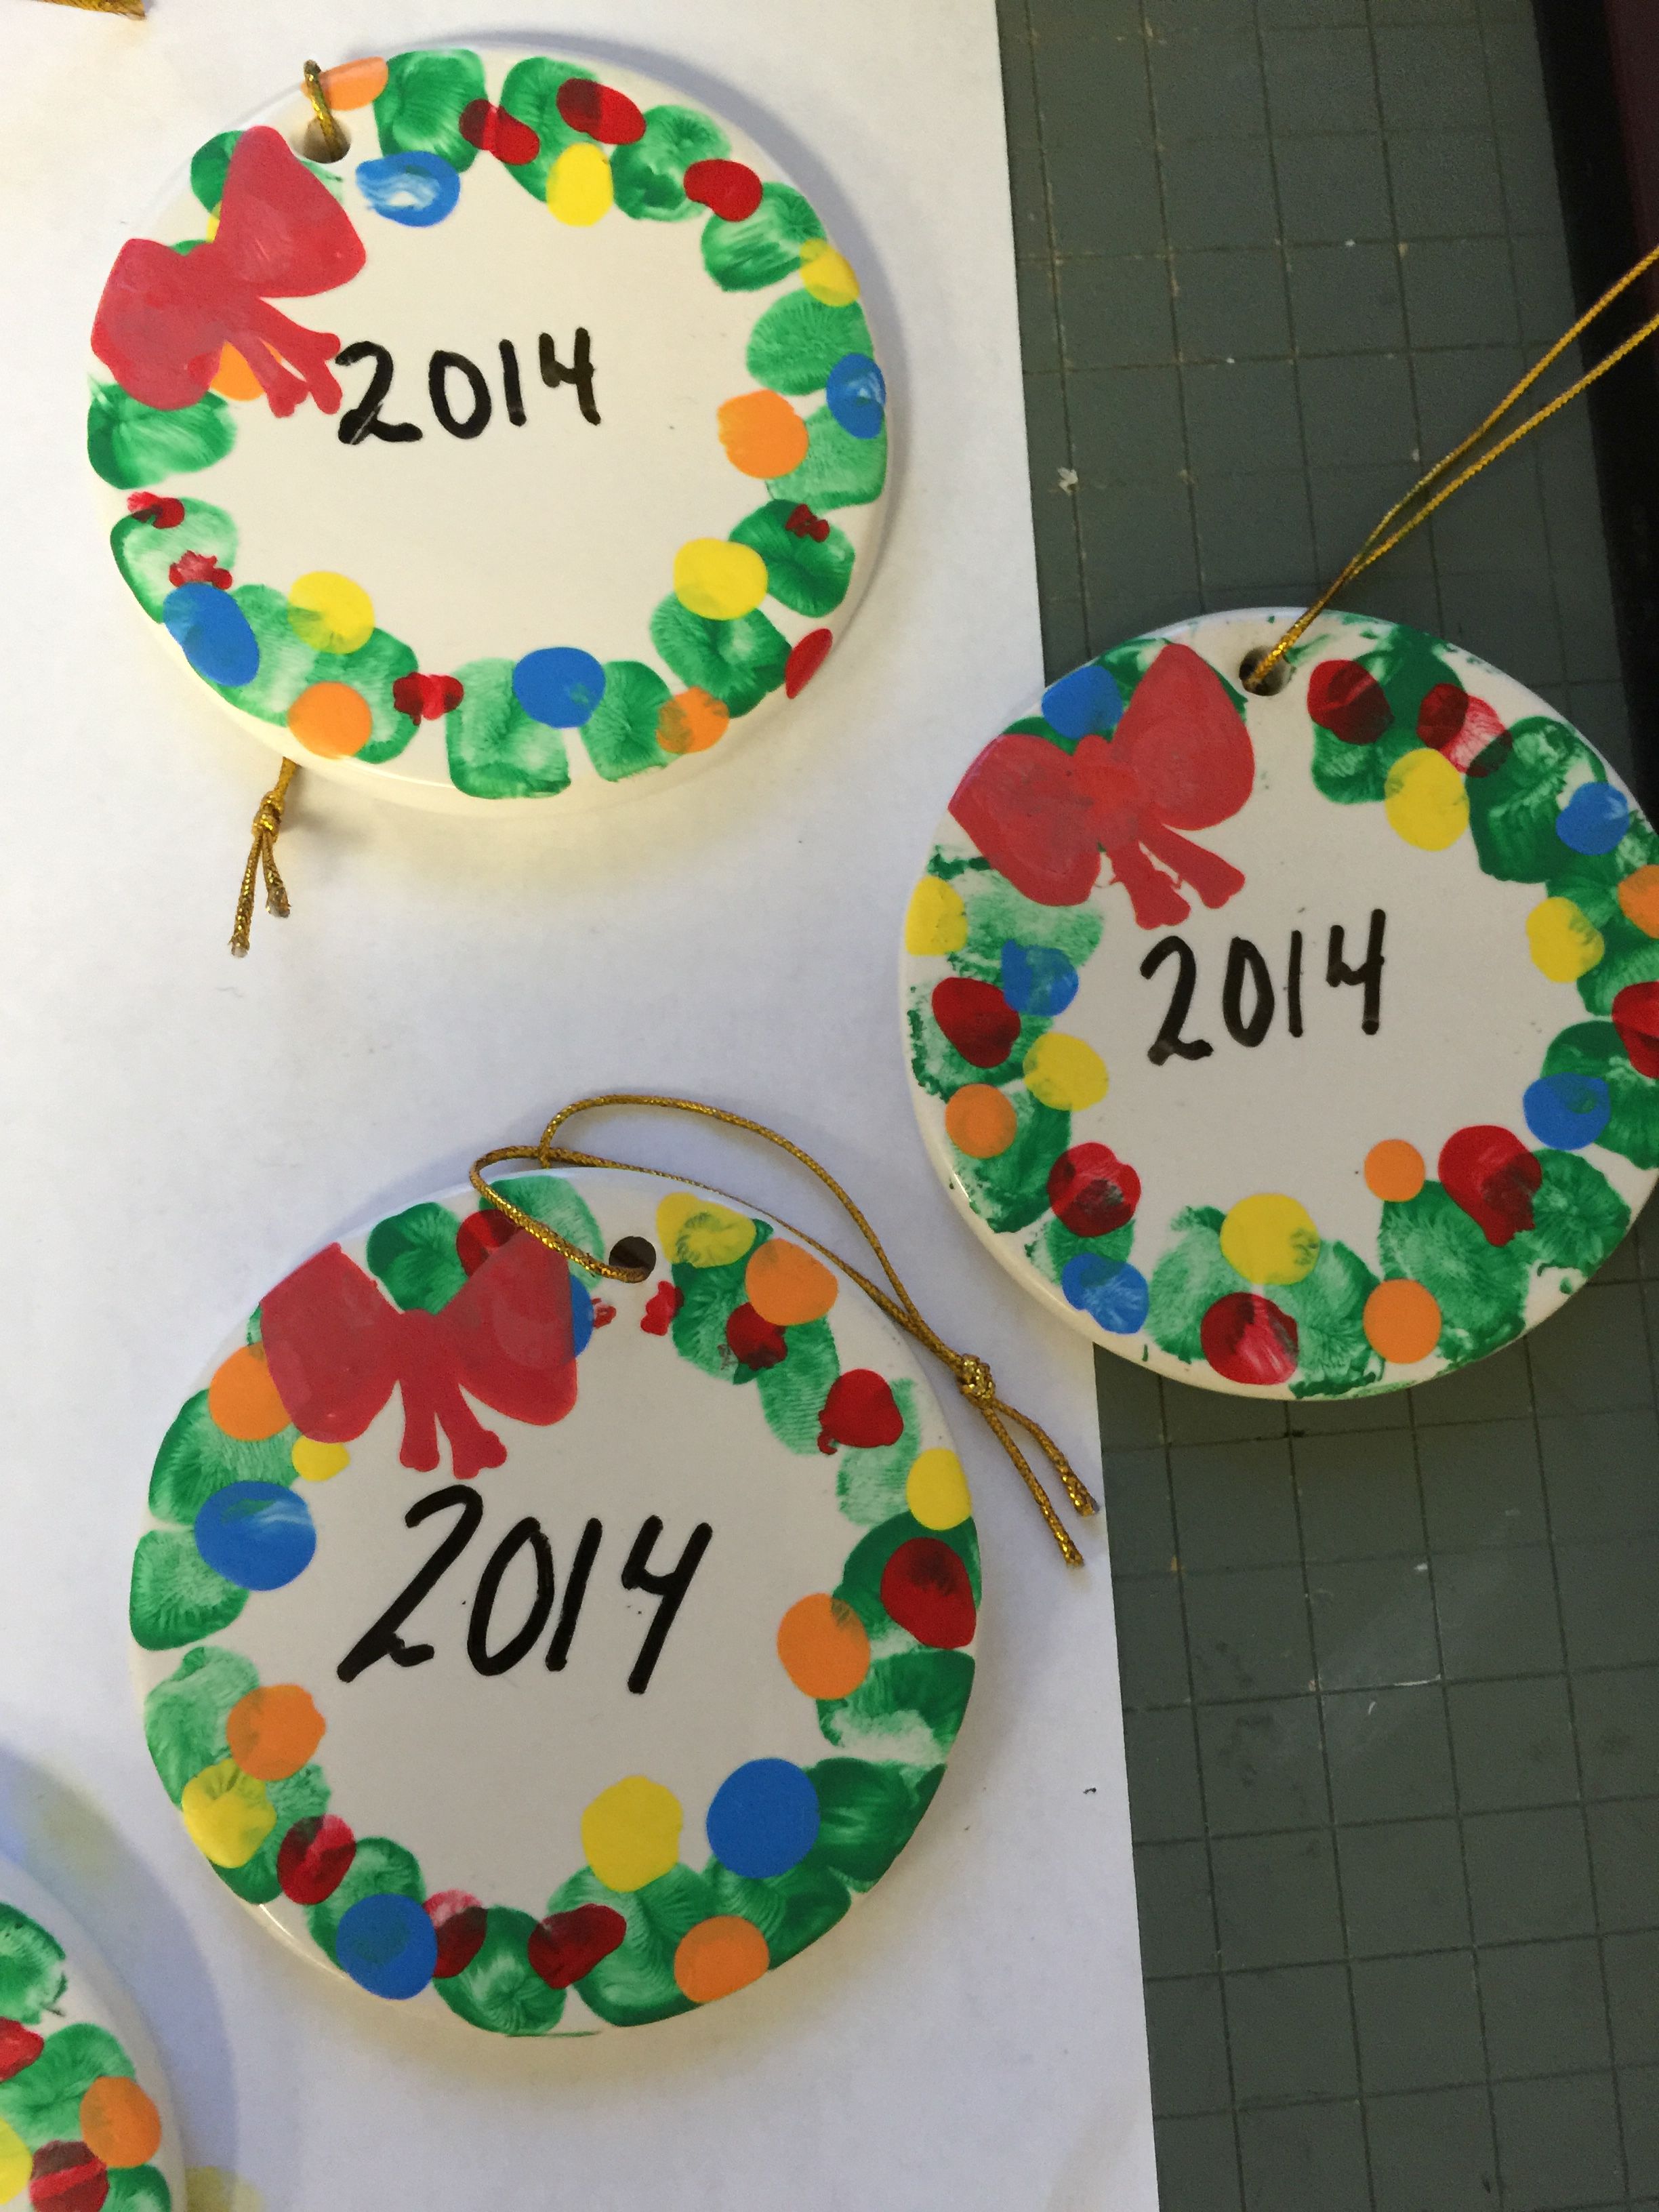
We spoke about the shape of the ornament (a circle) and brainstormed things that are Christmas like around the house that are circles.   (A) came up with a wreath all on his own.  Once he came up with that I thought maybe just green ((A)’s finger)  with some red ((E)’s finger) would be enough.  (A) wanted to make it more colorful so we incorporated all of the colors.  I love it!

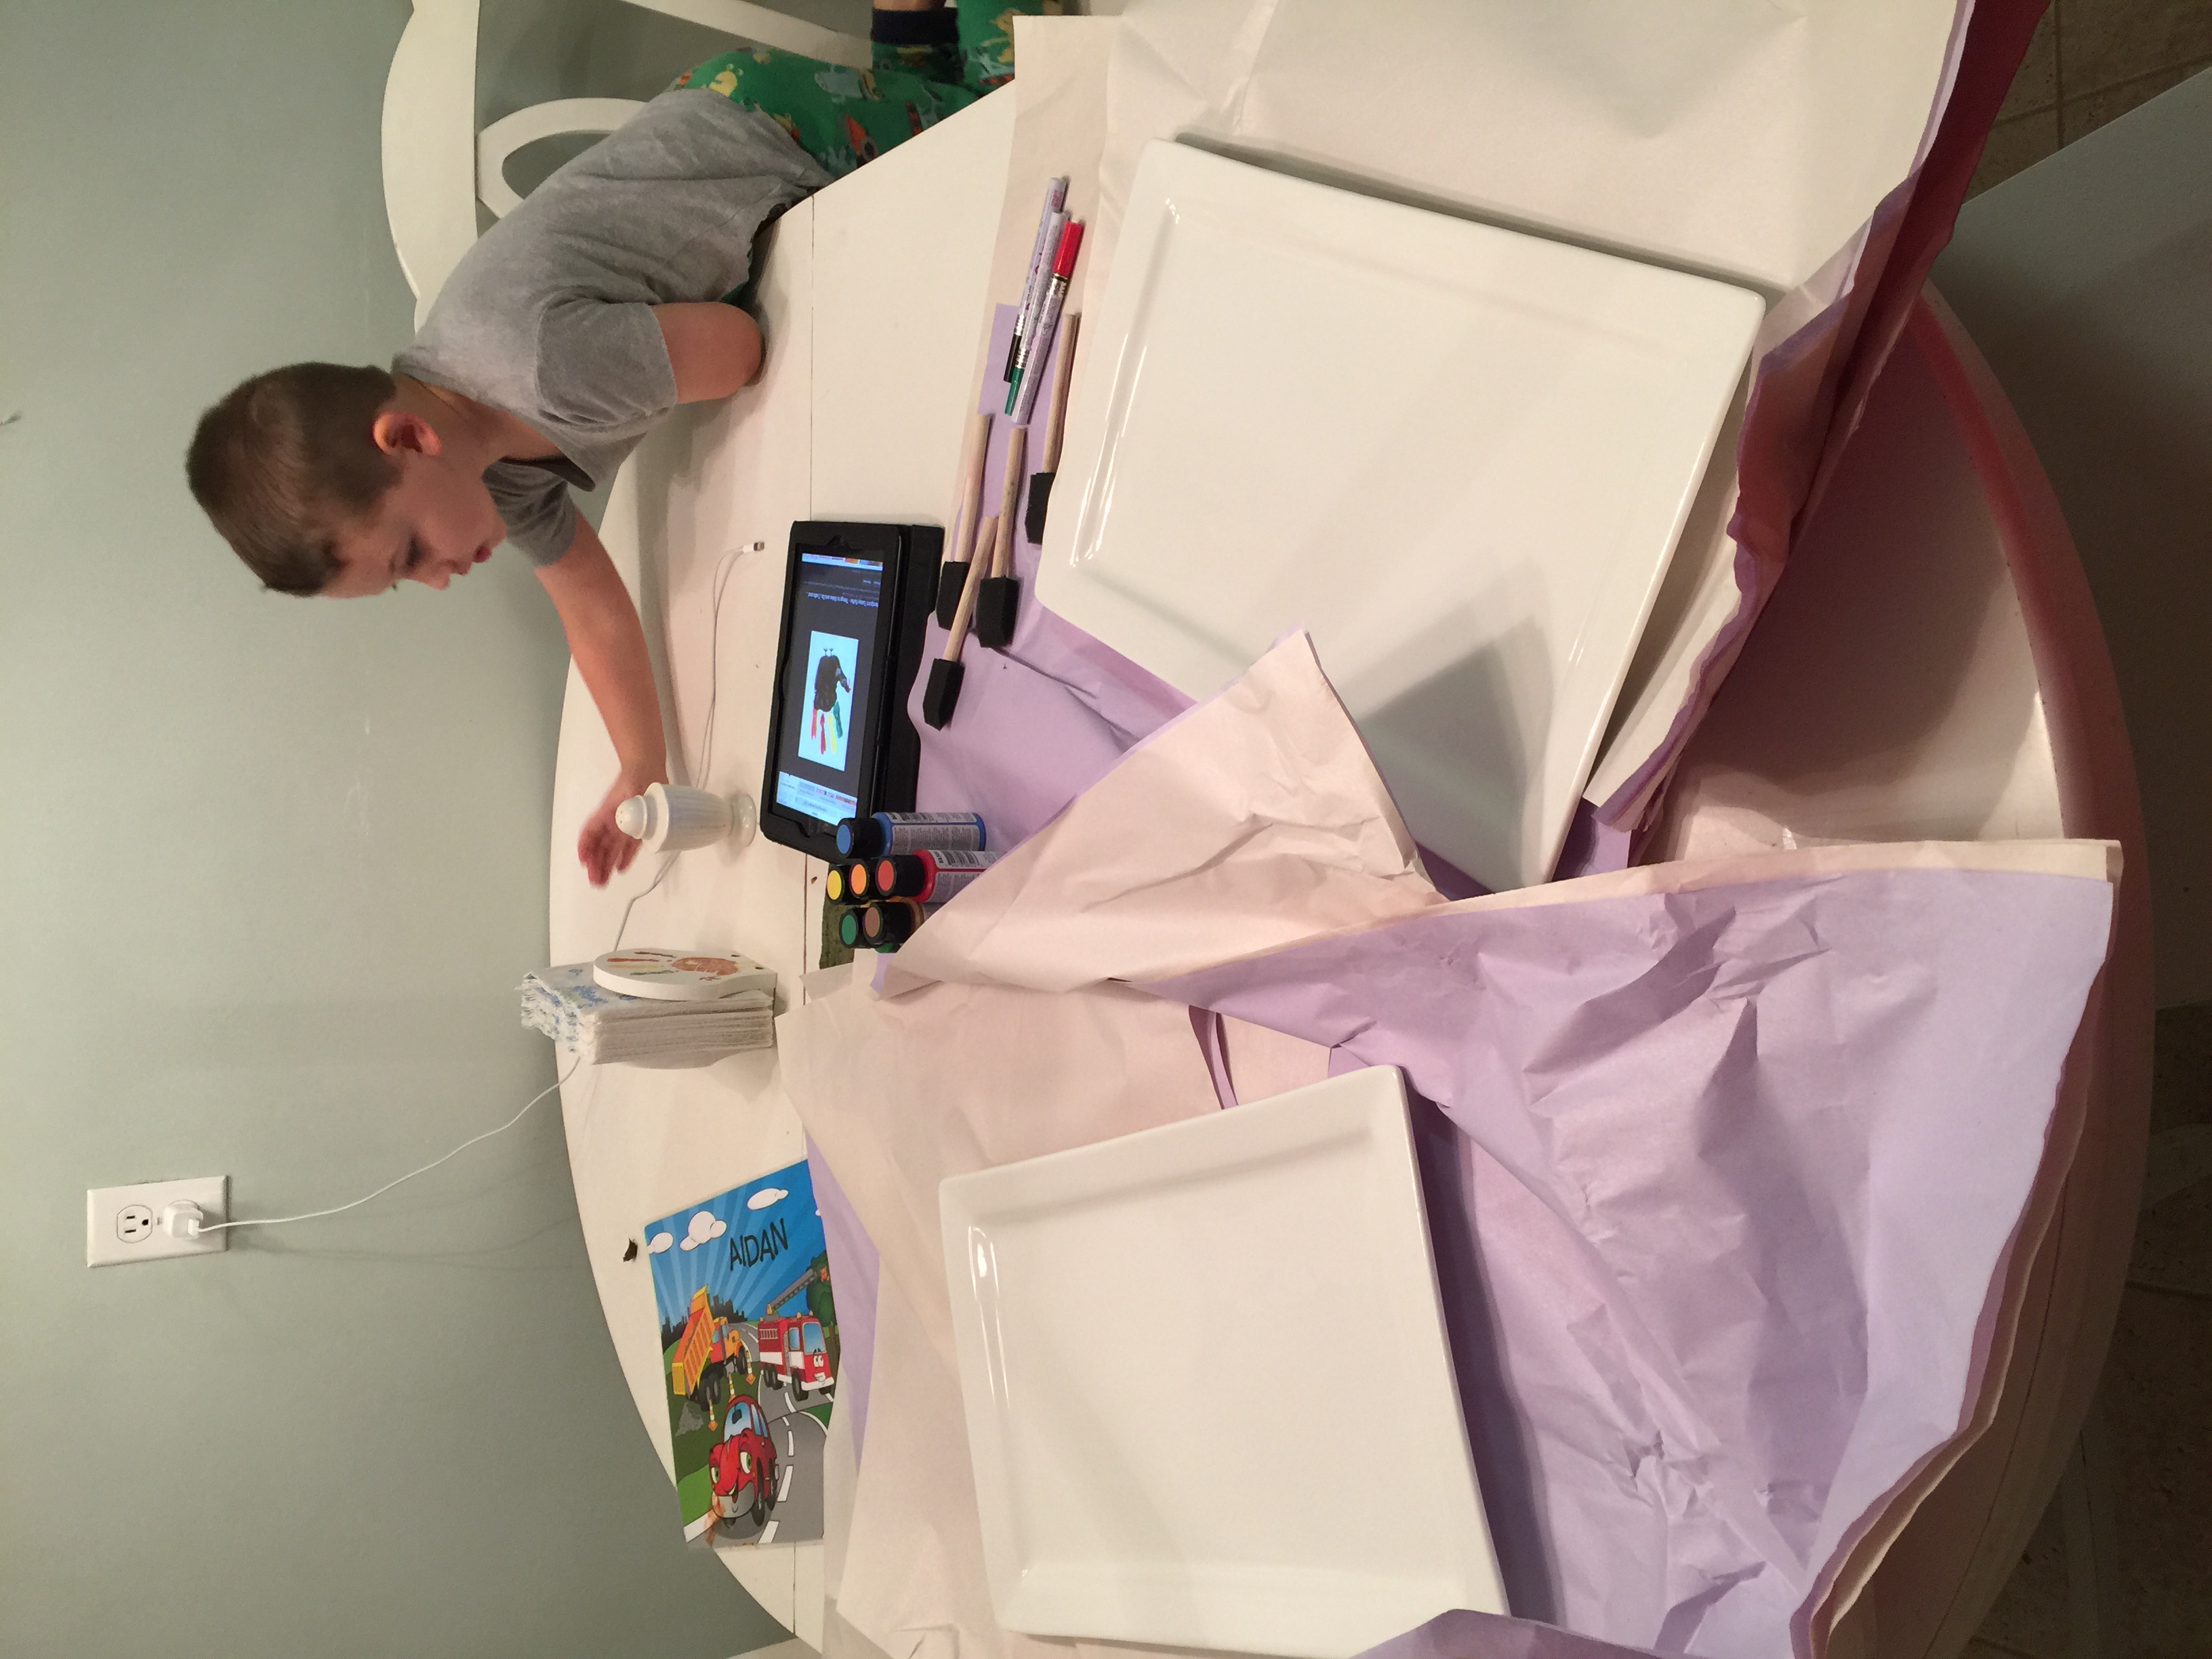
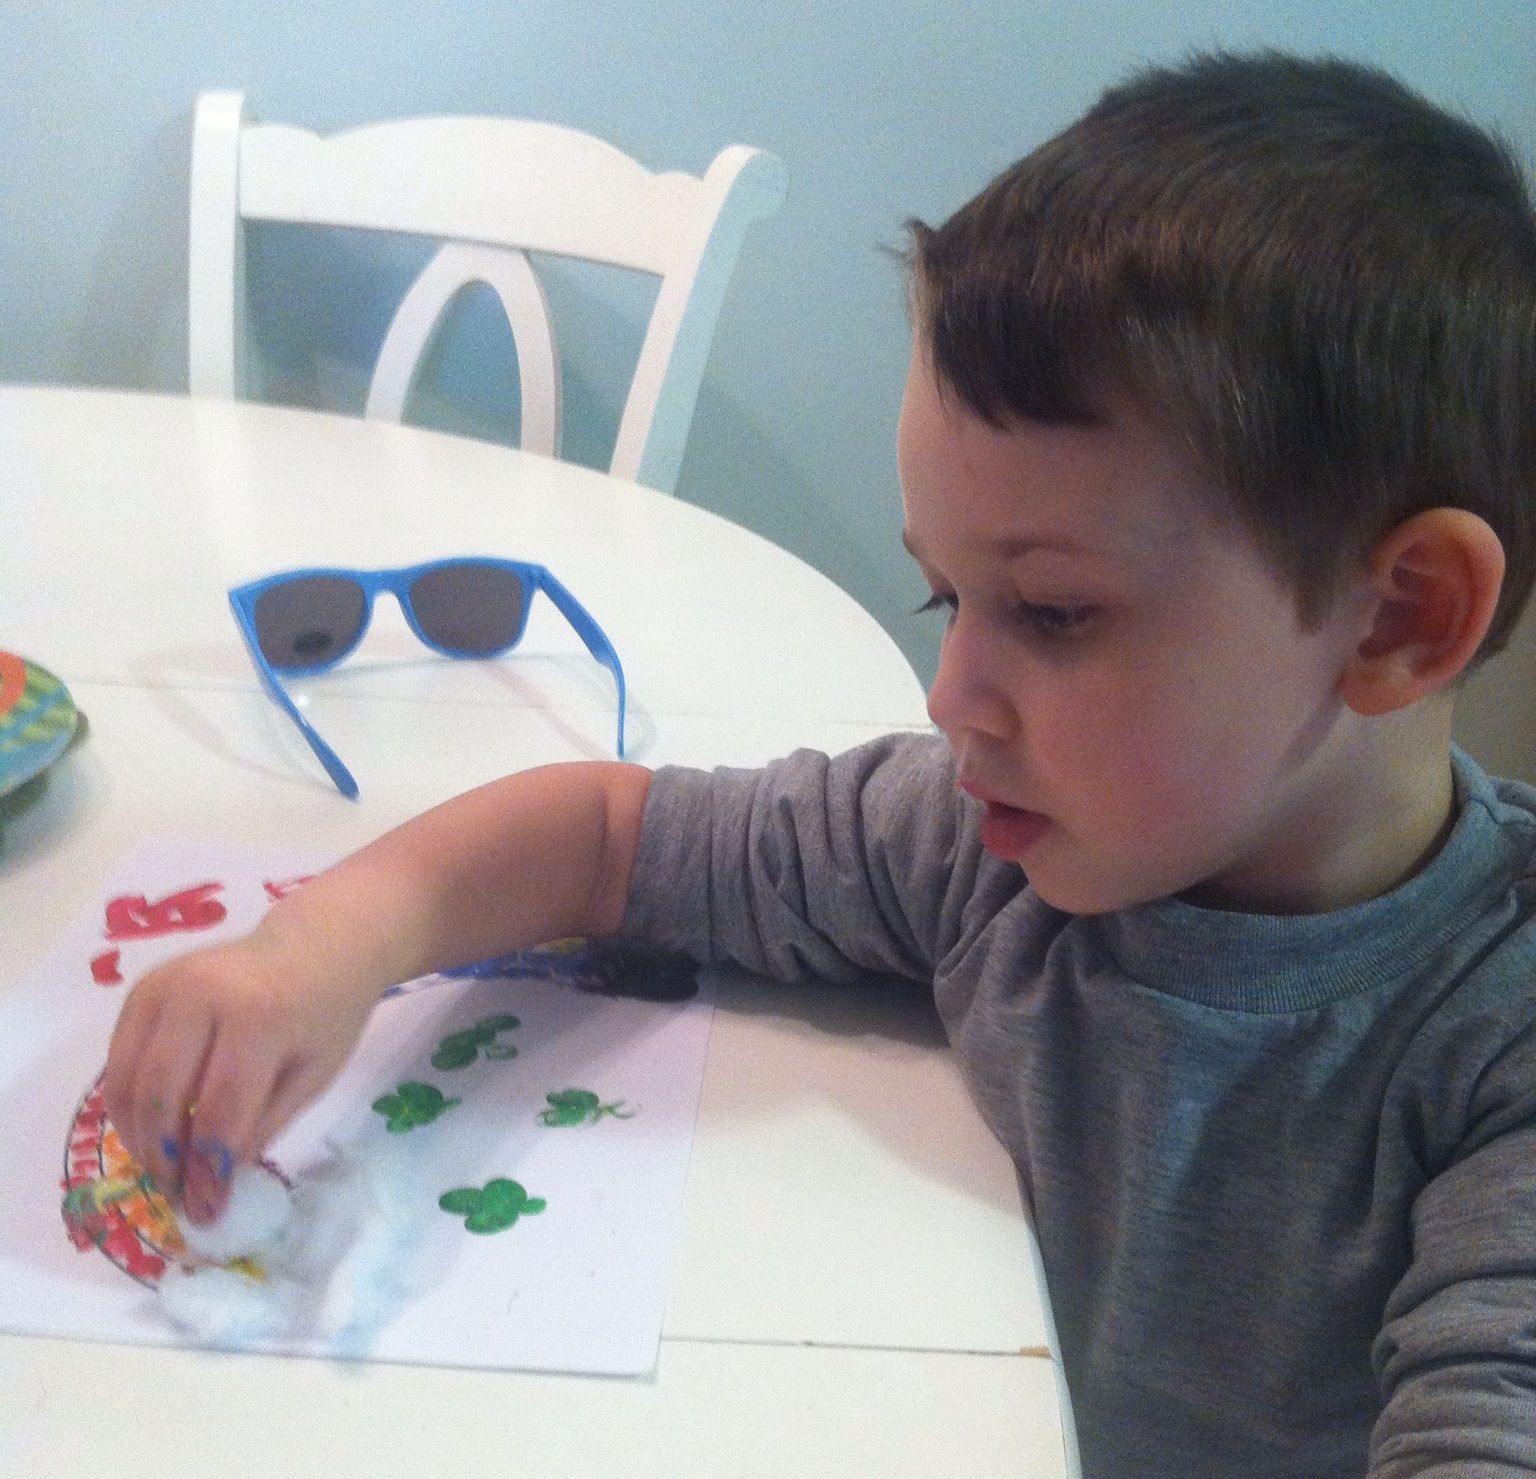
(A) designs an ornament.  He practiced on paper first.

Ornament Design

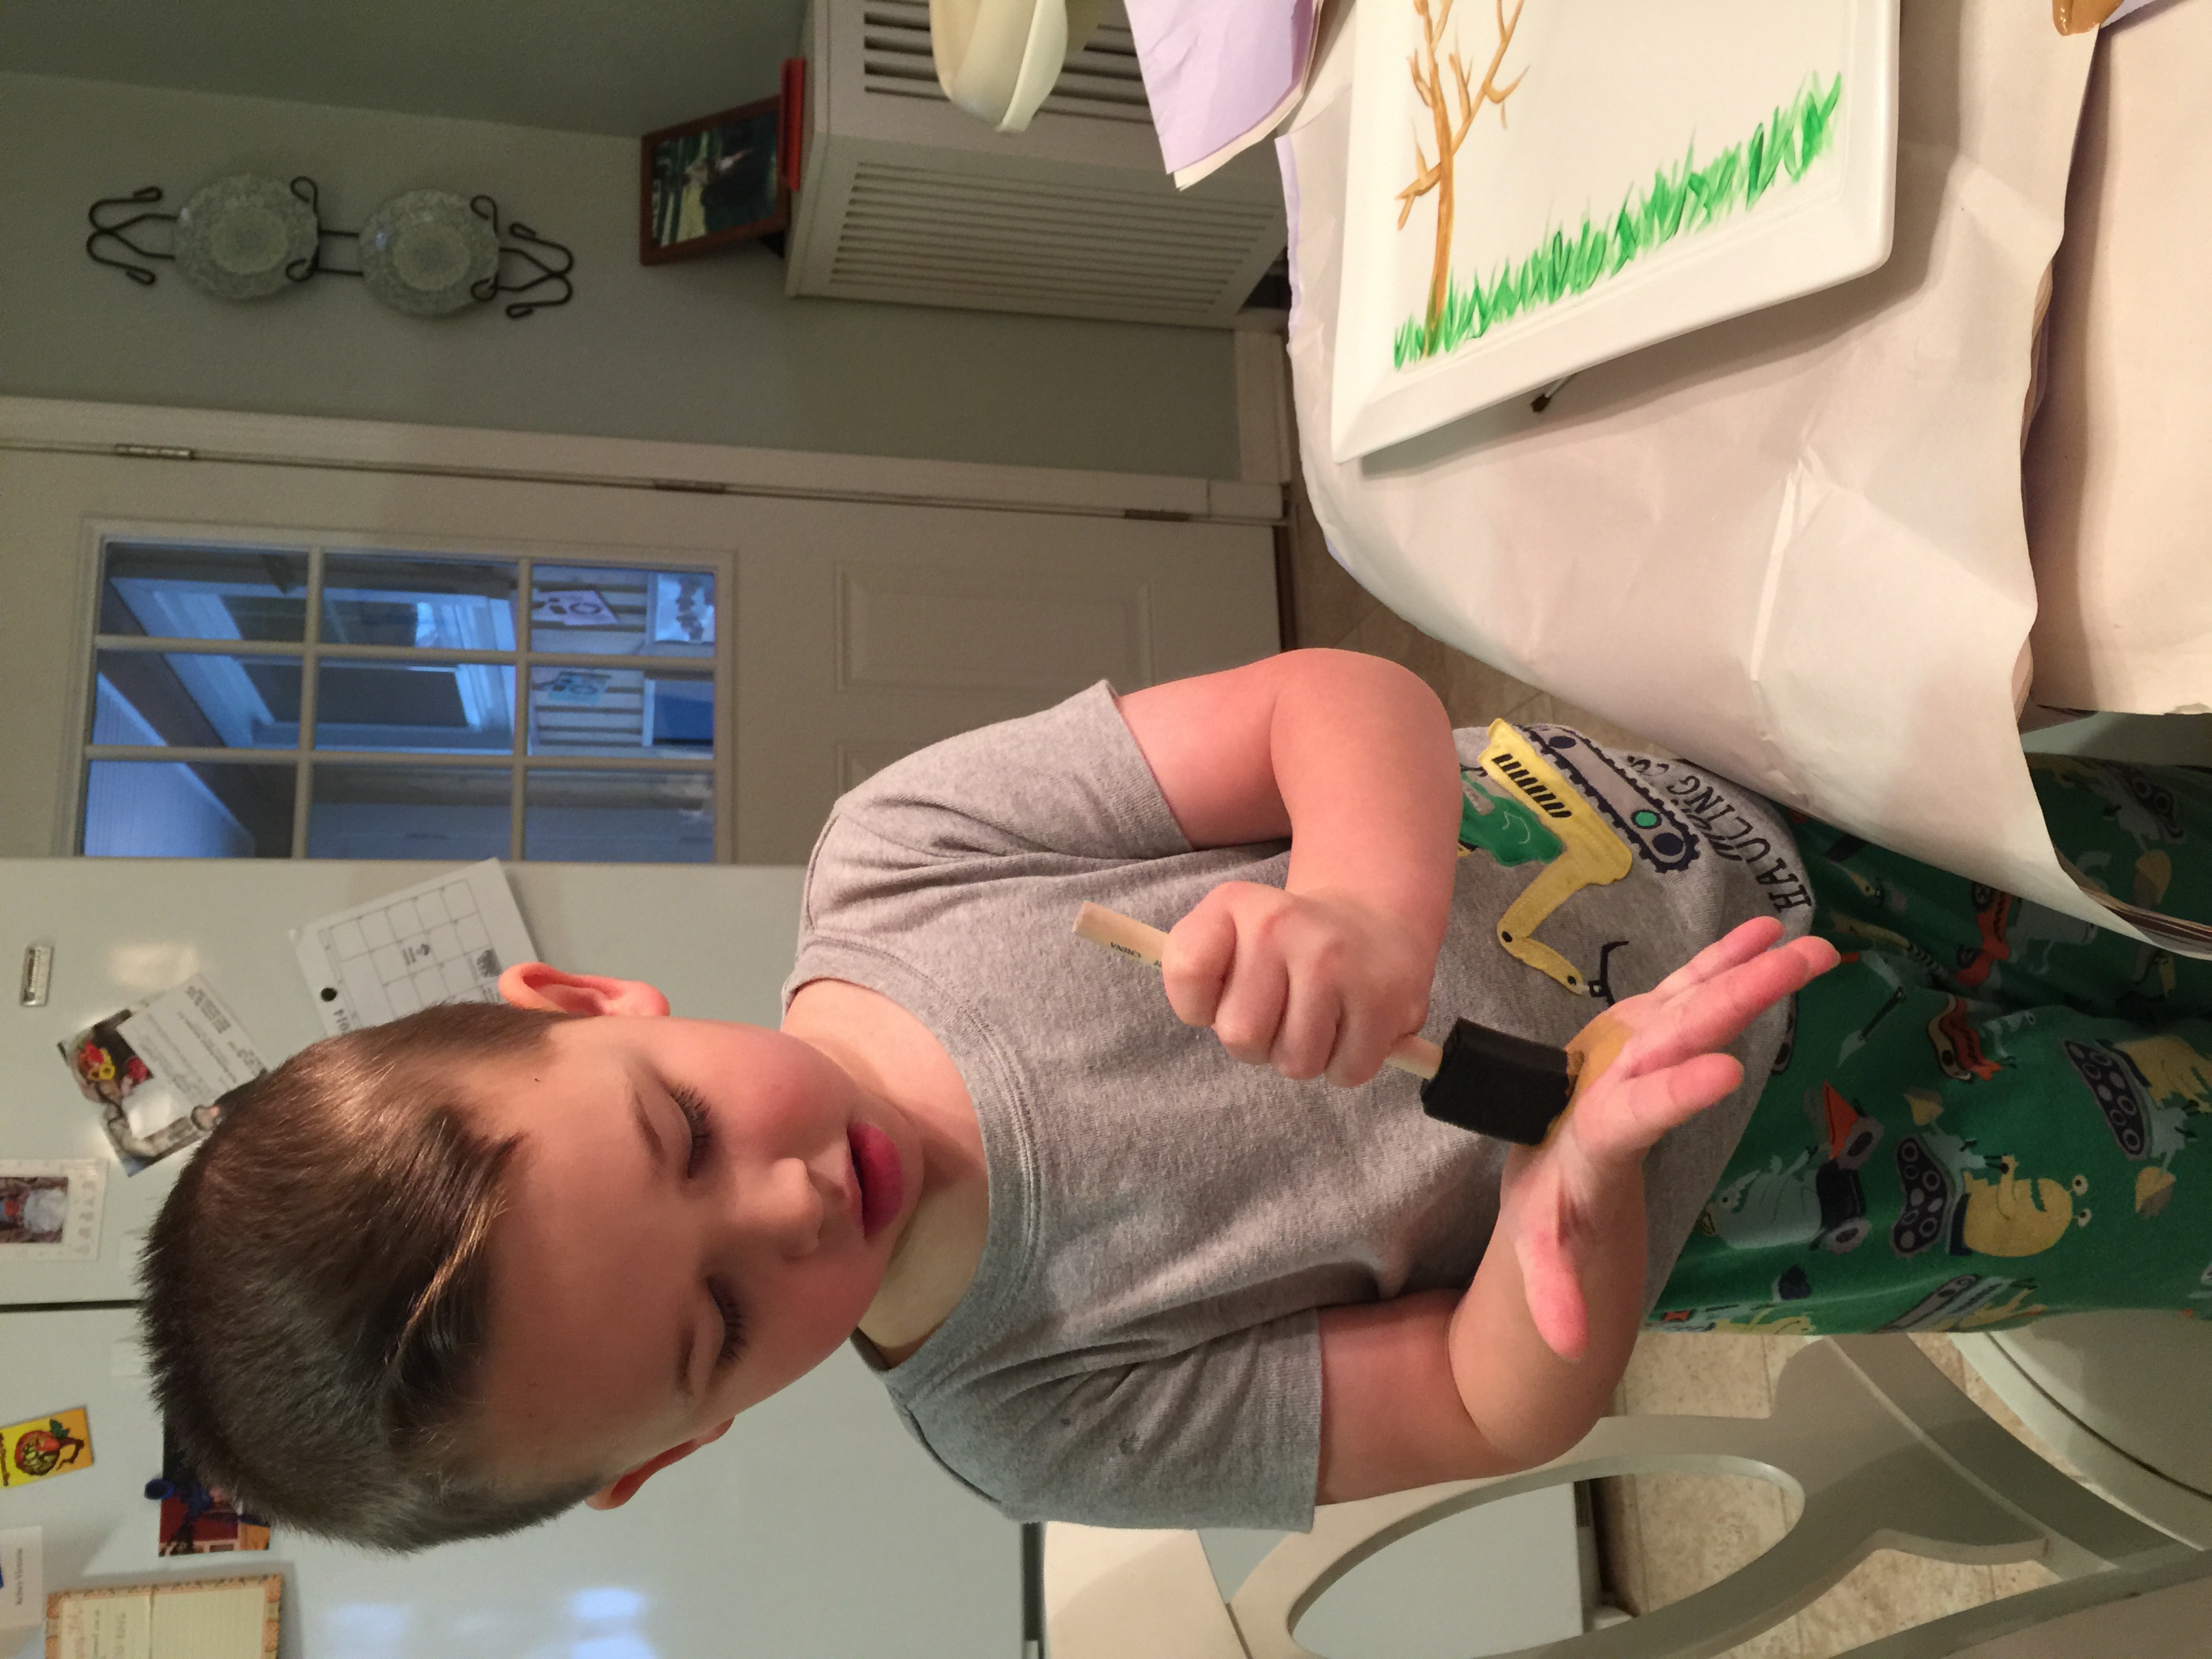
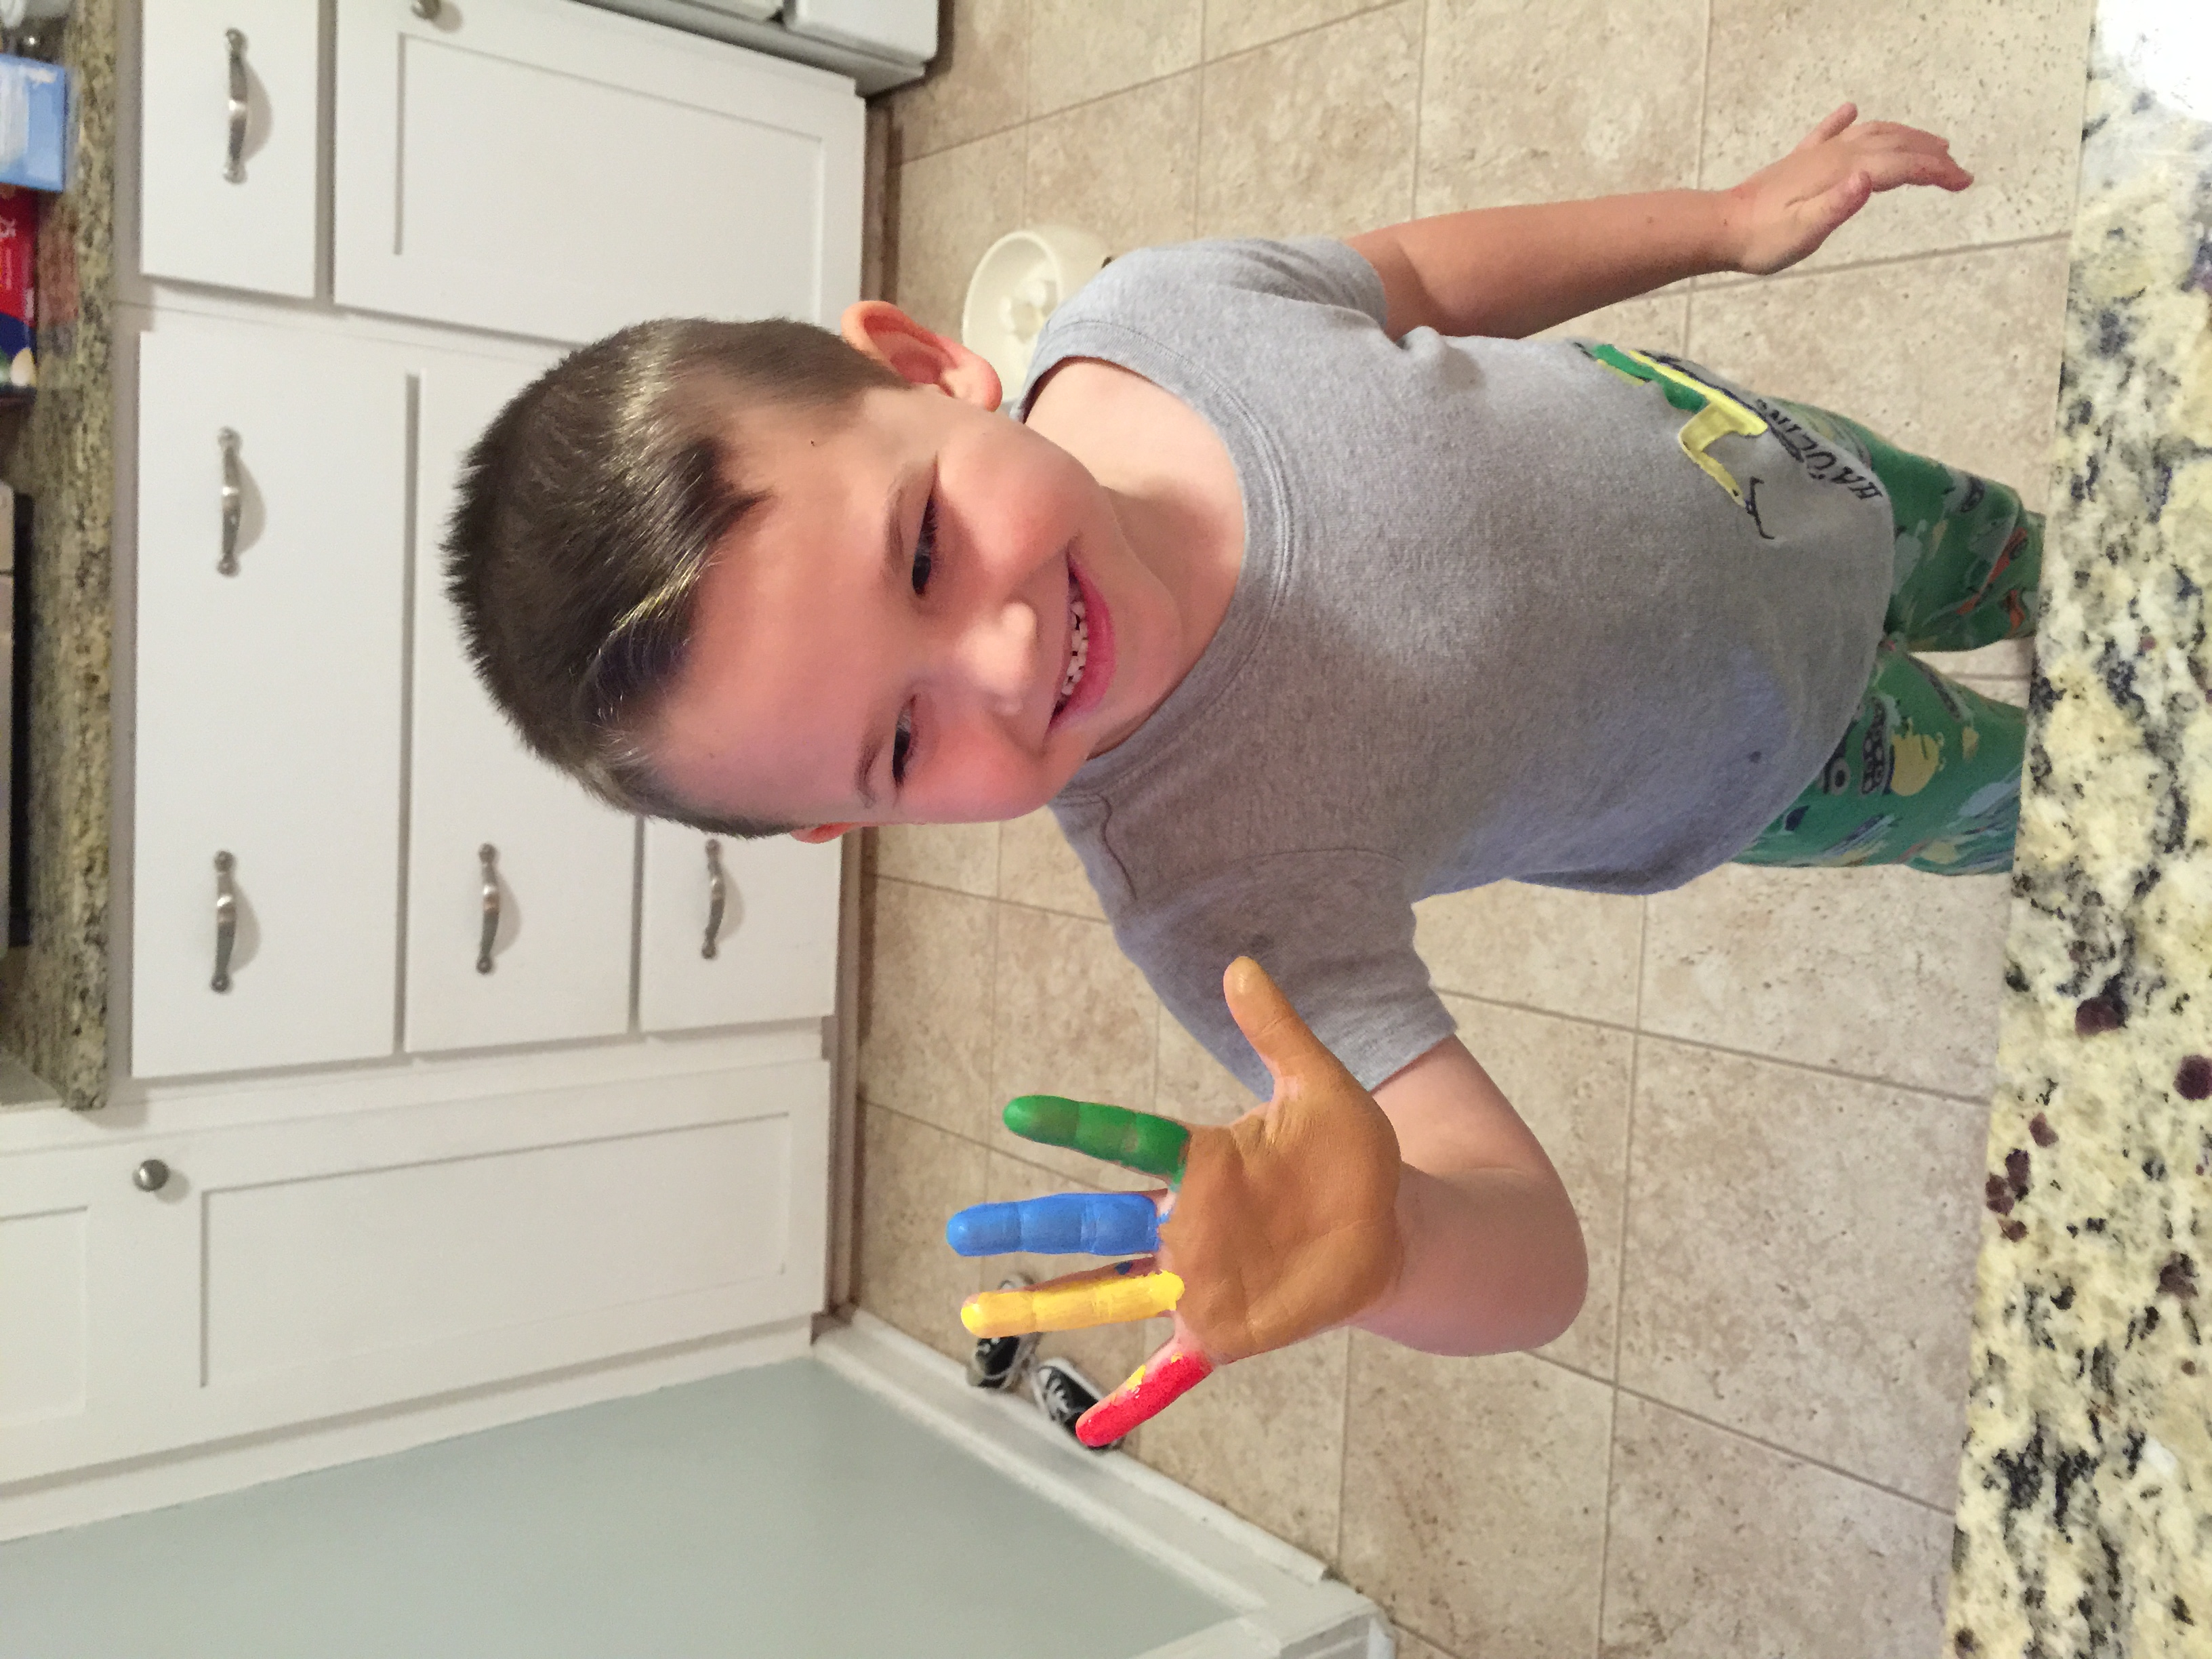
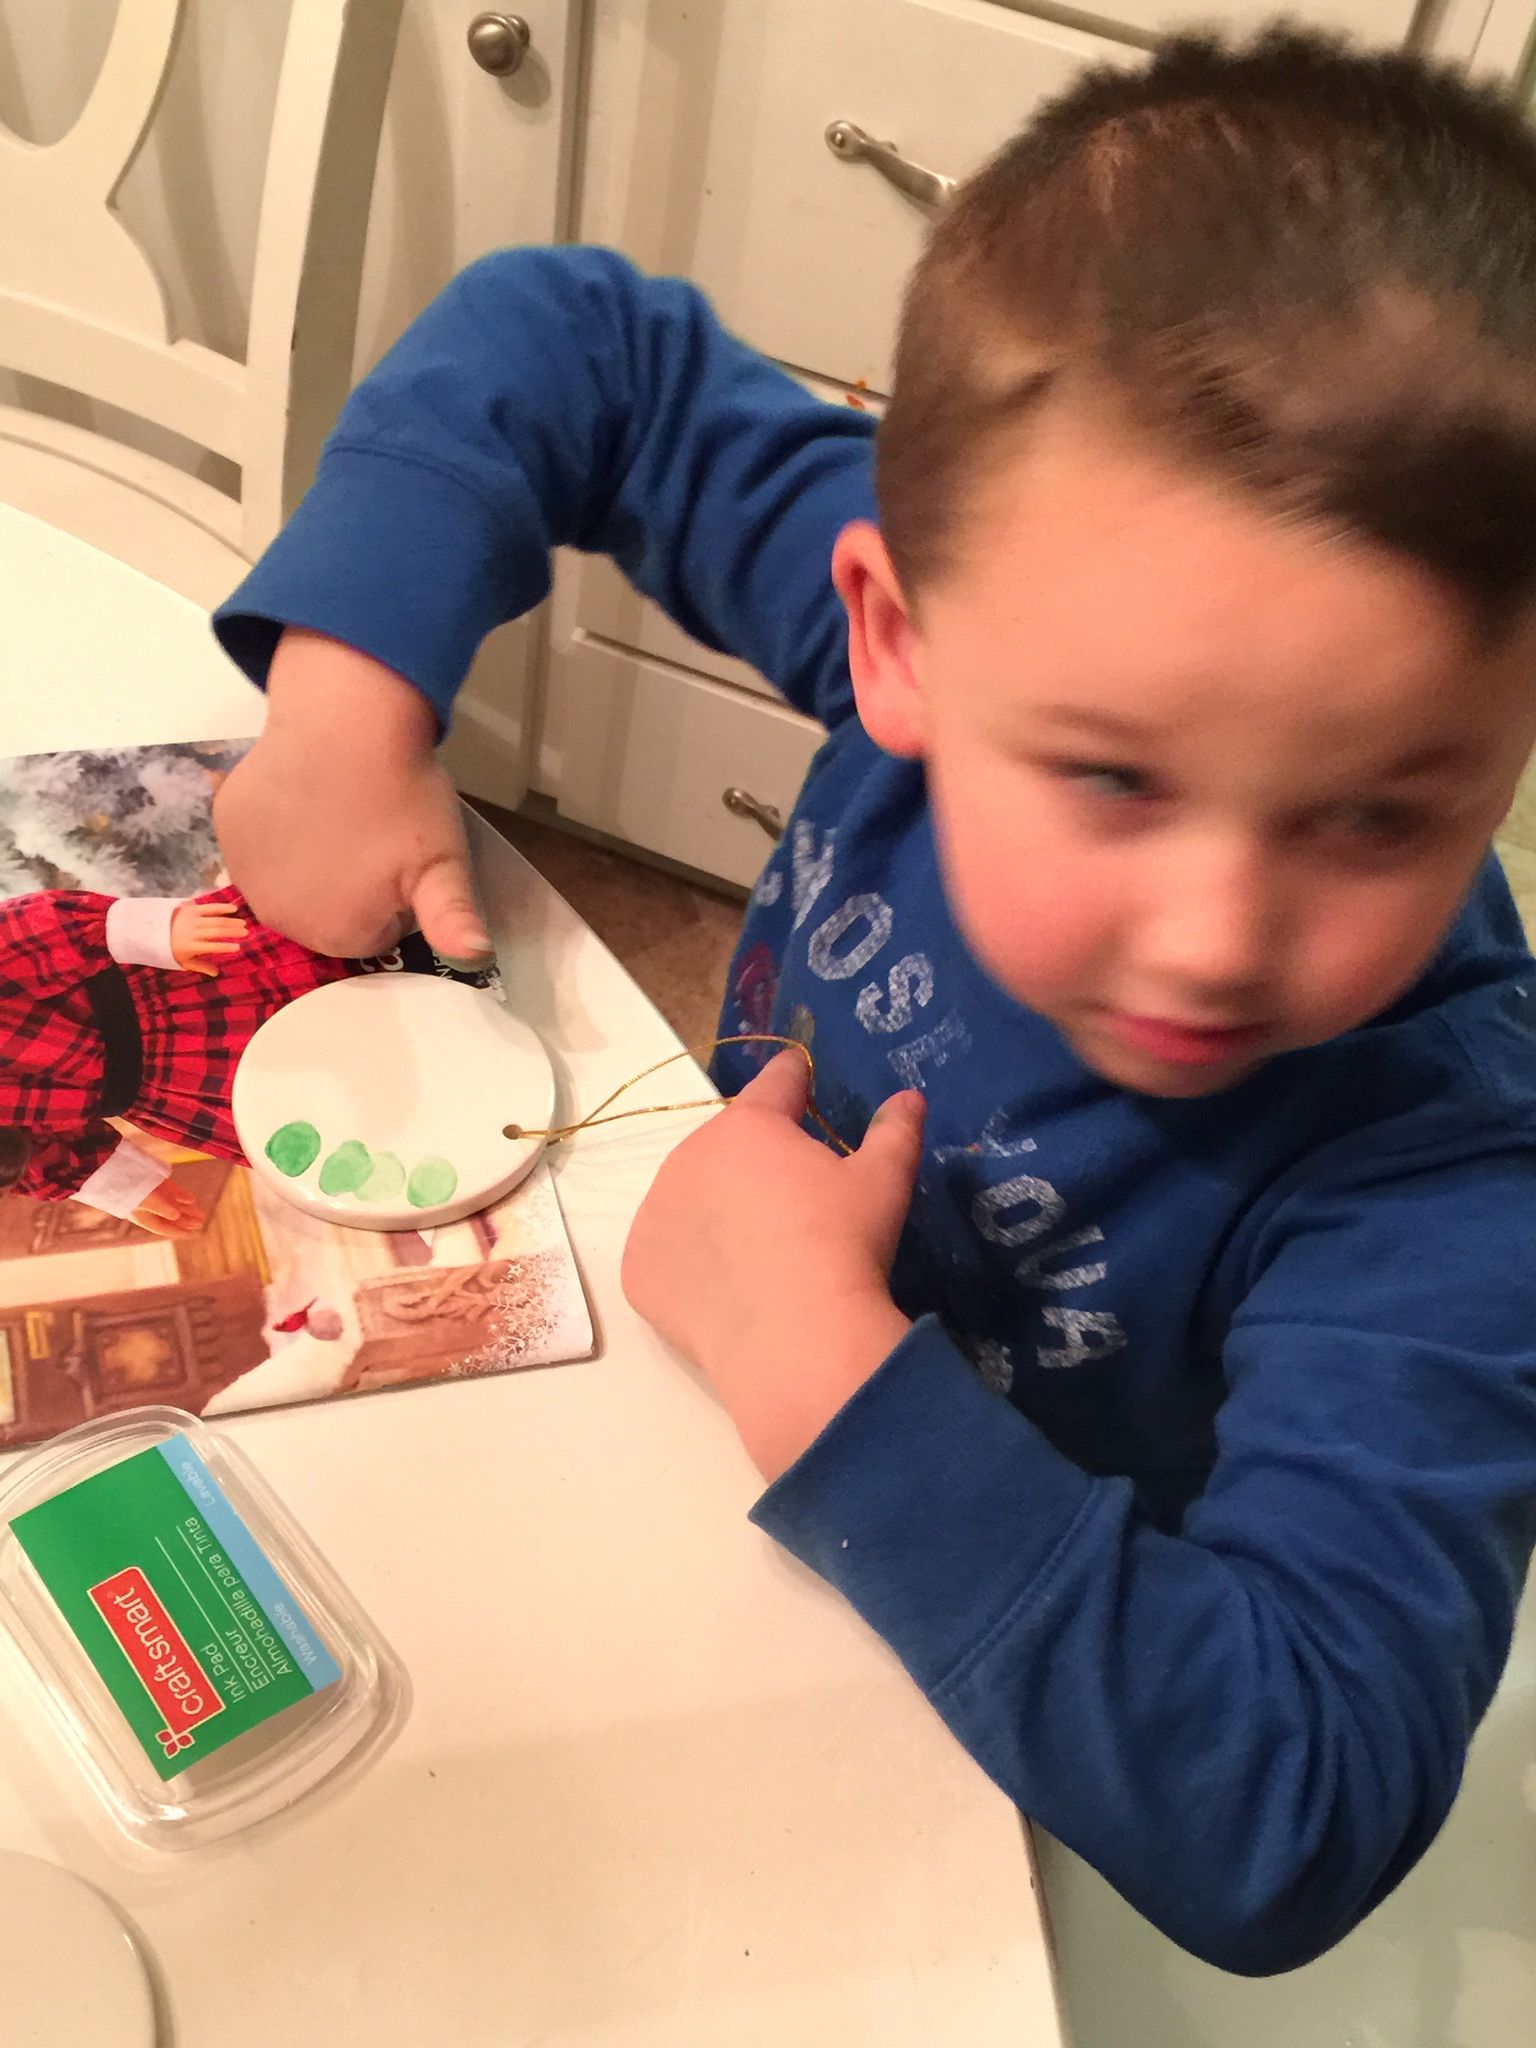
We started by placing (A)’s thumbprint all around each of the 7 ornaments.  At 4 he was able to do this by himself which was really great to see.  Once the greenery was done he and his sister used the different colors to make the decorations on the wreaths.

(A) and (E) decorate the wreaths.

Making a wreath

Making a wreath 2

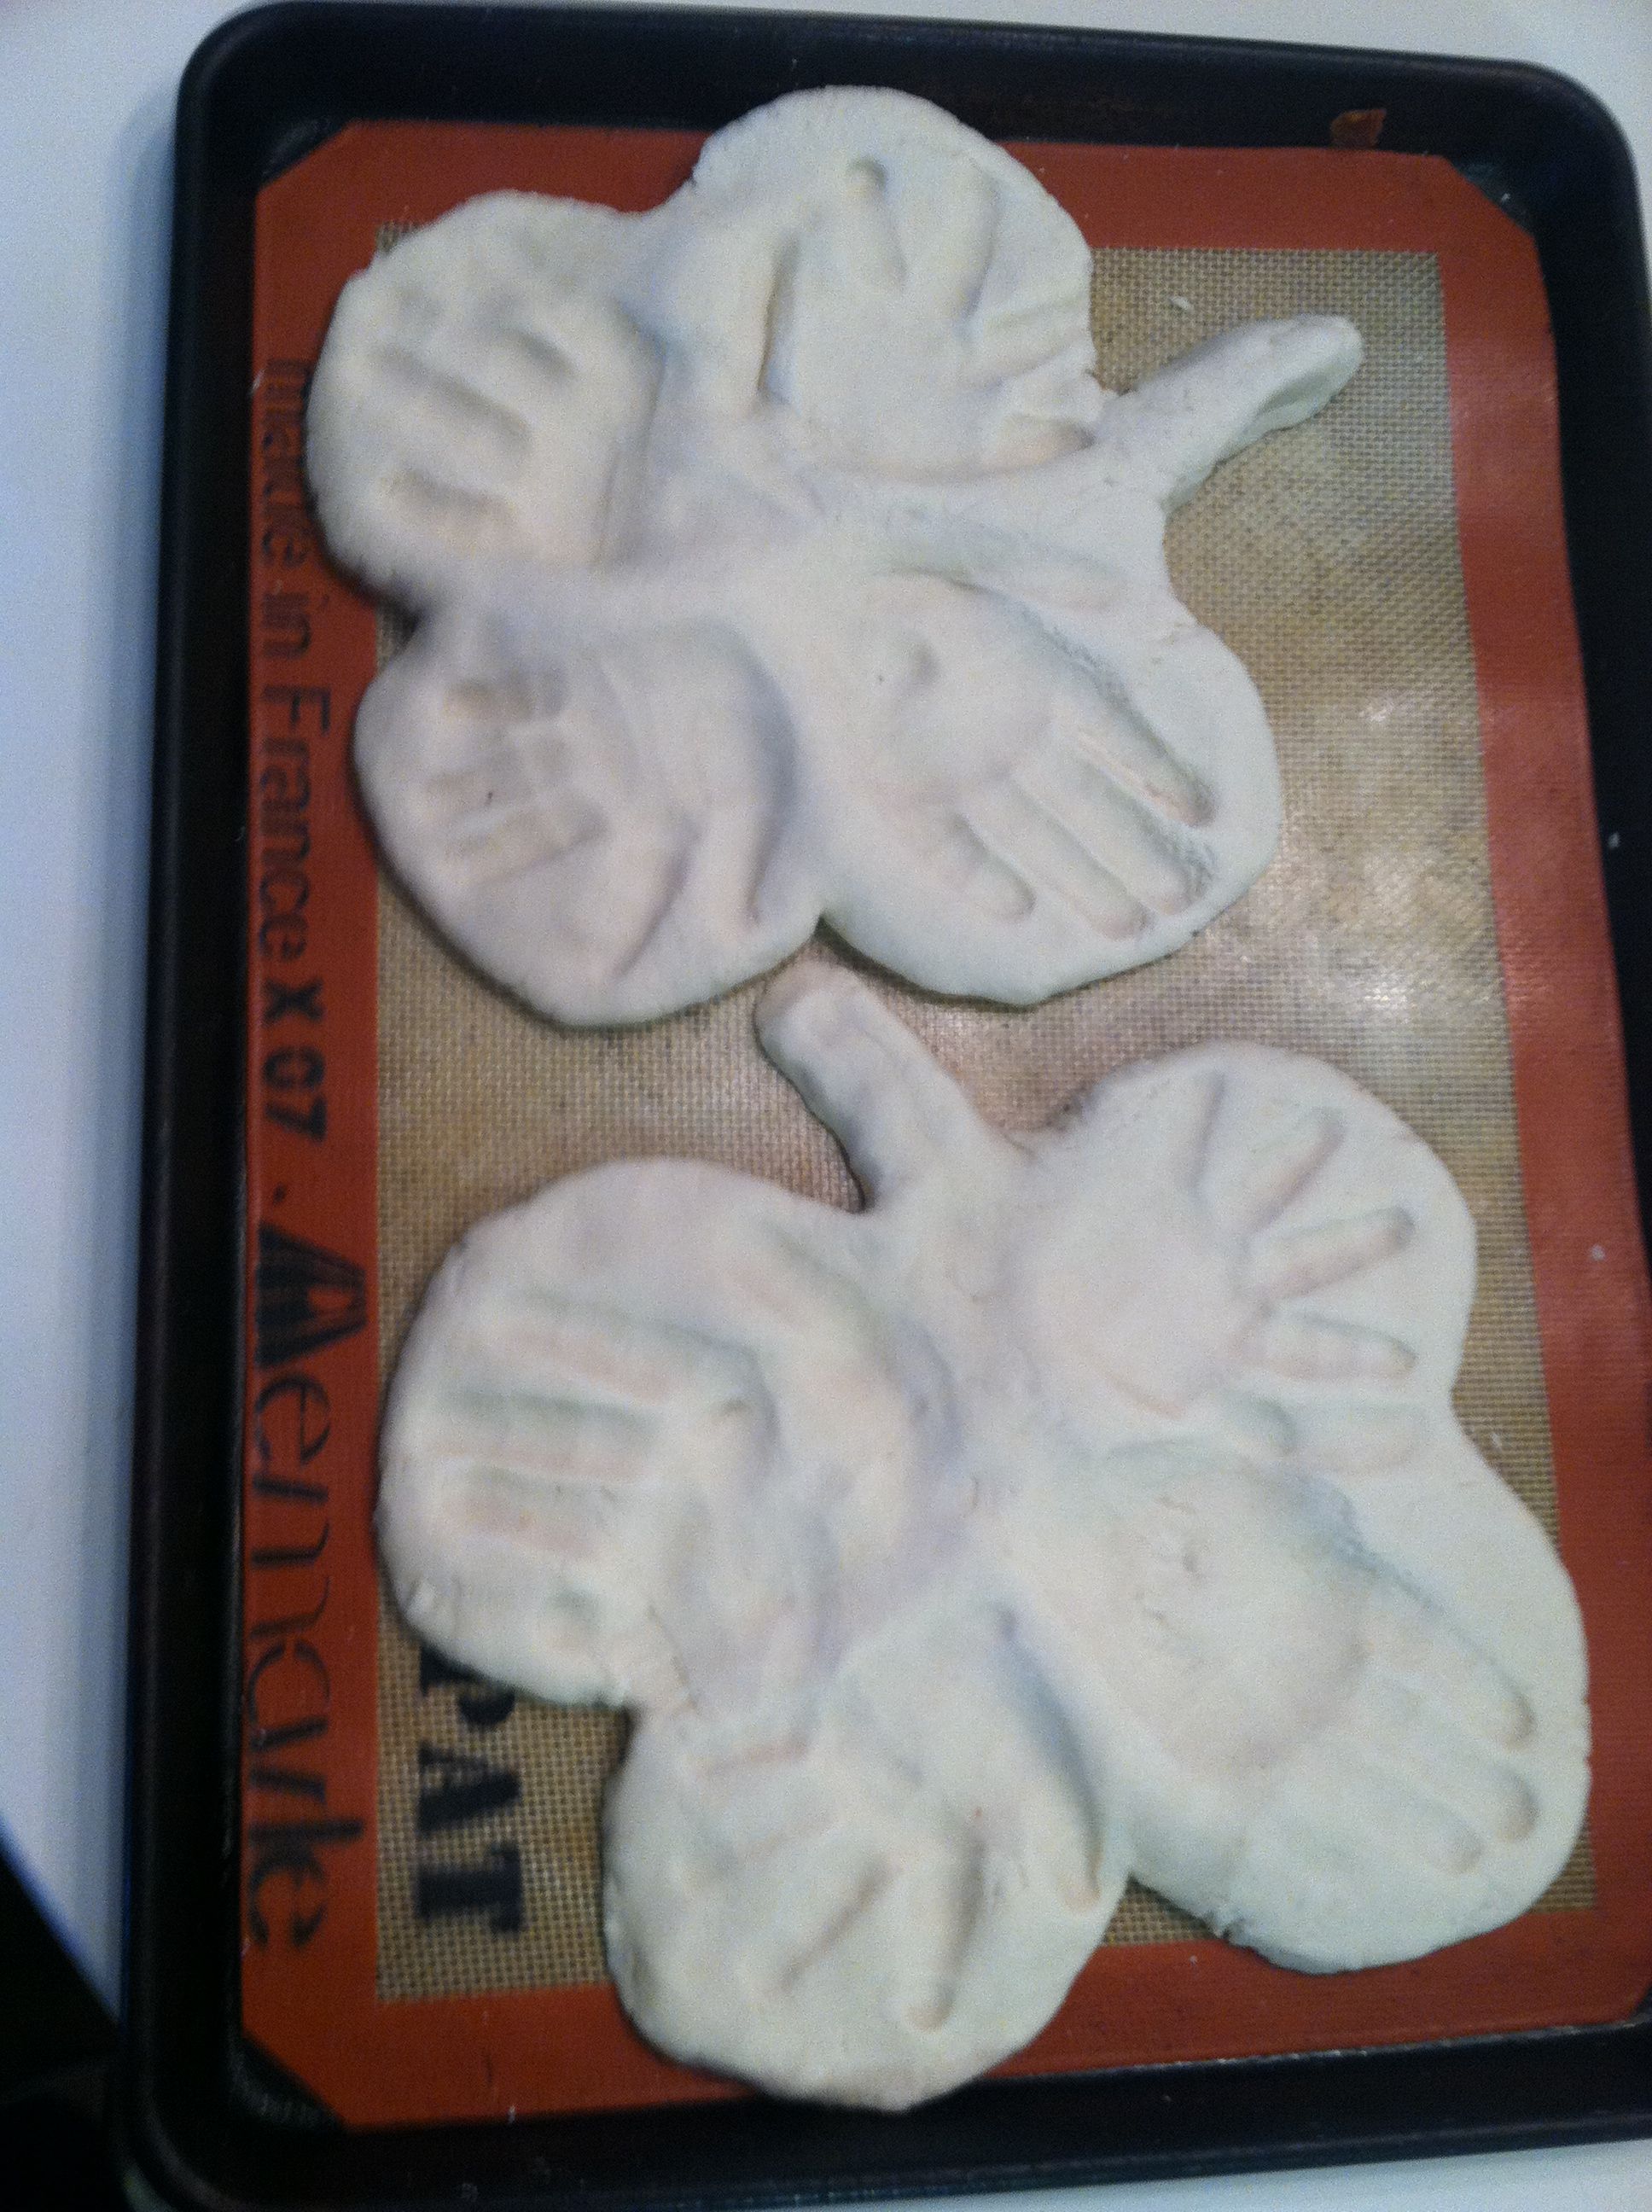
Done with fingerprints.

wreaths ready

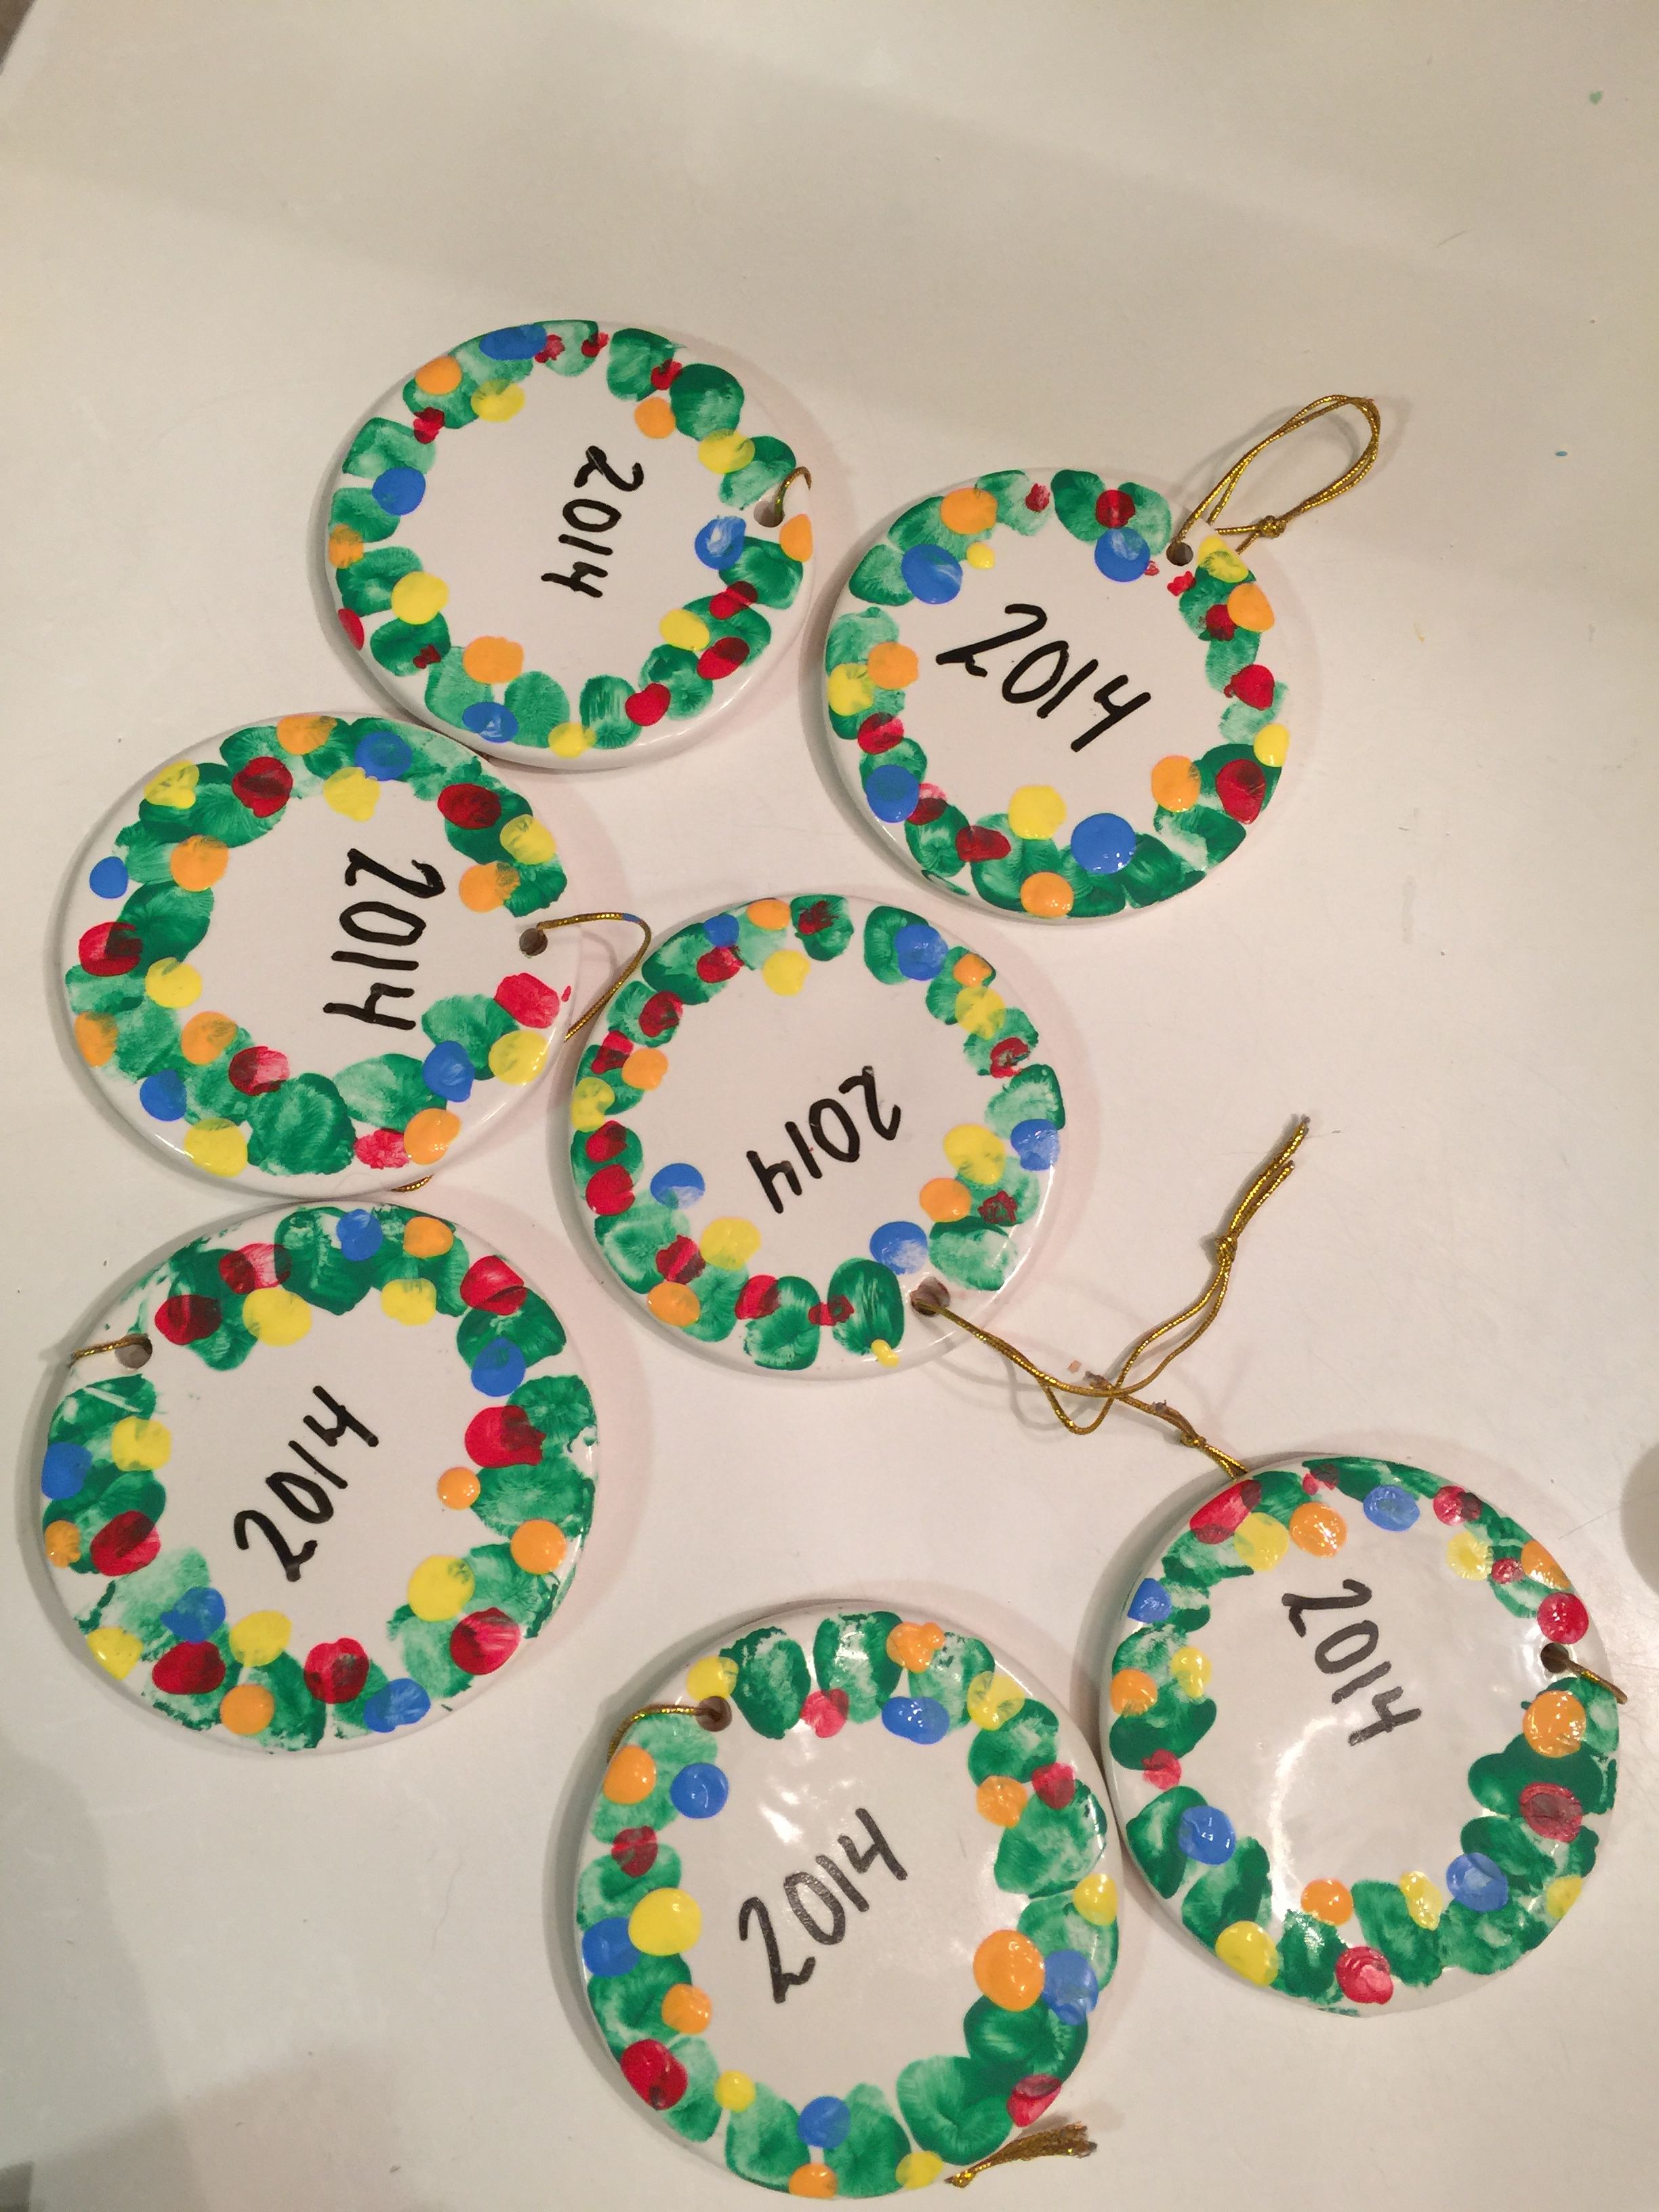
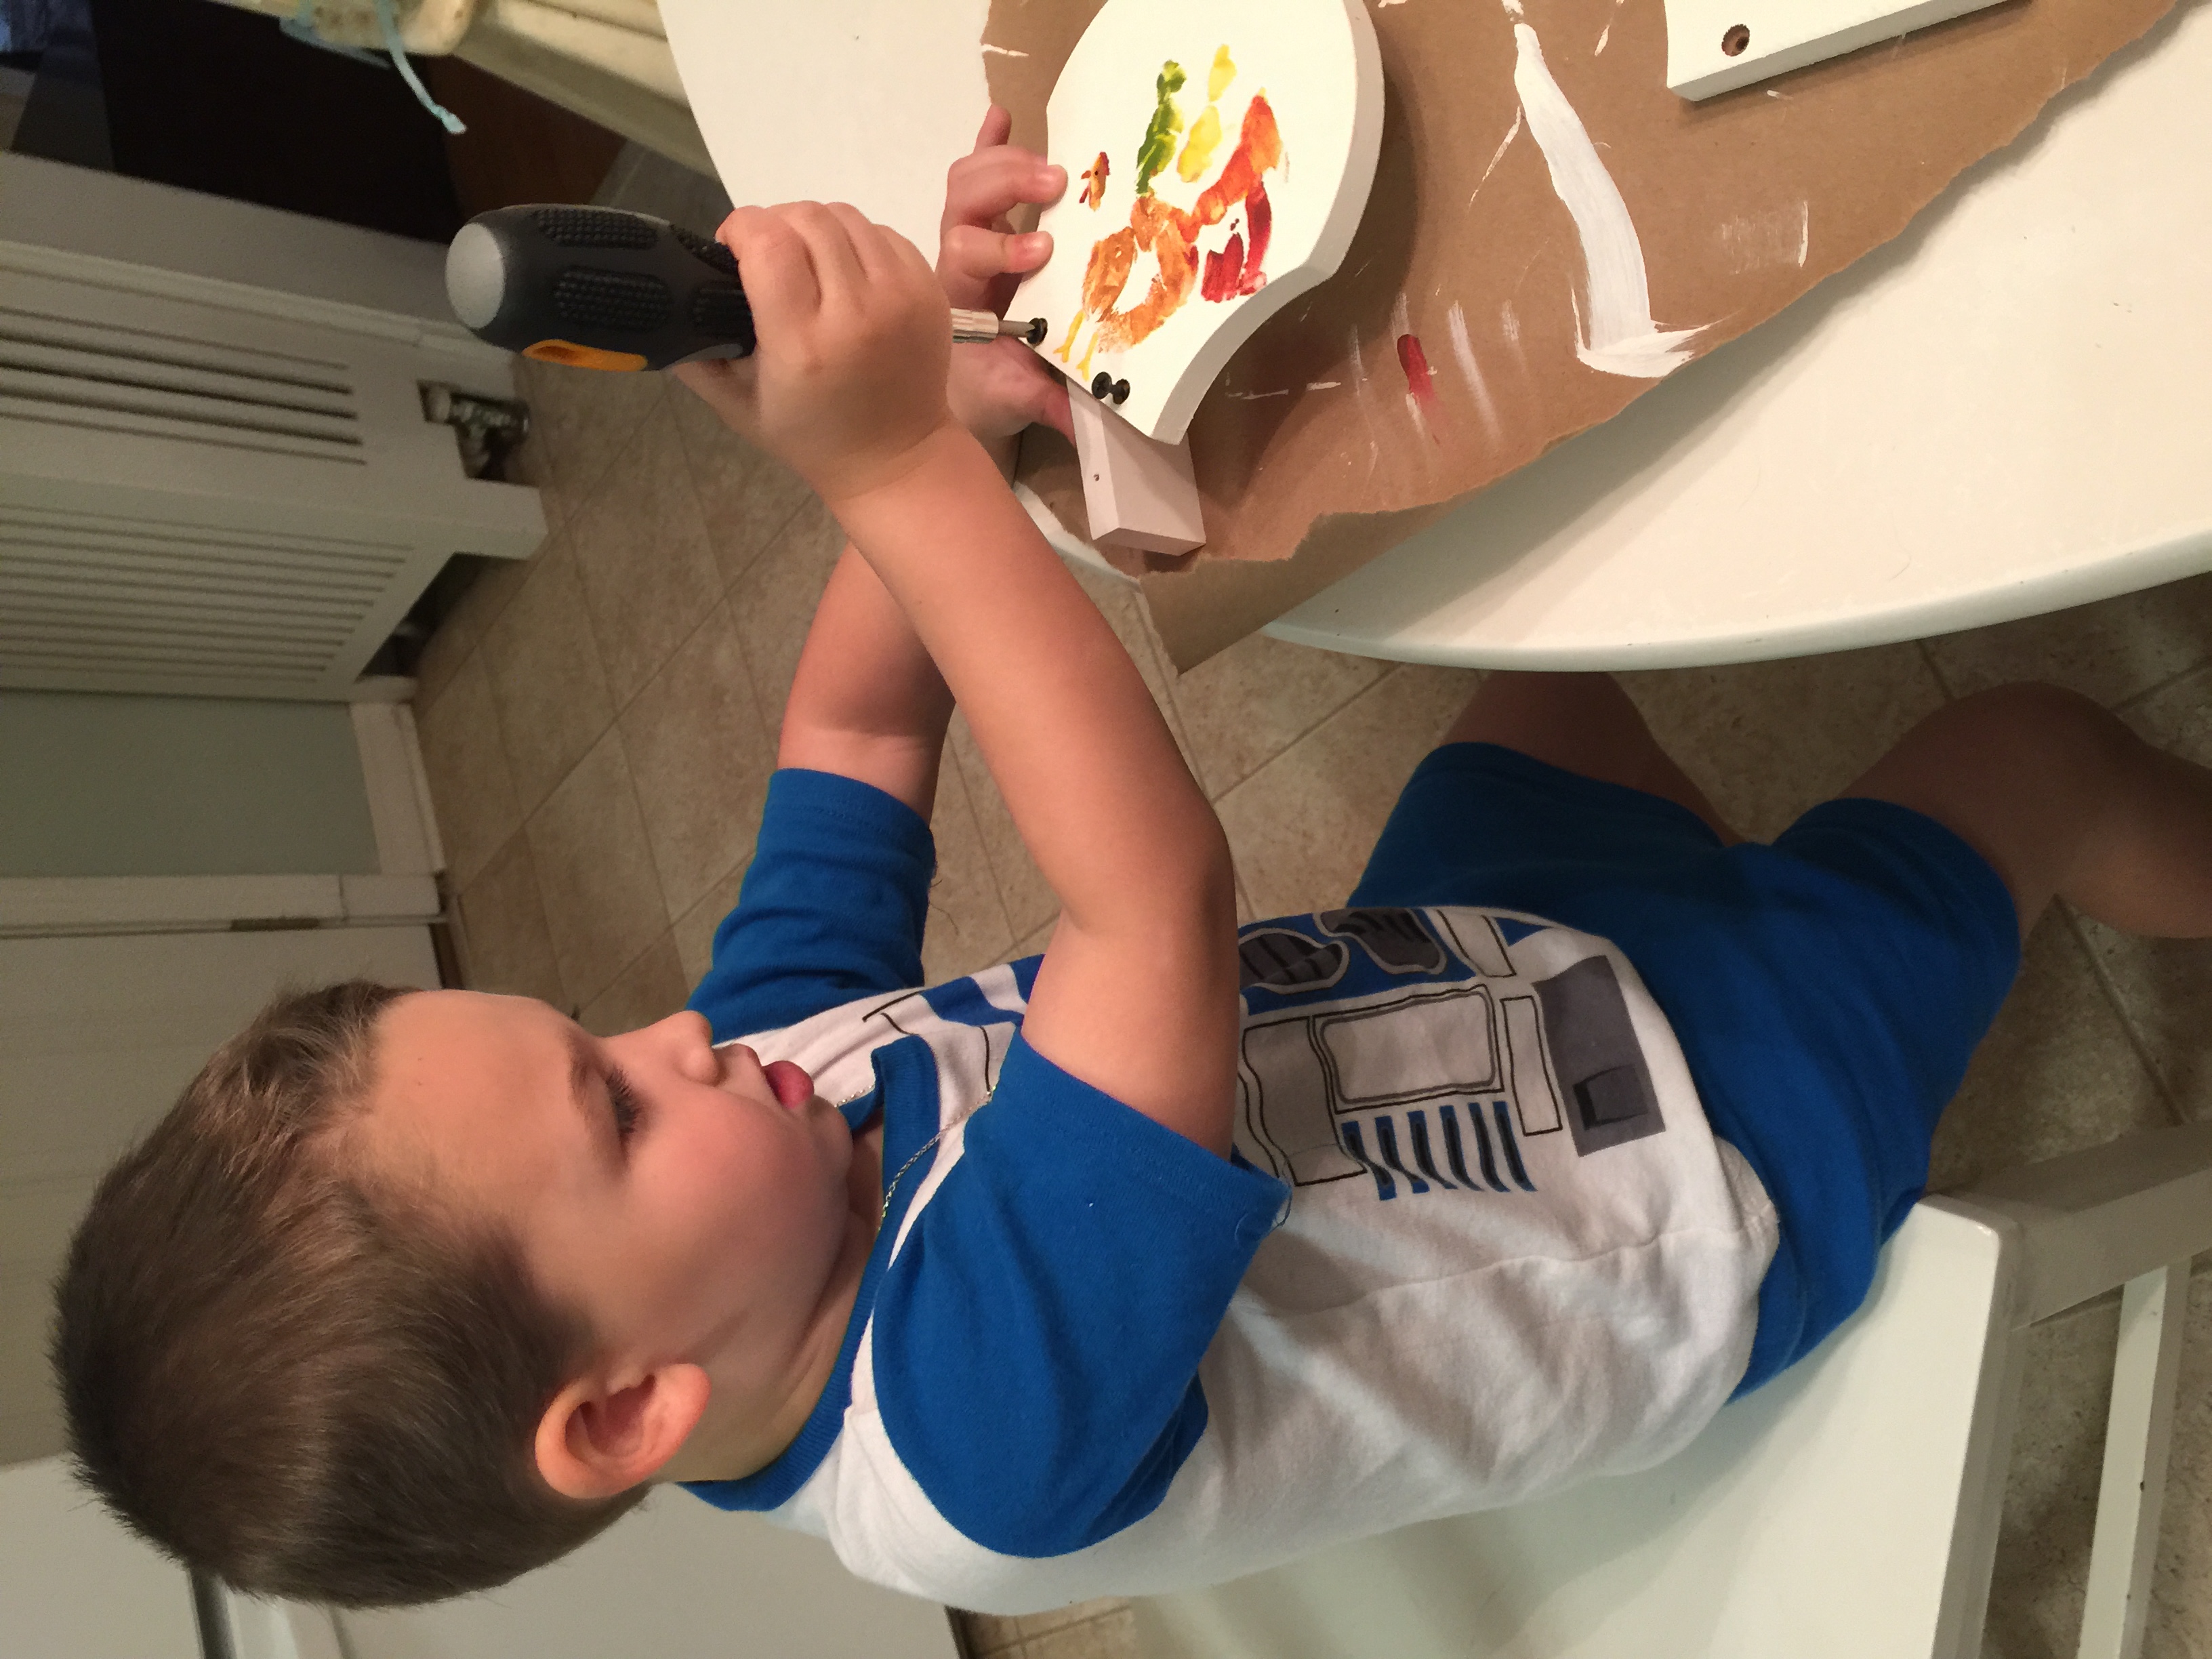
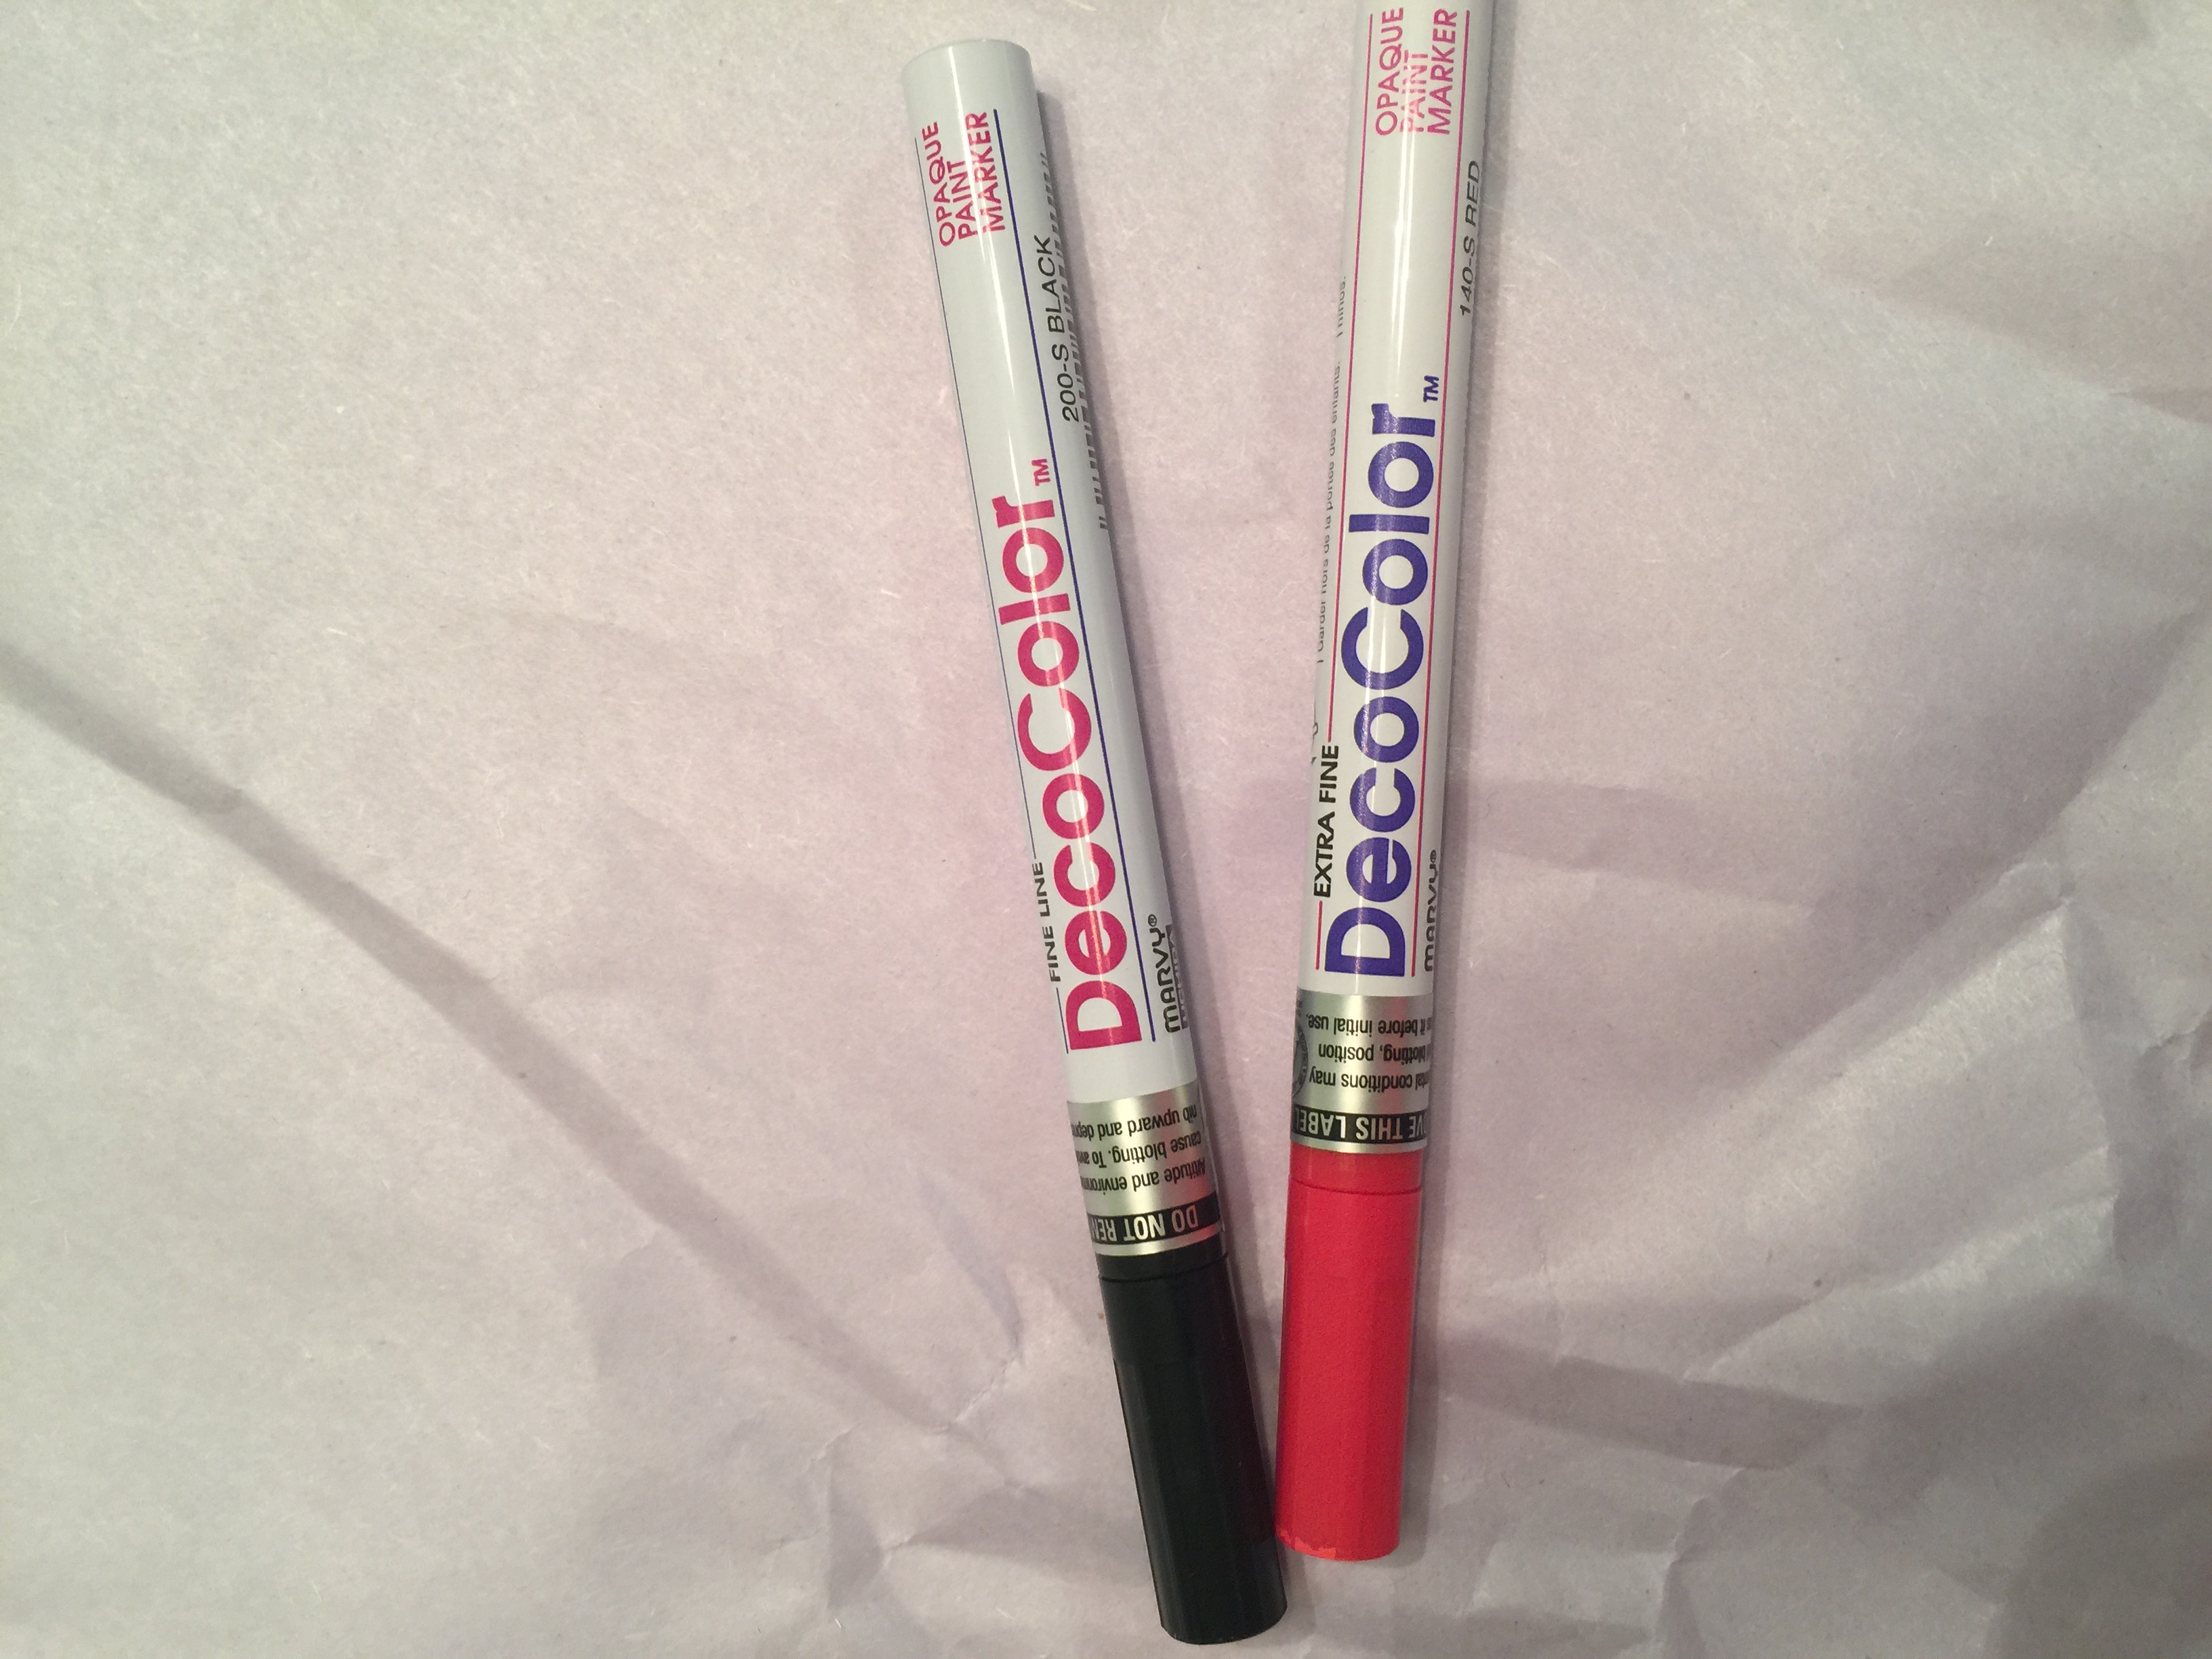
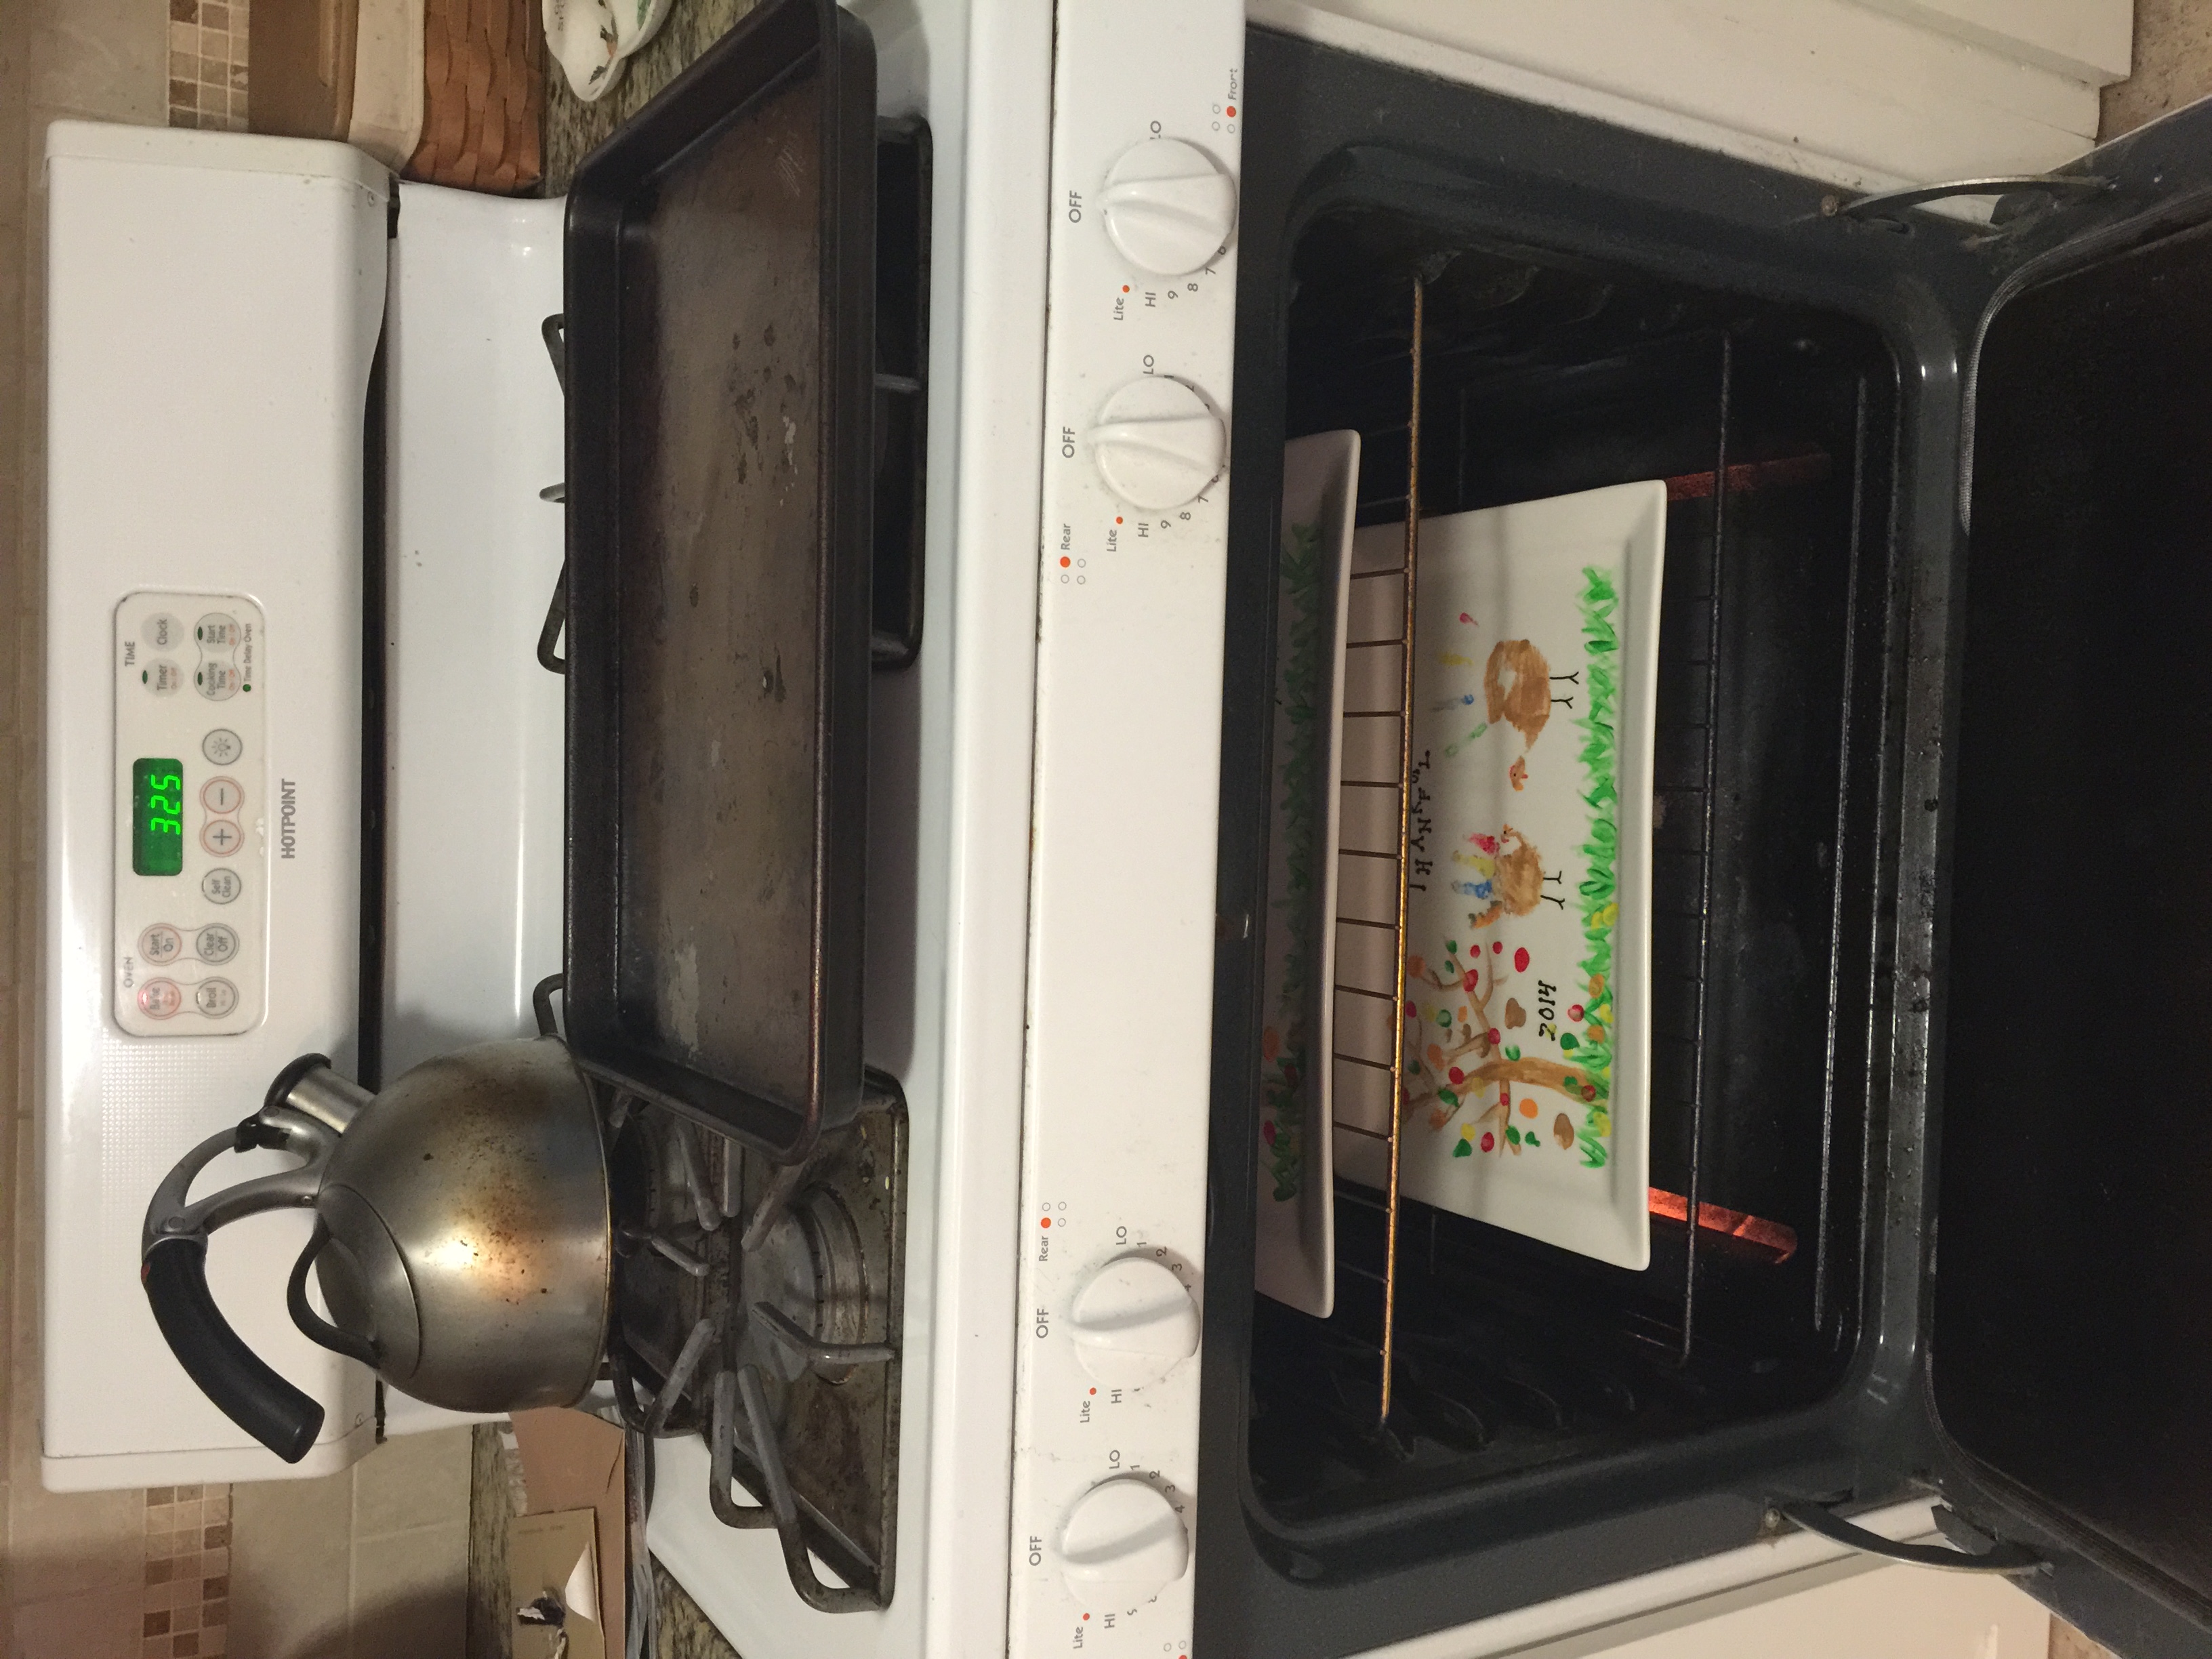
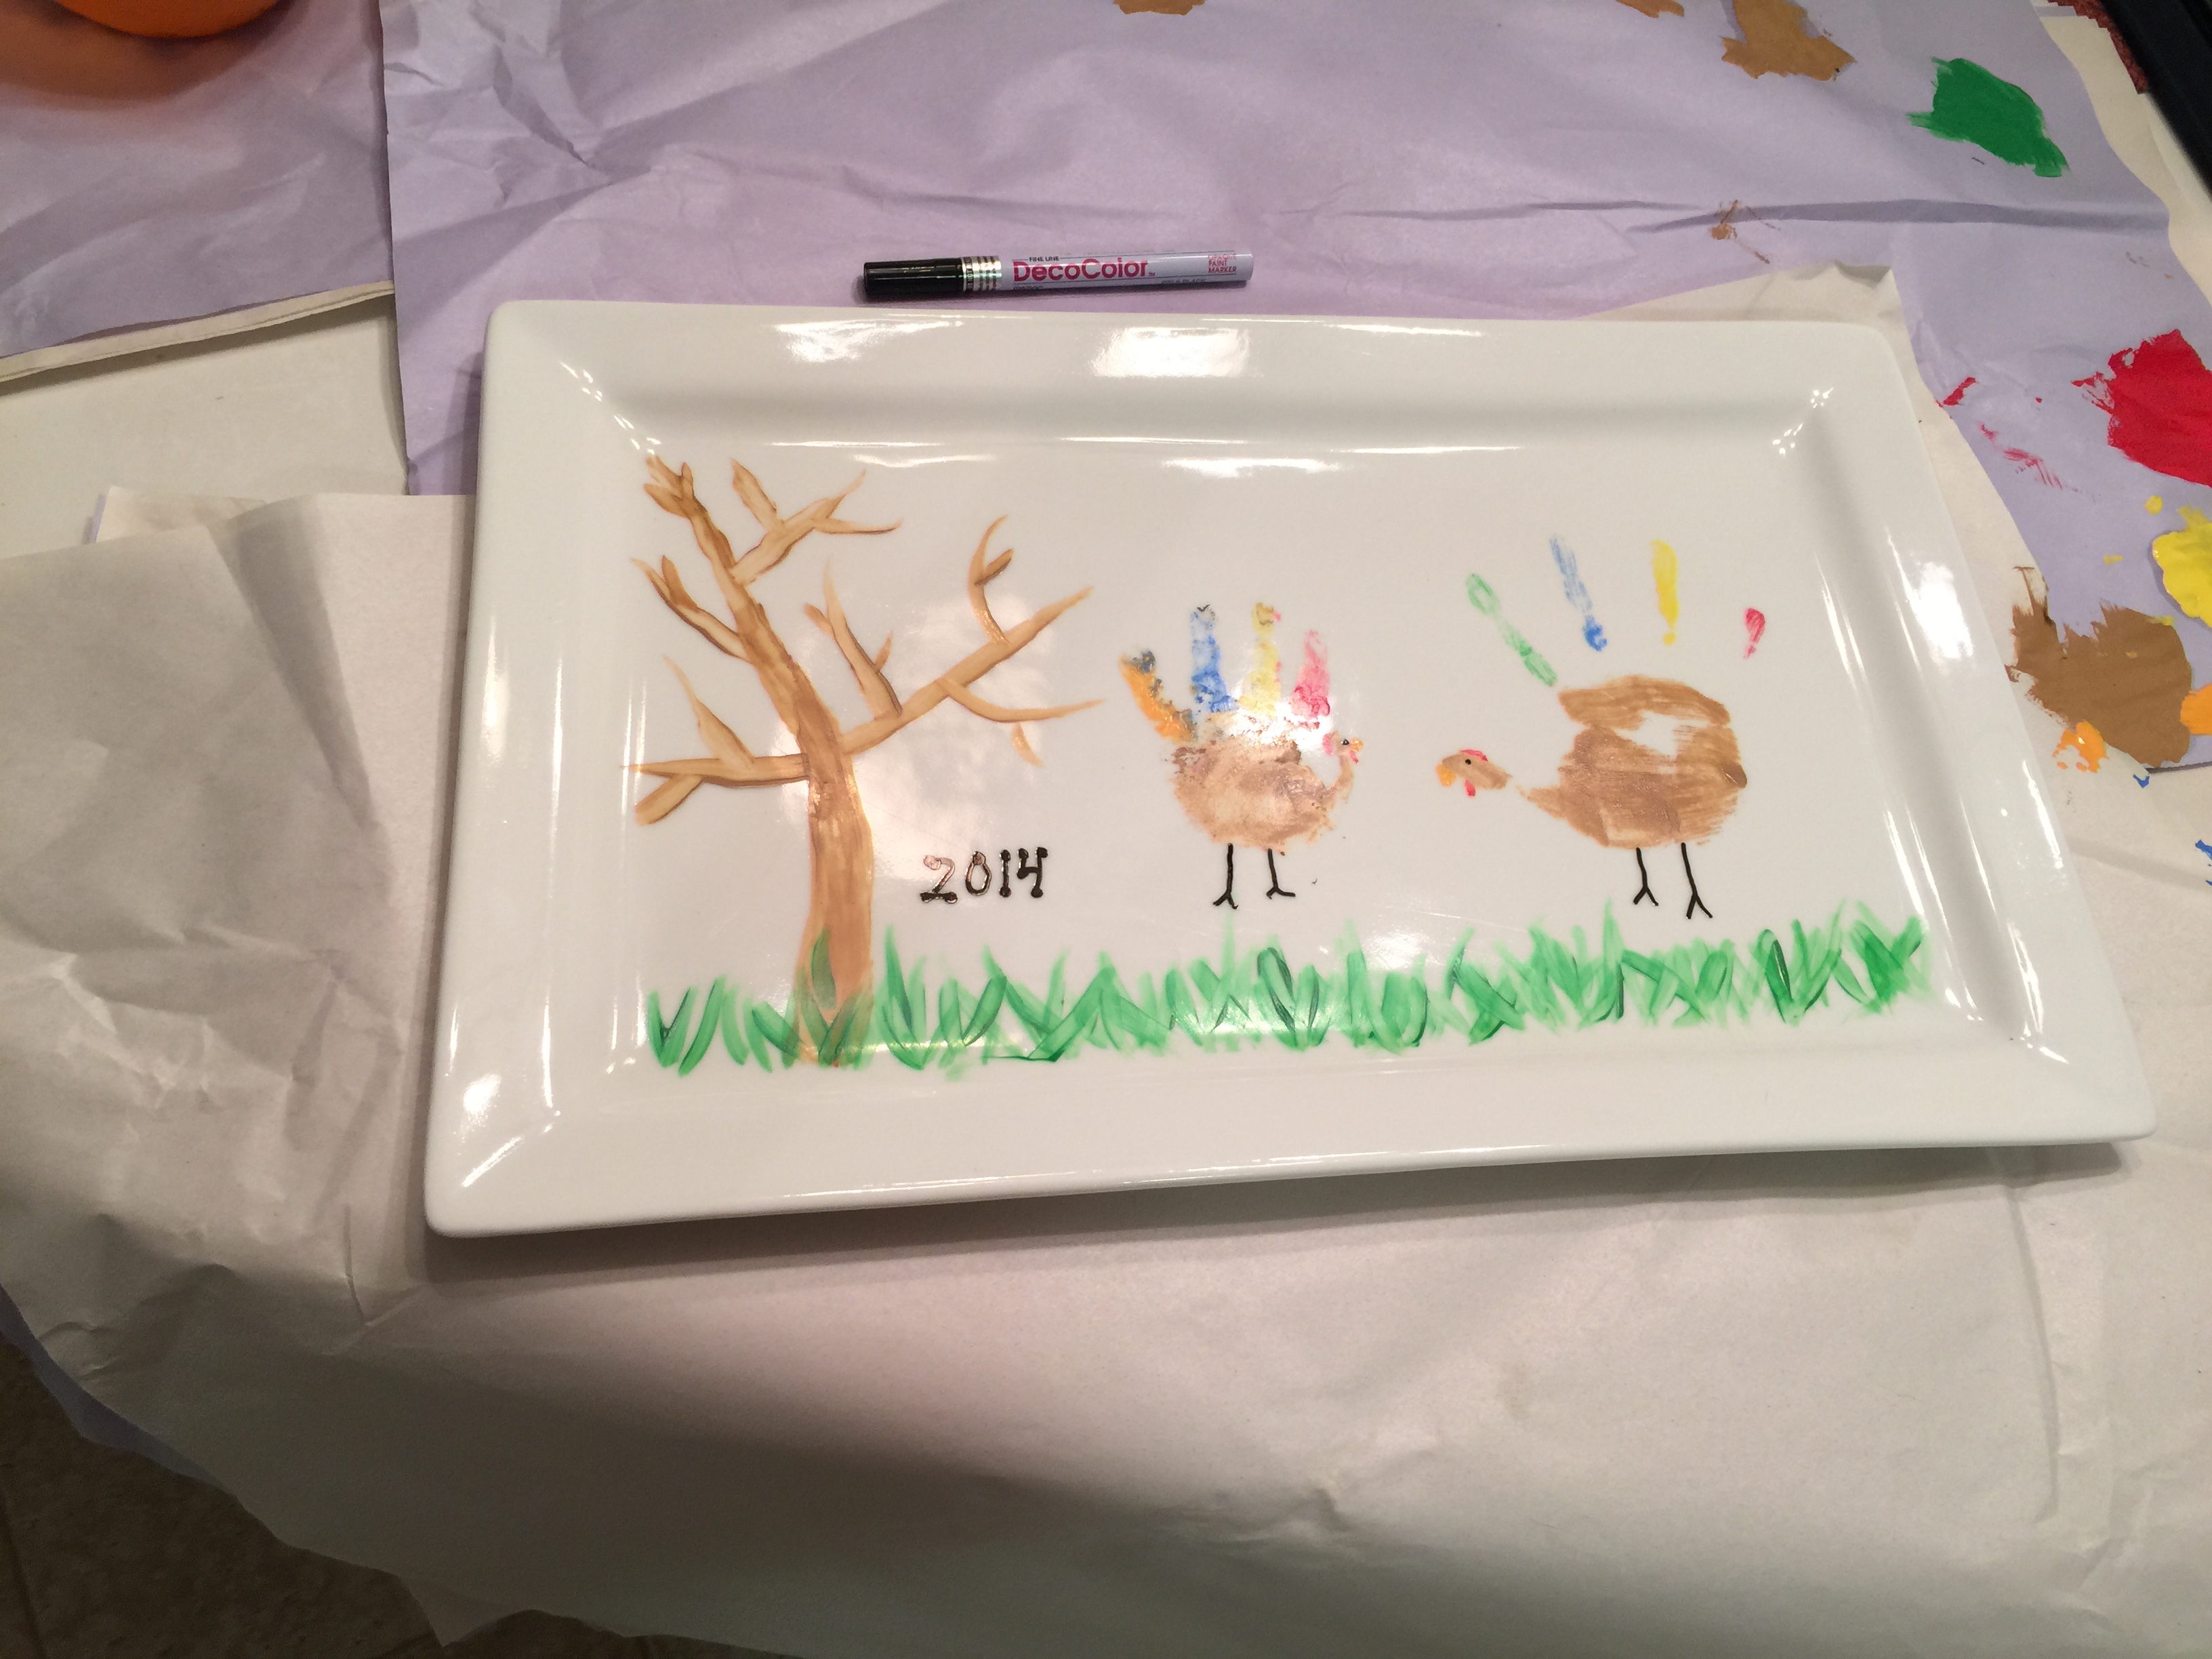
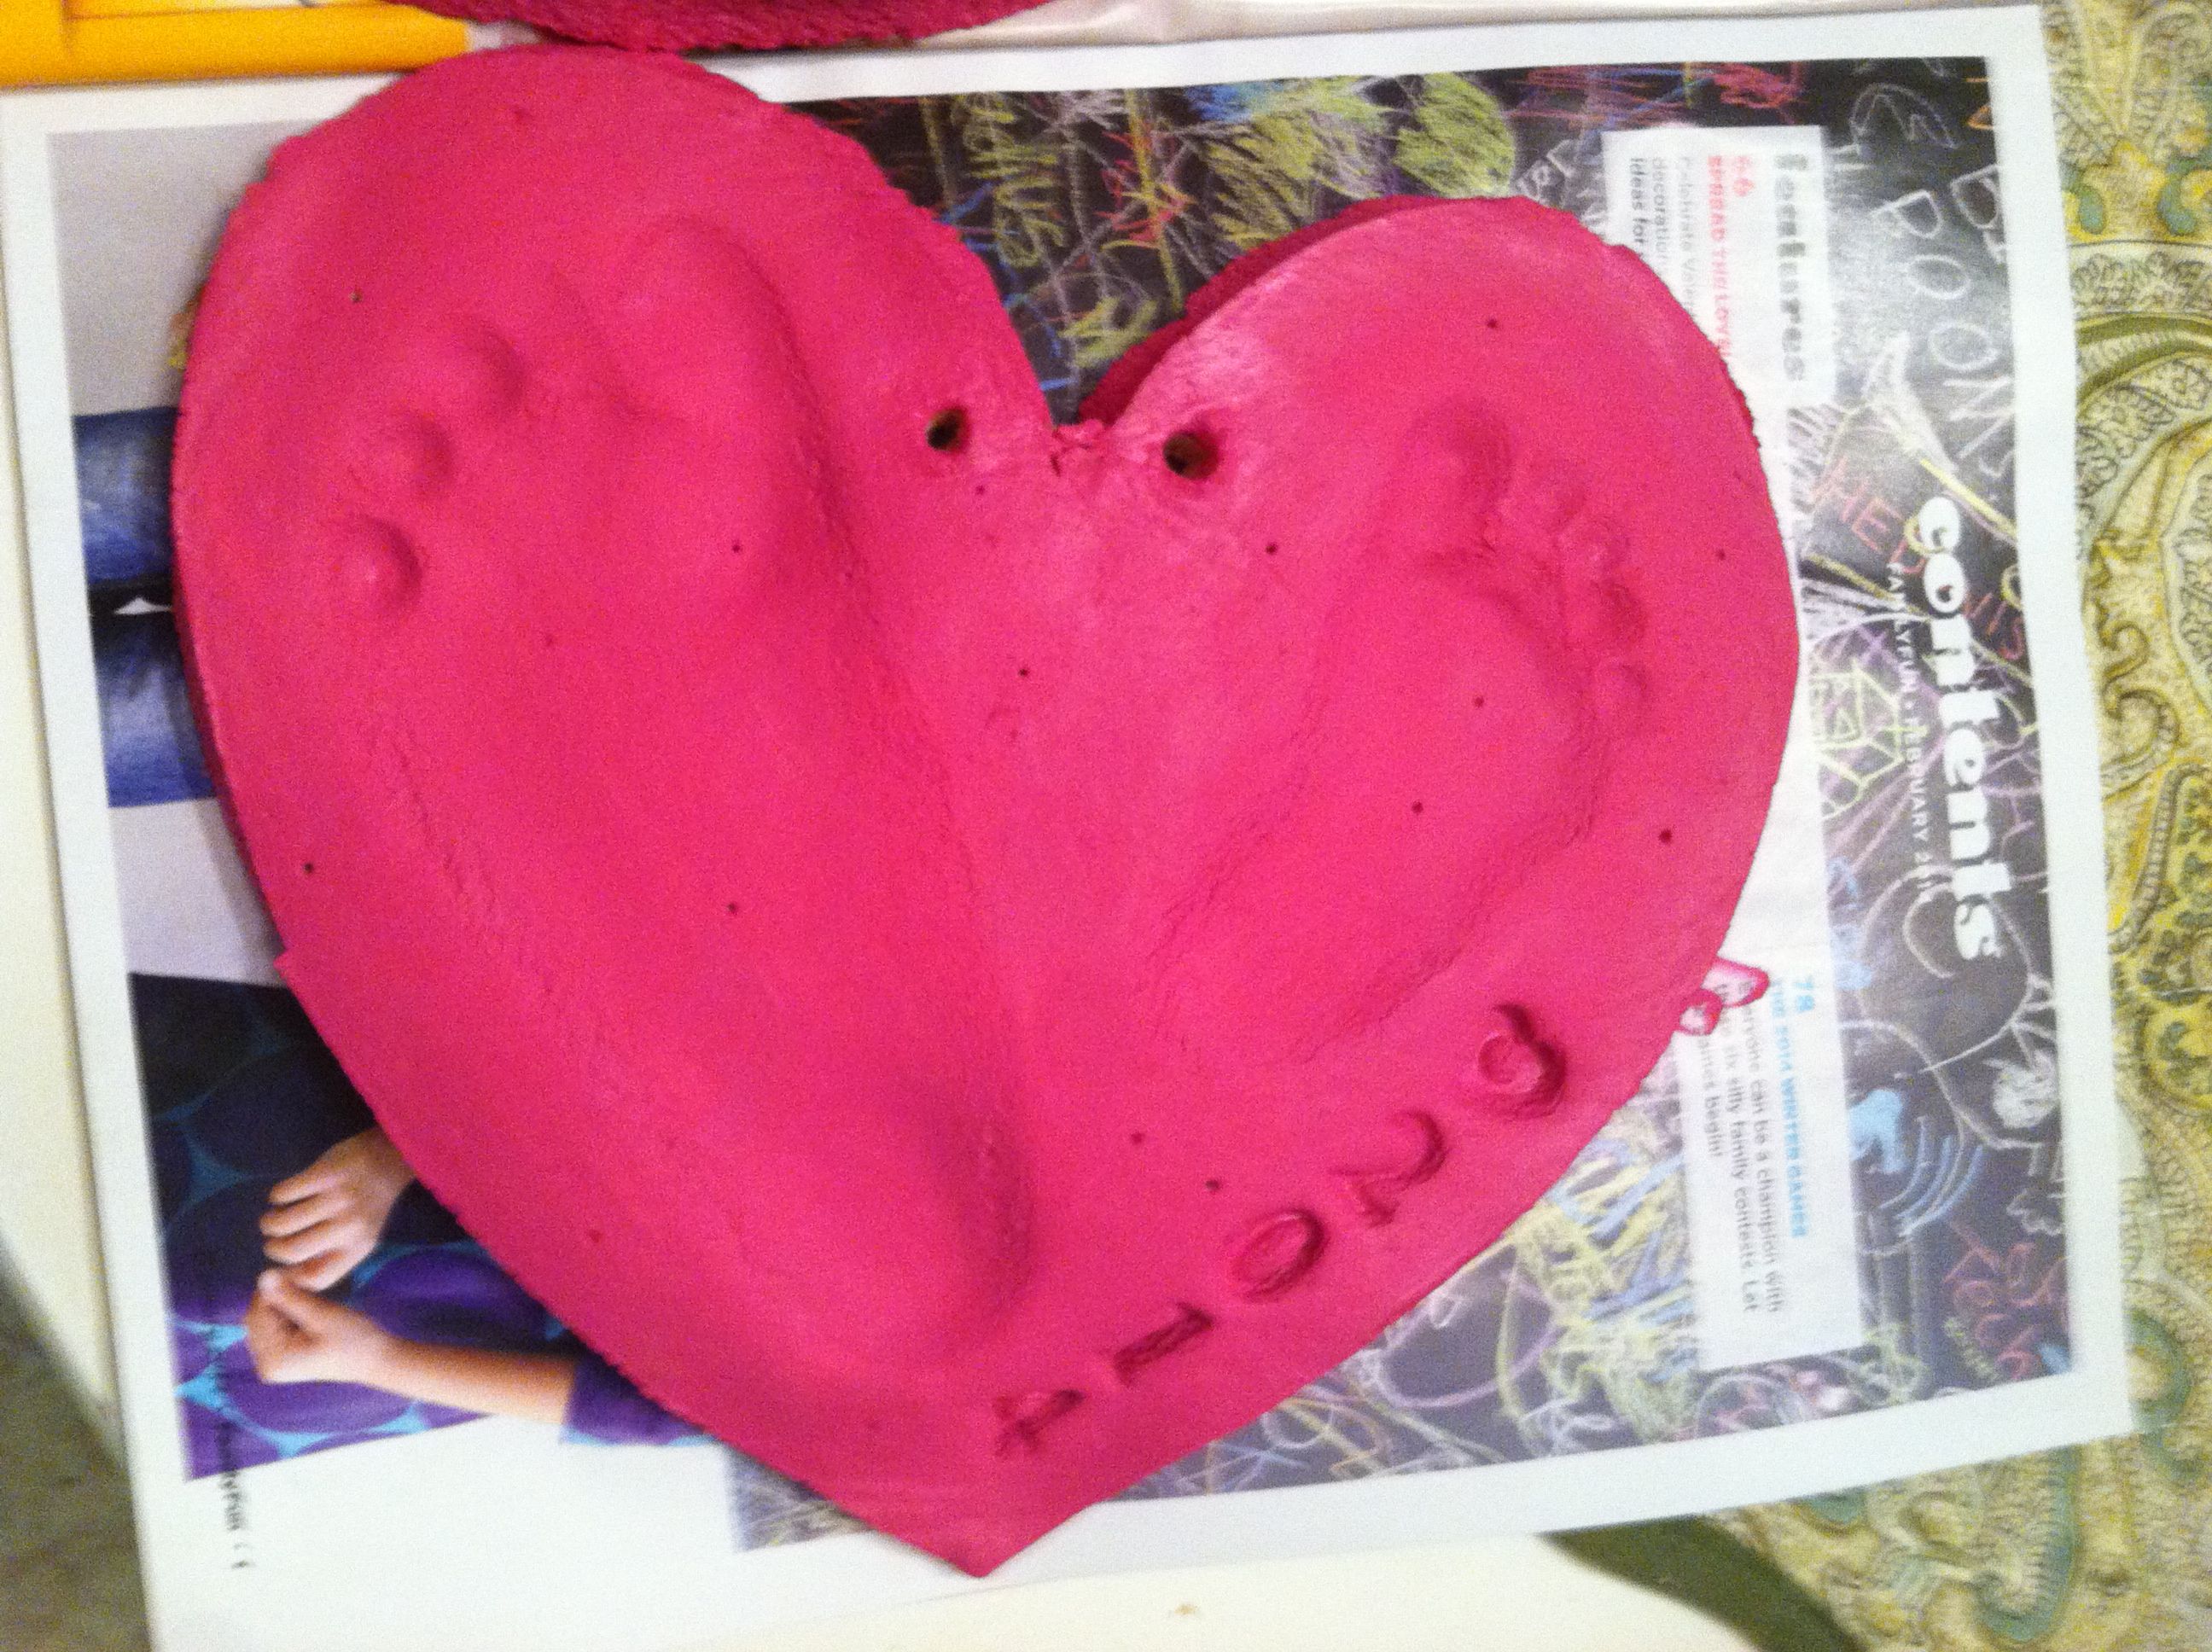
Once that part was done I added the “2014” and drew a bow on each.  I will be spraying them with quick drying lacquer to seal them up as a last step, I also wrote their initials with their ages on the back.

I really like how it came out.  Its tradition for us to make an ornament each year and I haven’t been disappointed yet.  Now with (A) getting older and using his own creativity I see them really taking off!

Our finished product!

wreath complete

Merry Christmas!!!

2 Comments .

Thanksgiving Crafts 2014

Posted on December 3, 2014 by RocklandNYMom Posted in Crafts .

Disclosure:  This is an unsponsored post.  All opinions expressed are my own.

I love to craft.  I am obsessed with handprint, fingerprint, and footprint art.  I guess I feel like they grow so fast, there has to be a way to preserve the memories of the small hands and feet while you can.  Its personalized, and fun for the kids as well.  These crafts always make grandparents smile, and are an amazing reminder for me year after year.  

This Thanksgiving we did two crafts.  the first was a napkin holder that I had gotten from Home Depot two kits a few years back.  I didn’t make them at the time because I knew I wanted to wait.  I didn’t use the enclosed sticker, instead I painted the holder white (or rather (A) did) and then we did turkeys on both sides, one side is (A)’s hand and the other is (E)’s.  Sorry no photos of (E) as she needs to be supervised due to her age and I haven’t learned how to take photos and also make sure there aren’t turkeys on my wall yet ;o)

Here is the blank kit.

Turkey Napkin Holder 1

It took several coats of white paint to cover nicely.  Its just typical craft paint nothing special. 

Turkey Napkin Holder 2

Handprints applied.

Turkey Napkin Holder 3

(A) assembles the holders (a great way for him to learn how to use a screwdriver).

Turkey Napkin Holder 4

 Our beautiful finished turkey napkin holders.

Turkey Napkin Holder 5

Our next project was a set of platters.  We decided to make turkey platters to give as gifts for Thanksgiving this year.

First we went to Homegoods and purchased two platters.  You see in the picture a plate and mug which we will use for one of our Christmas Crafts later this year.

Our supplies in cart.

Platters

Once home we cleaned the platters thoroughly and then I went over then with rubbing alcohol.  (A) and I then searched Thanksgiving crafts to find a design that we liked.

searching for a design

I lost the design battle and (A) chose one that I thought was too close to the napkin holders, but was still adorable, so we went with it.

To do the painting and drawing I used the following (not endorsed in any way, I just like these products).

Pens

 paint

I painted the trees and (A) helped with grass.

Trees painted

(A) painted his hand and pressed it on each plate. He then helped me to paint his sisters hand to place on each plate.Aidan paints hand

Cutie Pie

 I drew eyes and feet, and wrote the year and “Thankful”.

(A) then made leaves with his fingerprint in all different fall colors.

adding leaves

The platters were baked on 350 for 30 minutes to set, and then allowed to cool in the oven with the door open.

in the oven

The platters are “supposed” to be ok to eat on.  I used for bread and would use for cookies, I am not sure I would put my turkey on them.  They are super neat and very adorable.  Both family members who received them were thrilled.  I cannot wait for our next projects!!!

both hands

Ladies Night- Fall Wreath Class

Posted on November 12, 2014 by RocklandNYMom Posted in Crafts, Out and about..., Reviews, We're Having a Party .

Disclosure:  This is a sponsored post as I was invited to a class at My Sweet Pea in New City.  All opinions expressed are my own.

Last Thursday I attended the Fall Wreath Making Class at My Sweet Pea in New City.  The class was the first of a series of seasonal Wreaths that will be held for adults at the store on Thursday evenings.  I was excited to attend as I love decorating for the seasons, love crafting, and love a night out with other adults.

We got together to begin the class and we brought a few bottles of wine.  All of the supplies (included in the price of the class) were ready and waiting for us as we got there, including different options for the ribbon, paint, and adornments.  I found this was one of the best parts of the class, because although we all learned the same skills we were able to modify to better fit our design style and personalities.

The smaller craft room at My Sweet Pea ready for class.

Wreath Set up

The group of ladies that we were with were great.  Doreen (our teacher) helped us to get started and even offered other ways of beginning the design if we were having difficulty.  She was very helpful and offered to show us time and time again.  In fact, I had to start over when I wasn’t loving the way it was coming out. Doreen said that its totally normal, happens often and offered suggestions as to how to start again and make it look more like I had envisioned.  The first thing she had us do was paint our monogram letters so that they would be dry by the time we needed to add them at the end of the class.  After that we created the basic shape of our wreaths.

Beginning the burlap process.

Ladies working

Basic shape ready!

Shannon Burlap Done

Once we got that completed for the wreath (the burlap was really the longest part), Doreen showed us how to make the nice large bows you see all of the time.  She showed us how to do it first free hand and then showed us using a special little gadget called the “bowdabra”.  Each student liked a different look to their bow, some larger and more round, others flatter and smaller.  Doreen patiently walked each one of us through the process until we loved our own bows.

J thinks about what she wants her bow to look like. 

Making a perfect Bow

The last part of the wreath making had us adding our embellishments.  We had the monogram letters from earlier on in the project as well as choices in flowers (either burlap or silk).  The finished products are shown below.

Our finished products, LOVE THEM!!!

Finished Wreaths

They all came out amazingly and I am so proud to display it on my front door.  I cannot wait to make my Christmas Wreath on 11/20.

To register for a class email: MySweetPeaStore@yahooo.com.  I am hooked, I’ll see you there.

Wreaths aren’t your thing?  My Sweet Pea offers other classes for adults and children.  There are adult and children’s cake/cupcake decorating classes as well as some other craft classes for kids.  Have a crafty child who would love a birthday party that follows these lines, My Sweet Holds those too!  The monthly schedule is below.  If a group wants to get together and do a certain craft that you don’t see, give Sheri at My Sweet Pea a call and she can arrange it for you.

1 Comment .

Santa Sacs- A Christmas Giveback

Posted on November 7, 2014 by RocklandNYMom Posted in Christmas 2014, Crafts, Reviews, Specialty Items, Thoughts.. .

Disclosure: This is an unsponsored post, all opinions expressed are my own.

One give back mission that we are beginning this year will be centered around these custom “Santa Sacs”. I ordered beautiful classic sacs from Doodlebells, if you are interested order fast.  Malorie has amazing turn around time (especially for such customized and well made items), but orders will fill up quickly and you won’t want to miss out.

The idea behind the sacs is that “Marvin” will bring them early with a letter from Santa which will provide us with directions. The directions are to fill their sac with older toys that they no longer play with or have outgrown.  This will help to make room for the new toys that they will receive and give the kids the opportunity to decide what they can give up.  They will then leave the filled Sacs out for “Marvin” to return to Santa.  Santa will repair and clean up all of the toys to give to boys and girls who would like to have them this year.  This way, removing toys from their collections has a purpose.  I will schedule a “pick up please” appointment to have the toys taken away as a donation to those who would like and enjoy them (of course these toys are still in good shape and hopefully will bring joy to other little boys and girls).

I was looking for sacs that looked like they would belong to the man himself. I wanted them to be classic red and white, with “fur” trim, and to be personalized for each of my children.  I used their monograms to make it more timeless.  Malorie took my request and ran with it.  She also had some pretty awesome ideas for other bags if you are looking for something more customized.  Her abilities like her imagination knows no bounds.  The results are shown below.

Emma Santa Sac

Aidan Santa Sac

The quality of these bags is beyond compare. Much nicer than their mass produced counterparts.  Having them made in a classic design means that they will be able to be used as the kids grow up and they won’t be too childish for quite some time.

I am so excited to debut them this year there is no doubt in my mind that these bags will be another magical reminder of the true spirit of Christmas.

To place an order with Malorie you can contact her on Facebook Click Here or you can check out her Website Click Here.

1 Comment .

Playroom Project

Posted on March 20, 2014 by RocklandNYMom Posted in Crafts, Playroom Project .

Like everyone I struggle with where to keep everything.  This past year I lost my father to cancer and he kept telling (among other things) to make a playroom for my kids.  Well I am finally taking his advice, and of course, dedicating the whole project to him.  I have been researching and looking for ways to make the room unique, fun but sophisticated enough to grow with the kids, multipurposed (need a bed for guests), and nice enough to blend with all of the hard work I have put into the rest of the house!!!

I will continually post my updates on the project here, but I wanted to share my first project.  I found an alphabet wall that I liked online, and decided I didn’t want to (A) decorate all of them myself, or (B) purchase a random set from ETSY or a store.  I wanted them to be personal.

Take a look at the picture below to see what I came up with!  As always, love the idea?  Use It!

Playroom Project Letter

1 Comment .

Rainbow Activity

Posted on March 13, 2014 by RocklandNYMom Posted in Crafts, Crafts and More Crafts .

Always looking for ways to do something creative and reinforce what (A) is working on in school, I came up with this quick and fun activity.  All you need is the printout, your little one’s hands, some glue, cotton balls, and paints.

This activity works on fine motor skills, staying in the lines, following directions, working on letters (R), colors and word recognition.

First I wanted to find a template to use that would be good for what I wanted to do, the only part I wanted to be done already was the rainbow curve.  I found a graphic, changed the orientation and saved it.  I love that it has the names of the colors on it, it reinforces the “sight” words for the basic colors.

 Template: Rainbow

I had some paints left over from a wooden project that we had painted during a snow storm.. AC Moore (or any craft store) sells the whole rainbow in little plastic containers (except Purple which I made myself) for about 2.99.  The little containers are perfect size for little fingers.

We went over the colors, and then started painting.  We used our pointer finger to make dots for each of the colors along the curve.  We then painted the side of (A)’s fist black to make the pot for gold.  Under the Rainbow we made little clovers from (A)’s fingers.

Rainbow Gold

(A) ripped apart some cotton balls to make the cloud on one side and spread some elmers glue on that area.

Rainbow Cloud

Finally, we worked on drawing the letter “R” on the top corner.

Our finished piece hanging from our art display in the kitchen (large painted clothes pins from AC Moore, yeah I live there…).

Rainbow Finished

Salt Dough Clover

Posted on March 10, 2014 by RocklandNYMom Posted in Crafts .

Now that i’ve gotten the hang of the salt dough, I have a million ideas for shapes and prints of the kids!  I thought I would make them and post for anyone who may want to make seasonal hand/foot prints of their kids.  I have of course tinkered a bit with the process and findings are posted here.

Changes Made:

  • At first I was going to go to the craft store to purchase air dry clay to test out, but reviews said that it is brittle and time consuming (to let it dry).  I wanted to post this before St. Patricks day.  Plus when I went I saw the price tag, which is a bit much even with a coupon.  At the same time, (A) enjoys mixing the salt dough so I stuck to the home-made dough.
  • I used the same recipe that I did for the Salt Dough Valentine ( click for link) that I previously posted, its still my favorite.

RECIPE

1 cup of fine grain salt
2 cups of flour
1 cup of lukewarm water
Cookie Sheets
Stepping stone imprint letters, numbers and shapes
Oven at 250 for about 4 hours.

  • This month’s shape is a 4 leaf clover.  I did this because I have two children so each got two spots, three leaf would be cool if you had one or three kids etc.  The possibilities are endless.  I used Kelly Green craft paint, and then a little white mixed in later on.
  • Last time I did feet, so I decided to switch it up and use hands (of course any design could be done with either, or both if you have one child/want each to have their own).
  • I had to Triple the recipe to make 2 clovers (I like them nice and thick, makes me feel like they are sturdier).  This also allows me to have enough left over for (A) to play with during the process, it’s the only way to make the shapes I need and not have him want to play with those :o).clover
  • I kicked the temperature up a notch to 250 degrees, it did not burn the dough, and really cut down the cooking time (4 hours instead of the previous 6 1/2, again I make them thick).
  • I still think its a bit difficult to see the impressions (even though we pressed hard) without something to draw the attention, so instead of outlining each with words (like last time), I used a contrasting lighter color of green to paint the indents. Salt Dough Clover 2

Salt Dough Clover 3

  • I used a small stiff paint brush instead of a foam brush to paint.  I also let (A) paint the base layer of green and then did the impressions on my own.

Clover Final

  • I went to Christmas Tree Shops and purchased a medium clear plate stand to display it (.89) instead of putting in a hole to hang it, I could have done both, but I thought this was a nice change.. If I change my mind, I suppose I could use the sticky command strips.

 This is a low cost, high fun activity, and (A) constantly asks to play with Salt Dough (thank goodness because I have more ideas for the upcoming holidays/months!).


2 Comments .

Doodlebells Specialized Gifts

Posted on March 8, 2014 by RocklandNYMom Posted in Crafts, Crafts and More Crafts, Reviews, Specialty Items, Uncategorized .

Doodle Bells Logo

Disclosure:  This is an unsponsored post.  All opinions expressed are my own.

If you follow my ramblings you know a few things about me.

  1.  I have some super talented friends.
  2. I love home-made crafty items.
  3. I have great ideas but am not as talented as many of my friends.

One such talented friend is Malorie of Doodle Bells.  I taught with Malorie for several years and we bonded immediately because of our love for crafts and meticulous attention to detail.  When friends have children she would also always go out of her way to create something (often more than one thing) for them.  Quilts, taggies, picture frames… You name it, she would make it.  She made me a beautiful quilt, pillow and taggie for (A) when he was born.  He is now 3.5 and he still uses two out of three of them.  What has always been apparent is that Malorie’s attention to detail never wavered.  She takes into consideration your personality, what your nursery is going to look like, and makes this masterpiece just for you.  It’s thoughtful, beautiful, and well made. 

I was not at all surprised when she finally made the decision to turn her hobby into a business.  If anyone can do it she can.  This is how Doodlebells was born. Through her Facebook www.facebook.com/doodlebells  page and now her webpage www.doodlebells.com, Malorie is creating well-made custom items from pillowcase dresses, invitations, t-shirts, and tutu’s, to hooded towels, quilts, and taggies.  Did I mention everything that she makes? Nope, it’s impossible.  Every day I feel like I am seeing something new posted on Facebook.  It wasn’t long before I had to order something (did I mention I love personalized items?).

So I ordered a personalized hooded towel for (A) and a pillowcase dress for (E).  Well let me tell you how awesome the whole experience was.  What is nice is that you can either choose from the items that she has already made, or you can create a custom order.  For a control freak like me, the second option is perfect.  But what is even better is that I can always see what she has on hand, and grab that up for a gift or something.  Doodlebells also takes PayPal so that was very convenient for me.  First, I let Malorie know what colors I was thinking for each, she sent me options and I got to choose everything.  I wasn’t sure about the dress, so I showed her a picture of one that I loved that she had made previously. She went with the same color scheme as the previous dress, and then sent me a picture to be sure it was what I liked.  For the towel, we chose green because (A) loves it.  Then we had his name added, along with a truck, he loves trucks.

Once the items were completed I got a “teaser” posted on Facebook.  I was so excited!  They were just what I had asked for!!!  I knew that when I received them I was going to be super happy, but I am even happier now that I actually have them in my possession.  (A) was ecstatic to see his towel.  He loves that his name is on it, he immediately started spelling out his name and tapping the letters.  Followed of course by… “Mommy is that a big rig?!”  He insisted on having a bath that night and trying it out.

What I love about the towel:

  • It’s made with real towel, so it’s absorbent, not like many novelty towels out there.
  • The hooded part is large enough for him to grow into.
  • I got to choose all of the design stuff.
  • The personalization is sewn on and will remain sturdy for my little guy throughout all of his tough wear and tear.
  • The personalization makes it easy to take on school trips, to a playdate, or camp. There is really no mistaking it.

Then there is the dress.  (E) doesn’t talk yet but if she did she would be really excited.  It’s adorable.  In the colder weather I can throw on some leggings and a sleeved onesie, it’s attractive and easy to get on and off (especially during a diaper change).  In the warmer months, it will be great to wear with just a diaper cover, and equally as cute.  It’s well made just like the towel, all edges are finished off (with seams hidden), so much attention paid to detail.  I am just amazed.  I would suffice it to say that it was my first order from Doodlebells but will not be my last.  I love what I ordered.  If you are a friend or family member, I would not be surprised if a Christmas or Birthday gift came with a tag that has a cute little blue bug on it and the name Doodlebells.  If it does, be excited, be very excited.

To see more of Malorie’s work please visit her website www.doodlebells.com or check her out on Facebook www.facebook.com/doodlebells where she often posts her finished products for viewing, or purchase.

(A) shows off his Truck Towel.  He won’t let me wash it again, he insists on using it.  I guess i’ll have to wash it during nap time.

Doodle Towel 2

(E) in her amazing dress, look how well it compliments her eyes!

Fire Mountain 084

A shot of the whole dress!  So cute with underclothes, roomy enough for her to grow into and wear without undergarments this summer!!

Fire Mountain 088

She gets around in it just fine!! Cute and functional!!!

Fire Mountain 091

Salt Dough Valentines Day Project- URGH!

Posted on February 10, 2014 by RocklandNYMom Posted in Crafts .

Disclosure:  This is an unsponsored post.  All opinions here are my own.

I love to do projects, that is clear.  I am an avid Pinterest participant.  So of course with Valentine’s Day right around the corner I had to find something to do for the grandmother’s.  I am slightly obsessed with hand and footprints, I mean they change so quickly.  Their hands and feet will never again be the size they are right now.  It is this obsession that most of my projects for the family from the kids center around.  I wanted to do something special this year and decided on a salt dough heart.  In each half of the heart I wanted to put one of the kids footprints.  Instead of making it a stepping stone I wanted to make it a wall hanger.

BOY did this one frustrate me!  I thought that this would be easy, i’ve seen it so many times, but there is some bad information out there so I tried to weed it out for you.

Here is what I learned, and I will also include for you the links to the sites I used to create my masterpieces.

  • Not all salt dough recipes are the same, some of them are different and did not work for me ( I tried 3).
  • You need to poke holes in the top otherwise it will bubble and pop.
  • Low and slow  is the key.. a higher temperature results in browning of the dough.
  • It actually takes way longer than the sites say to harden and dry out.
  • You may have to flip your piece to cook the back side.
  • I used my silpat to cook it on so that it didn’t stick, when I used non-stick spray the pieces came out oily looking.
  • Use your hands to shpe the dough, it looks much nicer than cutting it (my opinion).
  • Tinting the dough also didn’t work so well, I painted it afterwards.
  • If you are poking holes to hang, make them large and be sure it went through large on the other side.

RECIPE

1 cup of fine grain salt
2 cups of flour
1 cup of lukewarm water
Cookie Sheets
Stepping stone imprint letters, numbers and shapes
Oven at 250 for about 4 hours.

  1. Once dry I painted each side twice.  I considered different colors to look like conversation hearts, but (D) decided he liked the pink and we went with it.
  2. I poked the ribbon from the back to the front so that you could see the bow.
  3. To personalize and also bring attention to the footprints, I used a permanent marker around the edges and wrote all of the kids’ favorite things this year.
  4. On the back, I wrote their initials (always in a monogram I love monograms) and their ages.  I also had (A) trace his name on the back because that is what they are working on in preschool.

My baked project. Baked Heart

Painted Pink  Pink Heart

The front of my completed heart.

Complete Heart Front

For cards I really wanted to do something personal, but didn’t want the hastle of ordering online and waiting.  I used the Snapfish print at home cards and uploaded my picures of the kids.

Valentines Card

3 Comments .

More Than Words and ABC’s

Posted on November 21, 2013 by RocklandNYMom Posted in Crafts, Crafts and More Crafts, Uncategorized .

Logo_____________________________________________________________________

Disclosure: I did not receive any monetary compensation in exchange for this post, all opinions expressed here are my own.

I recently found a super talented local mom Cindy on Facebook and had to write about her. I saw her posting these awesome subway type graphics made up of different sayings about children into different shapes. Each piece of work is delivered to you as a “soft” file that you can use on any venue you would like (I am considering pillows for the playroom in addition to the wall art I originally intended). The already created shapes that she has cost $25 a piece. I was immediately drawn to these adorable graphics.

Cindy is a stay at home mom who has always enjoyed being creative. One day she stumbled on to these. She has fun designing them and has had a great response. Cindy has just opened her ETSY shop called “More than Words and ABC’s.” She has started with a nursery theme including shapes such as hearts, flowers , trains and sailboats. She currently is broadening her shop to also include other themes such a love, family and friends so keep checking her shop for more .The flower was perfect for my daughter whose nursery is themed with flowers because gardening is something that we like to do as a family. The other designs were awesome but didn’t quite fit in with my son’s personality. I started thinking that if she could do that perhaps she could make a fire truck. Yes she does custom orders (for a small additional fee). I decided to ask her and the result is shown below.

  The custom Fire Truck made for AJ.image

Cindy was fast and super precise, checking several different color schemes with me to make sure that I was happy.  I had both designs created and in my ETSY inbox in record time (2-3 days).  All you need to provide her with is your child’s name, date and time of birth, weight, and height.  She does the rest.  Cindy communicated with me the whole way and I have to say I am very pleased with the results, now I am just brainstorming all of the things that I plan to do with the graphics… I am loving the idea of a mug with both for grandparents and of course wall art.

 (E)’s flower

image

« Previous Page
Next Page »
  • About this Site
    • Privacy Policy & Disclosure
  • Savings for RNYM.com Readers!
  • Currently loving….
    • Feeding Baby
    • BabyCare 101
  • Directories
    • Pregnancy and Babies
    • Camps Directory 2023
    • Childcare/Pre-School Directory
    • Classes Directory
    • For the Home
    • Direct Sales Directory
    • Party Directory
    • Party Entertainment Directory
    • Photographers Directory
    • Family Services Directory
    • Crafters Directory
    • Specialty Items Directory
    • Play Ball
  • A Good Cause
  • I’m Going on a Trip…
    • Theater
  • We’re having a party….
  • RNYM’s Favorite Recipes
  • Become Part of RocklandNYMom
  • RNYM in the News!
  • Christmas 2019

Newsletter Sign Up

Categories

Recent Comments

  • MB on Home Made Christmas Ornaments!
  • Mom E. on LEGOLAND NY- The RNYM Scoop
  • RocklandNYMom on Socially Safe Santa
  • sikis izle on Socially Safe Santa
  • Amanda Kivell on Camps Directory 2023

Meta

  • Register
  • Log in
  • Entries RSS
  • Comments RSS
  • WordPress.org

Recent Posts

  • Climbing out of our Comfort Zone
  • Four Stars for Movie House Paramus
  • Getting Back to it!
  • Kicking off Spring Break with a Time Mission Review!
  • Music Spring Break Camps at Bach 2 Rock!

CyberChimps WordPress Themes

© Rockland Mom